Swooning Over This Cheesy Philly Cheesesteak Sloppy Joes Recipe
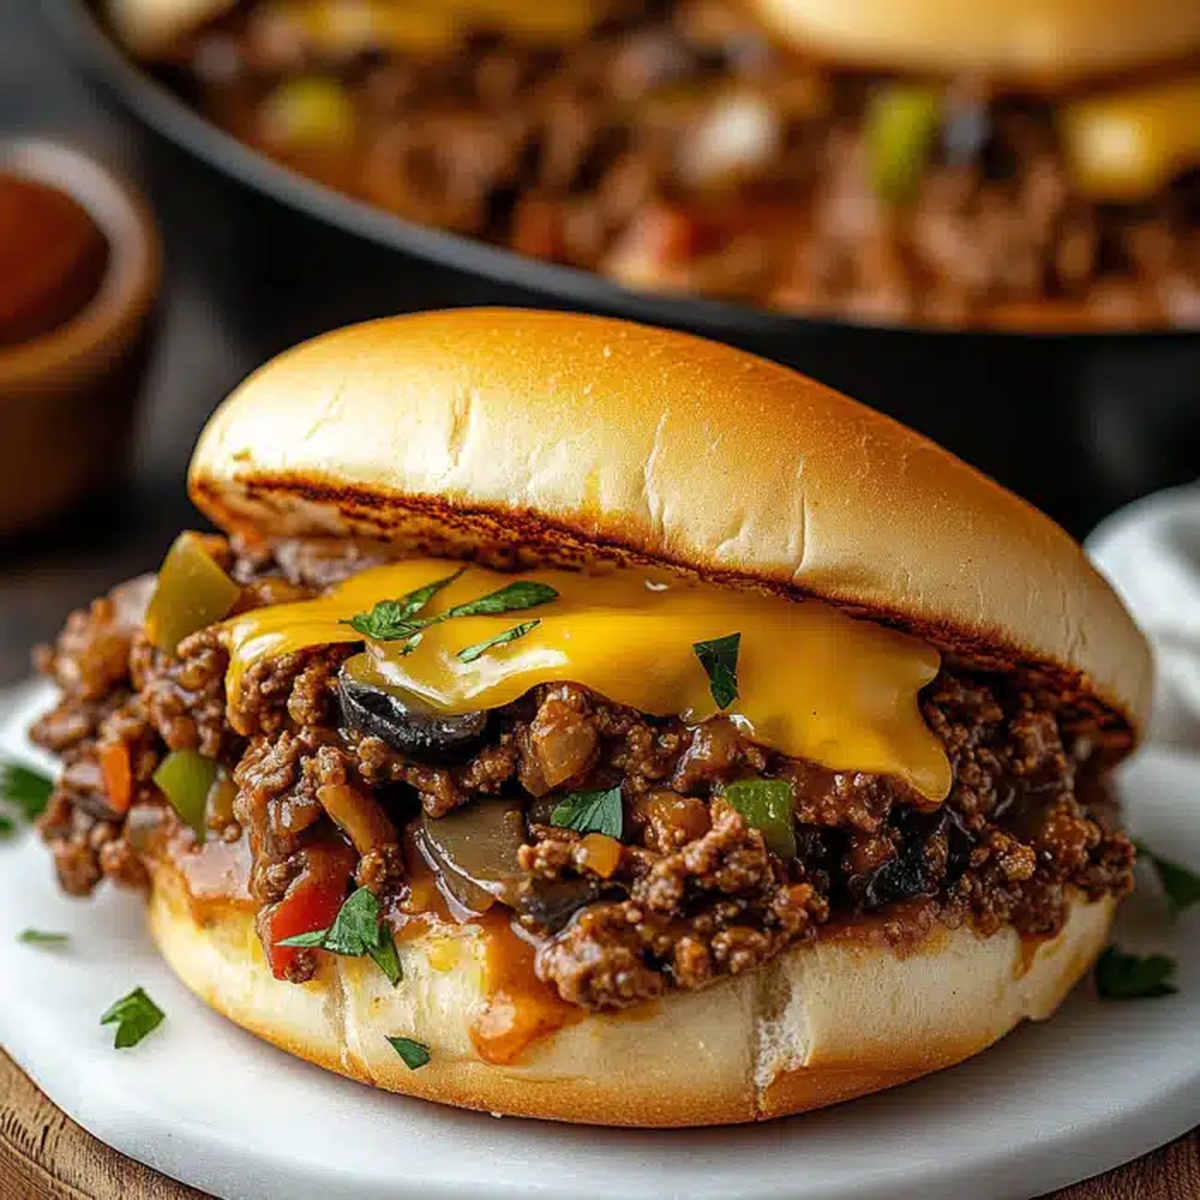
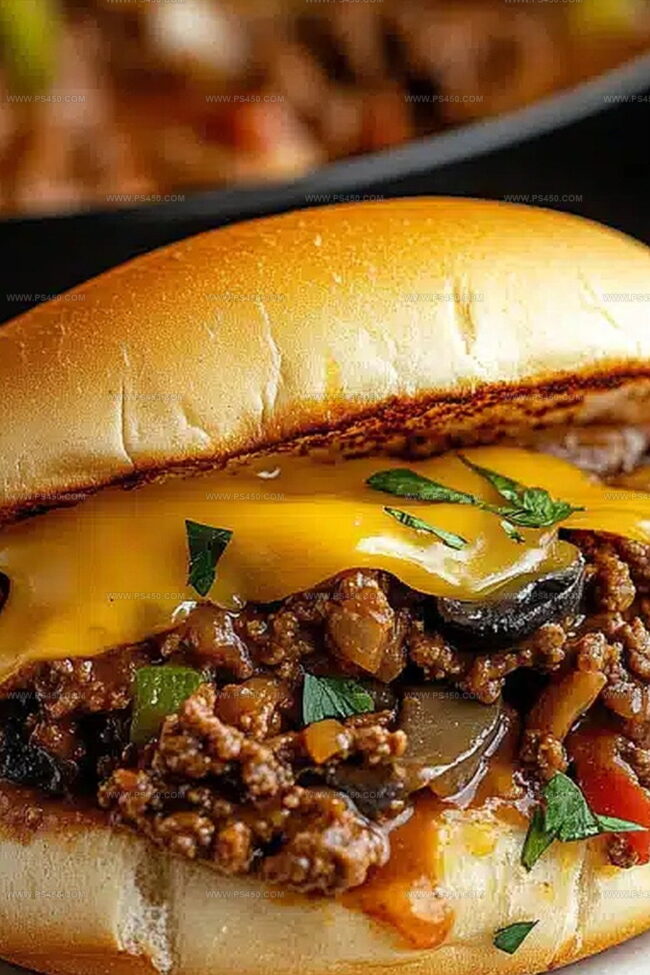
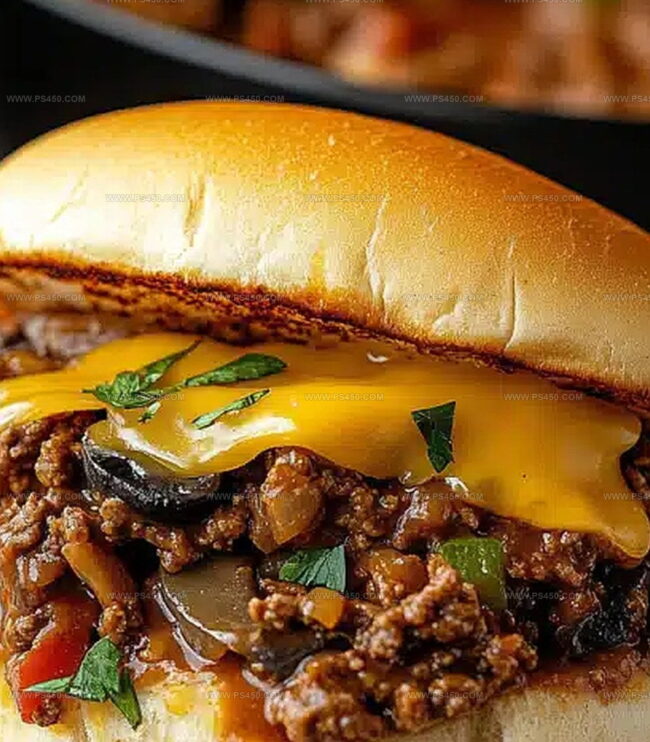
Comfort food takes an exciting turn with these philly cheesesteak sloppy joes that blend classic sandwich flavors into a mouthwatering meal.
Tender ground beef sizzles with bell peppers and onions, creating a rich and savory base.
The melted cheese adds a creamy texture that brings every bite to life.
Packed with robust flavor, this recipe delivers a hearty twist on traditional sloppy joes.
Easy to prepare and impossible to resist, these sandwiches will become an instant family favorite.
Each spoonful promises a delicious combination of classic cheesesteak elements nestled between soft hamburger buns.
You won’t be able to resist diving into this irresistible comfort food classic.
Quick Recipe Overview
What You’ll Need for Philly Cheesesteak Sloppy Joes
For Protein:For Sauce Components:For Garnish and Finishing:Kitchen Gear for Philly Cheesesteak Sloppy Joes
Making Philly Cheesesteak Sloppy Joes from Scratch
Crumble beef in a skillet over medium-high heat until fully cooked and no pink remains. Drain excess fat to keep the dish light and flavorful.
Toss chopped onions and bell peppers into the same skillet, cooking until they become soft and slightly caramelized, adding depth to the flavor profile.
Stir in ketchup, Worcestershire sauce, and beef broth, blending everything together to create a rich, tangy mixture that coats the meat and vegetables perfectly.
Sprinkle provolone or American cheese over the hot mixture, allowing it to melt and create a creamy, gooey texture that makes these sloppy joes irresistible.
Quickly toast hamburger buns until golden and crisp, providing a sturdy base that can handle the deliciously messy filling without falling apart.
Pile the cheesy beef mixture generously onto the toasted buns, making sure each sandwich is packed with flavor and guaranteed to satisfy hungry appetites.
Expert Ideas to Enhance Your Philly Cheesesteak Sloppy Joes
Serving Up Philly Cheesesteak Sloppy Joes in Style
Storing and Reheating Philly Cheesesteak Sloppy Joes
FAQs
Yes, you can substitute salmon with other firm fish like cod, halibut, or sea bass. Just ensure the fish is fresh and can withstand pan-searing.
Cornstarch helps create a crispy exterior and prevents the fish from sticking to the pan. If you don’t have cornstarch, you can use flour as an alternative coating.
The salmon is done when it turns golden brown and has a crispy exterior. The internal temperature should reach 145°F, and the fish should flake easily with a fork.
Adjust the red pepper flakes to control the heat. Use more for extra spiciness or omit them entirely for a milder flavor.
Print
Crispy Longhorn Steakhouse Parmesan Crusted Chicken Recipe
- Total Time: 30 minutes
- Yield: 5 1x
Description
Longhorn Steakhouse Parmesan Crusted Chicken blends Italian and American culinary traditions with crispy parmesan-coated chicken breasts. Home chefs can easily recreate this restaurant-style dish with simple ingredients and straightforward cooking techniques.
Ingredients
- 4 boneless, skinless chicken breasts
- ½ cup grated Parmesan cheese
- ½ cup shredded provolone cheese
- ¼ cup mayonnaise
- 1 tbsp ranch dressing
- 1 tbsp melted butter
- 1 tbsp olive oil (for pan-searing)
- ½ tsp garlic powder
- ½ tsp onion powder
- ½ tsp Italian seasoning
- ¼ tsp paprika (optional, for flavor)
- Salt and black pepper, to taste
Instructions
- Preparation: Preheat oven to 400F (200C), ensuring precise temperature calibration for optimal cooking results.
- Seasoning: Thoroughly coat chicken breasts with salt, black pepper, garlic powder, and onion powder, massaging spices deeply into the meat for maximum flavor infusion.
- Searing: Heat an oven-safe skillet over medium-high heat with olive oil, carefully placing chicken breasts to develop a golden-brown crust, cooking 4-5 minutes per side until internal temperature reaches 165F/74C.
- Topping Creation: Whisk together mayonnaise, melted butter, ranch dressing, Parmesan, Italian seasoning, and paprika until achieving a silky, uniform coating.
- Cheese Finish: Generously spread the prepared mixture over each chicken breast, completely covering the surface. Sprinkle provolone cheese to create a luxurious, melty topping.
- Final Broiling: Transfer skillet to broiler, carefully monitoring as cheese transforms into a bubbling, golden-brown crust within 1-3 minutes.
- Serving: Remove from oven, let rest briefly, and plate alongside selected accompaniments, presenting a restaurant-quality dish bursting with rich, complex flavors.
Notes
- Precise Temperature Control: Consistently monitor oven heat at 400F to prevent uneven cooking or drying out chicken, using an accurate kitchen thermometer.
- Seasoning Technique: Rub spices thoroughly into chicken, letting them marinate briefly to enhance flavor penetration and develop deeper taste profiles.
- Cheese Topping Precision: Spread Parmesan mixture evenly, avoiding thick clumps to ensure uniform melting and prevent burning under broiler.
- Moisture Preservation: Let chicken rest after cooking to retain juices, preventing dryness and maintaining tender, succulent texture.
- Prep Time: 10 minutes
- Cook Time: 20 minutes
- Category: Dinner, Lunch
- Method: Baking
- Cuisine: American
Nutrition
- Serving Size: 5
- Calories: 450
- Sugar: 1 g
- Sodium: 850 mg
- Fat: 30 g
- Saturated Fat: 10 g
- Unsaturated Fat: 15 g
- Trans Fat: 0 g
- Carbohydrates: 7 g
- Fiber: 0 g
- Protein: 40 g
- Cholesterol: 120 mg
Emily Morgan
Food Critic & Kitchen Tips Specialist
Expertise
Global Food Exploration & Critique, Simple Kitchen Hacks & Time-Saving Tips, Presentation & Plating Techniques, Culinary Research & Storytelling.
Education
New York University
Emily Morgan has journeyed across the globe, collecting culinary secrets that turn everyday ingredients into impressive meals.
Based in Seattle and armed with a Journalism degree from NYU, she blends thorough research with a flair for presentation, ensuring every dish looks just as good as it tastes.
Focusing on fresh flavors, simple methods, and a bit of fun, Emily shows home cooks how to elevate their daily cooking without fancy gadgets or complex steps.