Luscious Creamy Honey Butter Skillet Corn Recipe For Dinner Joy
Sweet summer corn bursts with flavor in this honey butter skillet corn that delivers pure comfort on a plate.
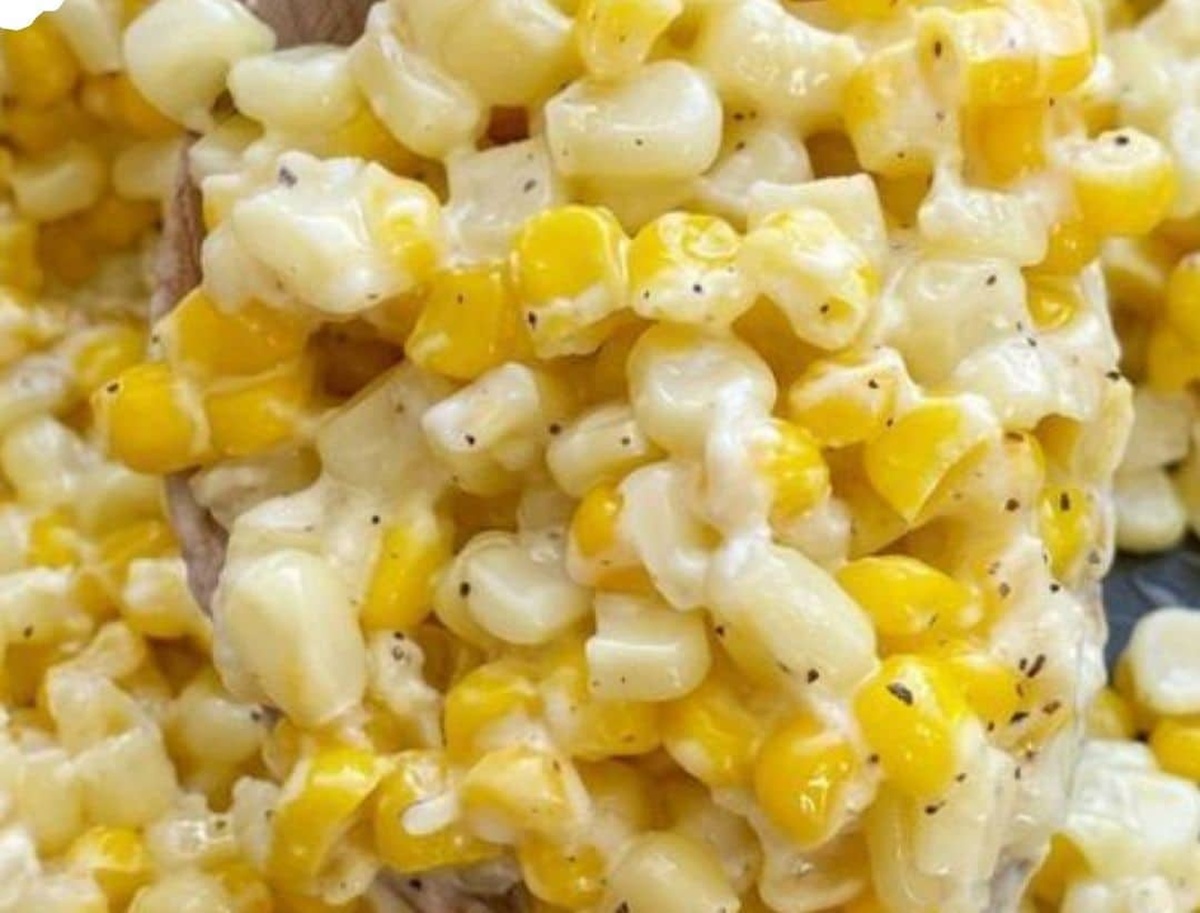
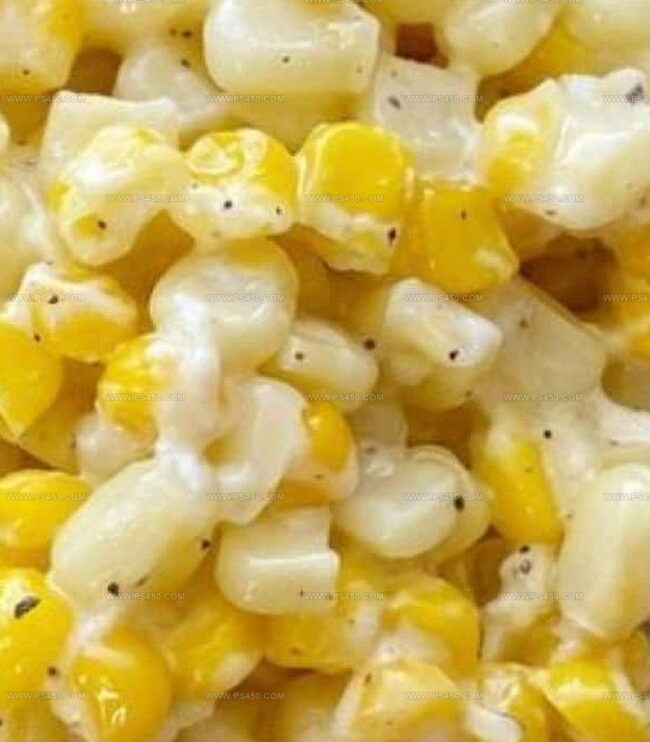
Golden kernels dance in a luscious cream-based sauce, creating a side dish that’s both indulgent and simple.
Southern kitchens have long celebrated this creamy corn recipe as a crowd-pleasing favorite.
Each spoonful melts with rich buttery goodness and a subtle hint of sweetness.
The combination of fresh corn and silky sauce transforms an ordinary vegetable into an extraordinary experience.
Families gather around the table, eagerly anticipating this irresistible corn dish that promises to become an instant classic.
Your dinner guests will beg you to share this mouthwatering recipe.
Quick Recipe Overview
Honey Butter Skillet Corn Ingredients
For Base Ingredients:For Creamy and Sweet Elements:For Finishing Touches:Tools to Make Sweet Skillet Corn
How to Cook Honey Butter Corn in a Skillet

Grab a large nonstick pan and melt butter over medium-high heat until it’s sizzling and golden.
Toss corn into the bubbling butter and let them swirl and cook for 5-7 minutes, stirring occasionally until they’re tender and warm.
Lower the heat and introduce honey and cream cheese to the corn, stirring constantly until everything melts into a luxurious, velvety mixture.
Sprinkle in salt and pepper to make the flavors pop, then transfer the corn to a beautiful serving dish.
Scatter fresh chives or scallions on top for a burst of color and a zesty finish that’ll make your taste buds dance.
Sweet-Savory Flavor Tricks for Skillet Corn
Serving Corn Fresh from the Skillet
Skillet Corn Storage and Reheat Guide
FAQs
Yes, you can use frozen corn. Thaw it completely and pat dry with paper towels before cooking to prevent excess moisture.
Absolutely! This Honey Butter Skillet Corn is vegetarian-friendly and doesn’t contain any meat products.
For extra creaminess, you can add a splash of heavy cream along with the cream cheese or use more cream cheese than the original recipe suggests.
A nonstick skillet is ideal, but a cast-iron skillet will also work well. Just ensure you keep the heat at medium to prevent burning.
Print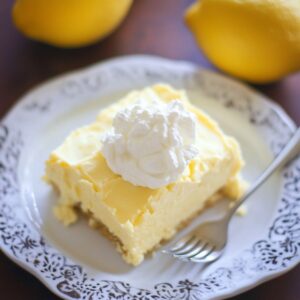
Silky Lemon Fluff Dessert Recipe
- Total Time: 2 hours 15 minutes
- Yield: 9 1x
Description
Lemon fluff dessert brings zesty citrus charm to any table. Light meringue and tangy lemon curd create a perfect balance of sweet and tart flavors you’ll savor with pure delight.
Ingredients
- 1 (8 oz / 226 g) package cream cheese, softened
- 1 (20 oz / 567 g) can crushed pineapple, drained
- 2 cups mini marshmallows
- 1 (3 oz / 85 g) box lemon jell-o
- 1 cup boiling water
- 1 tbsp lemon juice
- 1 (8 oz / 226 g) tub whipped topping, thawed
- Lemon zest (optional)
Instructions
- Gelatin Preparation: Whisk lemon Jell-O into steaming water, allowing mixture to cool and slightly thicken while developing a vibrant citrus essence.
- Cream Cheese Transformation: Beat cream cheese vigorously until achieving a silky smooth texture with no visible lumps, creating a rich foundational layer.
- Gelatin Integration: Methodically blend cooled lemon gelatin into cream cheese, ensuring a luminous, streak-free mixture that captures the dessert’s core flavor profile.
- Textural Enhancement: Fold in whipped topping to create an airy, light consistency that elevates the dessert’s delicate structure and mouthfeel.
- Flavor Layering: Incorporate drained pineapple chunks and mini marshmallows, distributing evenly to introduce tropical brightness and unexpected sweet pockets.
- Citrus Refinement: Drizzle fresh lemon juice throughout the mixture, intensifying the bright citrus notes and adding a subtle tangy undertone.
- Presentation and Setting: Transfer the velvety mixture into a rectangular dish or individual serving vessels, smoothing the surface for a polished appearance, then refrigerate for at least two hours until completely set.
- Final Touch: Before serving, optionally garnish with delicate lemon zest to accentuate the aromatic citrus profile and provide an elegant visual accent.
Notes
- Gelatin Precision: Whisk the Jell-O thoroughly to prevent clumping and ensure a smooth, even texture throughout the dessert.
- Cream Cheese Technique: Bring cream cheese to room temperature and beat until completely smooth to avoid lumpy patches in the final mixture.
- Folding Finesse: Use gentle, circular motions when incorporating whipped topping and pineapple to maintain the dessert’s light, airy structure.
- Chilling Crucial: Allow adequate refrigeration time for the dessert to set properly, creating the perfect creamy-yet-firm consistency.
- Prep Time: 15 minutes
- Cook Time: 30 minutes
- Category: Desserts
- Method: Mixing
- Cuisine: American
Nutrition
- Serving Size: 9
- Calories: 130
- Sugar: 15 g
- Sodium: 100 mg
- Fat: 6 g
- Saturated Fat: 4 g
- Unsaturated Fat: 2 g
- Trans Fat: 0 g
- Carbohydrates: 18 g
- Fiber: 0 g
- Protein: 1 g
- Cholesterol: 25 mg
John Nicholson
Lead Writer & Recipe Developer
Expertise
Recipe Testing and Development, Kitchen Hacks and Time-Saving Tips, Flavor Pairing and Ingredient Selection, Engaging Food Writing and Storytelling
Education
Johnson & Wales University
John Nicholson honed his skills at Johnson & Wales University, learning how to use fresh, local ingredients and down-to-earth techniques to make cooking simple and satisfying.
His recipes blend Southern comfort flavors with a modern touch, inviting everyone to cook with ease and confidence.
Living in Charleston, John takes cues from the city’s lively food scene, local markets, and seasonal produce. He’s all about making meals stress-free through easy tips, flavor pairings, and fun experiments in the kitchen