No-Bake Peanut Butter Balls Recipe with Smooth Texture
Indulge in the irresistible world of no-bake peanut butter balls that promise pure bliss.
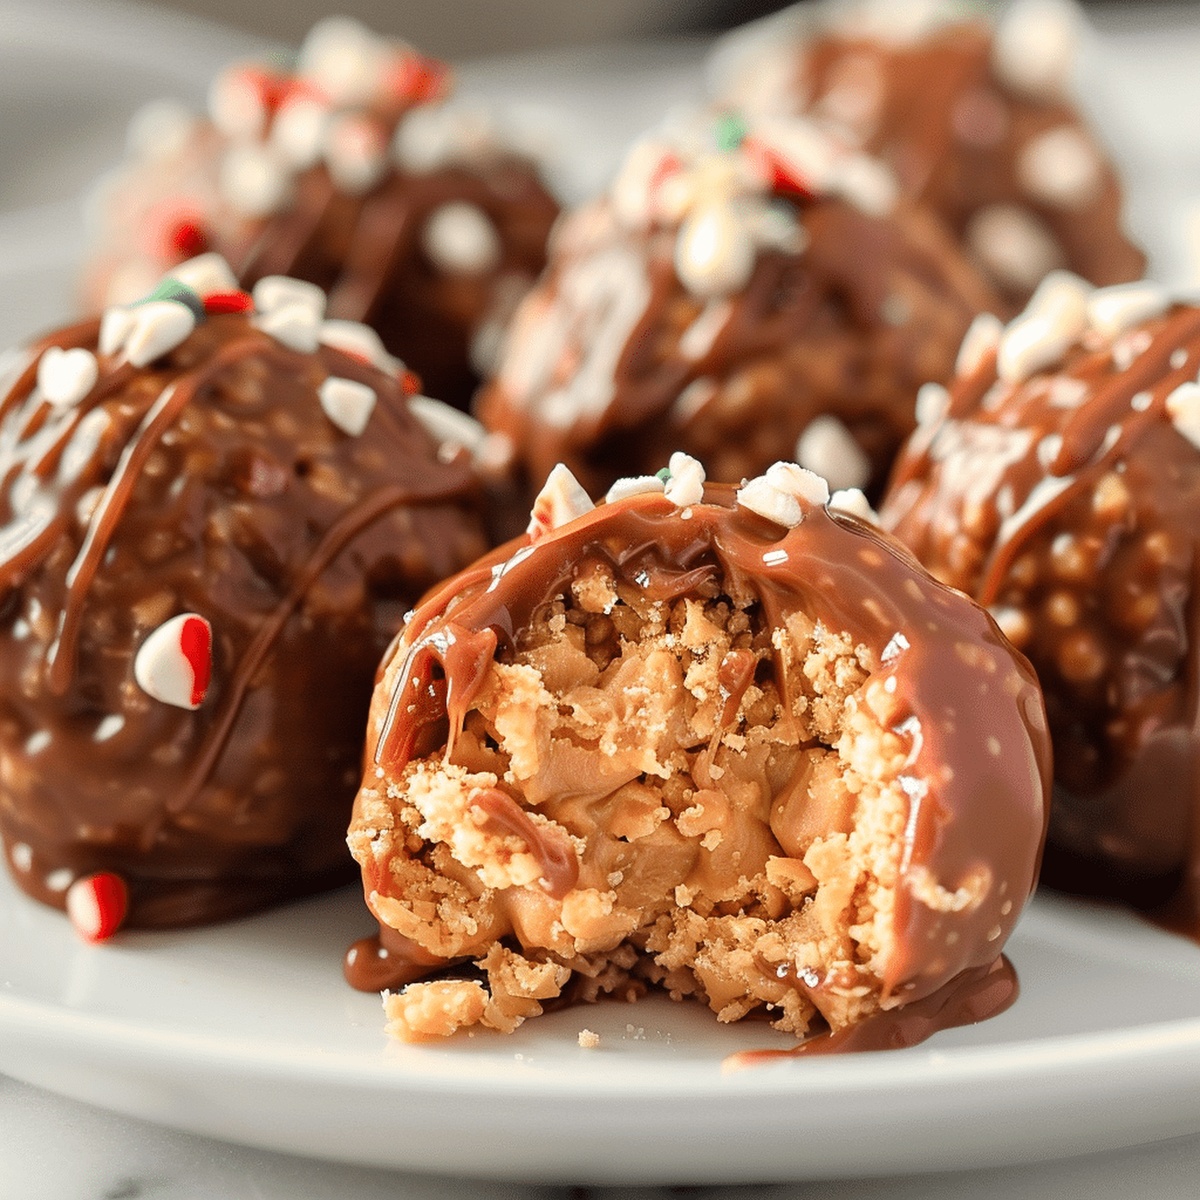
These delectable treats blend smooth peanut butter with rich chocolate in a dreamy no-bake recipe.
Sweet and simple, the creamy no-bake peanut butter balls come together with minimal effort and maximum satisfaction.
Crunchy oats and sweet honey add depth to each perfectly formed sphere.
The combination of chocolate and peanut butter creates a nostalgic flavor that dances on your taste buds.
No oven required means you can whip up these delightful morsels in minutes.
Prepare to fall in love with this easy, mouthwatering dessert that’s sure to become a household favorite.
Quick Recipe Overview
Ingredients for Peanut Butter Balls, No Oven Needed
For Base and Binding Ingredients:For Coating and Finishing:For Optional Flavor Enhancements:Tools That Make Peanut Butter Ball Prep
Directions for Rolling and Coating Peanut Butter Balls
Grab a mixing bowl and blend peanut butter, softened butter, and powdered sugar until silky smooth. Mix in crushed graham crackers or pretzels to build a thick consistency. Adjust texture by adding more crumbs if needed or chilling briefly.
Roll the mixture into bite-sized balls with your hands. Arrange them carefully on a parchment-lined tray. Pop the tray in the refrigerator for about 30 minutes to help them firm up.
Use a microwave-safe bowl to transform chocolate chips and coconut oil into a glossy, liquid chocolate. Heat in short bursts, stirring between each interval to ensure a smooth, even melt.
Rescue each chilled ball and give it a luxurious chocolate bath. Use a fork or toothpick to dip and coat each morsel, letting excess chocolate drip away. Return the chocolate-covered treats to the parchment-lined tray.
Slide the tray back into the refrigerator for 15-20 minutes, allowing the chocolate to solidify completely. Once set, transfer your decadent peanut butter balls to an airtight container and store in the fridge for future snacking.
Flavor Variations to Customize These No-Bake Treats
Peanut Butter Ball Serving Tips for Parties
Keep Peanut Butter Balls Fresh in the Fridge
FAQs
Yes, crunchy peanut butter works great and adds extra texture to the balls. Just ensure it’s well-mixed before combining with other ingredients.
Lightly coat your hands with powdered sugar or wear disposable gloves. This helps create smooth, uniform balls without the mixture sticking to your fingers.
Ensure the chocolate is completely melted and smooth. If needed, add a little more coconut oil to create a glossy, even coating. Tap the fork gently to remove excess chocolate.
Absolutely! These peanut butter balls can be prepared up to a week in advance. Keep them refrigerated in an airtight container, and they’ll stay fresh and delicious.
Print
Creamy No-Bake Peanut Butter Balls
- Total Time: 45 minutes
- Yield: 13 1x
Description
Irresistible no-bake peanut butter balls deliver creamy chocolate-covered bliss with minimal kitchen effort. Sweet morsels combine simple ingredients for a delightful treat you can quickly prepare and enjoy.
Ingredients
- 1 cup (240 g / 8.5 oz) creamy peanut butter
- 1 ½ cups (180 g / 6.3 oz) crushed graham crackers or crushed pretzels
- 1 cup (120 g / 4.2 oz) powdered sugar
- ¼ cup (60 g / 2.1 oz) unsalted butter, softened
- 1 ½ cups (270 g / 9.5 oz) semi-sweet or milk chocolate chips
- 1 tbsp (15 ml) coconut oil or shortening (optional, for smoother coating)
Instructions
- Mixture Preparation: Thoroughly blend peanut butter, butter, and powdered sugar until smooth and homogeneous, integrating graham crackers or pretzels for added texture and complexity.
- Shaping Process: Craft uniform spherical portions approximately one inch in diameter, positioning them carefully on a parchment-lined tray. Refrigerate for 30 minutes to enhance structural integrity.
- Chocolate Coating: Melt chocolate chips with coconut oil using gentle microwave technique, stirring intermittently to prevent burning. Expertly dip each chilled peanut butter sphere, ensuring complete and elegant chocolate coverage.
- Finishing Touch: Allow chocolate-enrobed treats to set on parchment paper, returning to refrigerator for 15-20 minutes until chocolate shell solidifies completely.
- Storage: Transfer finished confections to an airtight container, preserving within refrigerator to maintain optimal texture and flavor profile. Consume within one week for maximum enjoyment.
Notes
Soften Butter Perfectly: Let butter sit at room temperature for 15-30 minutes to achieve ideal spreadability without melting completely.
Control Mixture Consistency: Add powdered sugar gradually to prevent a dry or overly sticky texture; mix thoroughly to create a smooth, moldable base.
Chocolate Dipping Technique: Use a fork or dipping tool to ensure even chocolate coating, tapping gently to remove excess and create a clean, professional finish.
Dietary Adaptation Options: Swap traditional ingredients for gluten-free graham crackers, use dark chocolate for a richer flavor, or substitute almond butter for a nut-free alternative.
- Prep Time: 15 minutes
- Cook Time: 30 minutes
- Category: Snacks, Desserts
- Method: Blending
- Cuisine: American
Nutrition
- Serving Size: 13
- Calories: 292
- Sugar: 18 g
- Sodium: 100 mg
- Fat: 17 g
- Saturated Fat: 7 g
- Unsaturated Fat: 10 g
- Trans Fat: 0 g
- Carbohydrates: 30 g
- Fiber: 1 g
- Protein: 6 g
- Cholesterol: 15 mg
John Nicholson
Lead Writer & Recipe Developer
Expertise
Recipe Testing and Development, Kitchen Hacks and Time-Saving Tips, Flavor Pairing and Ingredient Selection, Engaging Food Writing and Storytelling
Education
Johnson & Wales University
John Nicholson honed his skills at Johnson & Wales University, learning how to use fresh, local ingredients and down-to-earth techniques to make cooking simple and satisfying.
His recipes blend Southern comfort flavors with a modern touch, inviting everyone to cook with ease and confidence.
Living in Charleston, John takes cues from the city’s lively food scene, local markets, and seasonal produce. He’s all about making meals stress-free through easy tips, flavor pairings, and fun experiments in the kitchen