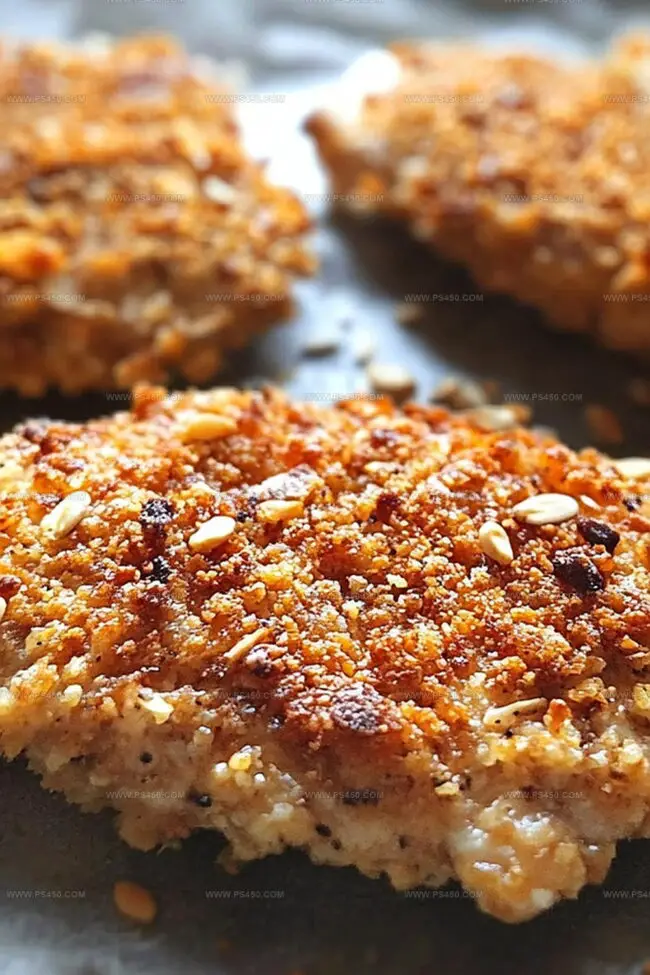
Crispy golden chicken cutlets spark joy on dinner plates across kitchens everywhere.
These delectable crispy baked chicken cutlets bring restaurant-quality crunch without deep-frying.
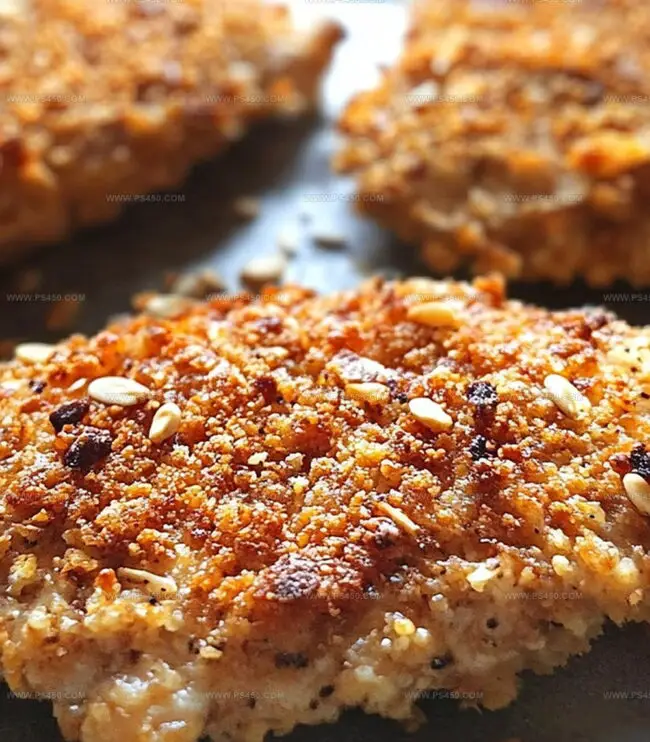
A simple coating of seasoned breadcrumbs creates an irresistible exterior that seals in tender meat.
Home cooks adore this foolproof technique that delivers maximum flavor with minimal effort.
Each bite offers a perfect balance of crunchy breading and juicy chicken that satisfies every comfort food craving.
The secret lies in a few smart preparation steps that guarantee a golden, crisp finish.
Serve these mouthwatering cutlets alongside your favorite sides for a meal that will have everyone asking for seconds.
Quick Recipe Overview
Prep Time: 15 minutes
Cook Time: 25 minutes
Total Time: 40 minutes
Calories: 320 kcal
Servings: 5
What You Need For Baked Chicken Cutlets
For Breading:
All-Purpose Flour: Creates a smooth base for egg and crumbs to stick, helping achieve a crispy exterior.
Large Eggs: Provides a sticky binding layer that helps breadcrumbs adhere perfectly to chicken.
Water: Helps thin eggs for better coating and even coverage on chicken cutlets.
For Crumb Coating:
Breadcrumbs: Delivers delightful crunch and golden-brown exterior when baked.
Parmesan Cheese: Adds savory depth and helps create a more flavorful, crispy crust.
For Seasoning and Preparation:
Cooking Spray: Ensures even browning and prevents sticking on baking sheet.
Chicken Cutlets: Lean protein that becomes tender and juicy when properly breaded and baked.
Parchment Paper or Foil: Provides easy cleanup and prevents chicken from sticking to baking sheet.
For Optional Seasonings (not specified in original recipe):
Salt: Enhances overall flavor profile of chicken.
Black Pepper: Adds mild heat and complements chicken’s natural taste.
Garlic Powder: Introduces aromatic, savory undertone to breading mixture.
Kitchen Tools For Crispy Chicken Cutlets
Baking sheet: Large, flat pan for even cooking and easy cleanup.
Parchment paper or foil: Prevents chicken from sticking and makes cleanup simple.
Shallow dishes (3): For creating breading station with flour, egg mixture, and breadcrumb coating.
Cooking spray: Helps achieve crispy, golden exterior and prevents dryness.
Measuring cups and spoons: For precise ingredient measurements.
Meat thermometer: Ensures chicken reaches safe internal temperature of 165F.
Tongs: Perfect for flipping chicken cutlets midway through baking.
How To Bake Chicken Cutlets
Prep the Oven Blast your oven to a sizzling 400F, creating the perfect cocoon for crispy chicken. Grab a baking sheet and give it a quick spray to prevent sticking.
Create Your Flavor Fortress Set up three magical bowls: one with flour for dusty coating, another with egg wash for gluing goodness, and the last with crunchy breadcrumb magic.
Transform Chicken Into Crispy Delights Dive each chicken piece into flour, giving it a light powdery jacket. Swim it through egg wash, then roll in the seasoned breadcrumb mixture. Press those crumbs firmly so they cling like best friends.
Arrange for Golden Perfection Place your breaded chicken champions on the prepared baking sheet. Give them a quick spray of cooking magic to help them turn gorgeous and golden.
Bake to Delicious Completion Slide the sheet into the hot oven and let them sizzle for 20-25 minutes. Flip once midway to ensure even browning. Your chicken is ready when it hits 165F and sports a beautiful golden-brown armor.
Crispy Tips & Seasoning Swaps For Chicken Cutlets
Crispy Coating Trick: Press breadcrumbs firmly onto chicken to create an extra crunchy exterior that won’t fall off during baking.
Gluten-Free Option: Swap wheat flour with almond flour or gluten-free breadcrumbs for those with wheat sensitivities, ensuring the same delicious crunch.
Flavor Boost: Experiment with different herb and spice combinations in the breadcrumb mixture like smoked paprika, dried oregano, or garlic powder to personalize the taste.
Low-Carb Adaptation: Replace breadcrumbs with crushed pork rinds or almond meal for a protein-packed, low-carbohydrate alternative that still delivers a satisfying crunch.
Make-Ahead Magic: Prepare breaded cutlets up to 24 hours in advance and store covered in the refrigerator, then bake when ready to serve for convenient meal planning.
Serving Chicken Cutlets With Style
Family-Style Feast: Serve these crispy chicken cutlets as the centerpiece of a comforting family dinner with roasted vegetables and mashed potatoes.
Sandwich Sensation: Slice the cutlets and layer them on fresh ciabatta bread with crisp lettuce, tomato slices, and a zesty mayo for a delicious lunch option.
Mediterranean Twist: Top the chicken with crumbled feta, chopped fresh parsley, and a drizzle of lemon juice for a bright, tangy Mediterranean-inspired meal that brings exciting flavors to the table.
Salad Topper: Slice the cutlets and place them over a mixed green salad with cucumber, cherry tomatoes, and a light vinaigrette for a protein-packed, fresh dining experience.
How To Store Baked Chicken Cutlets
Refrigerator Revival: Store leftover chicken cutlets in an airtight container, keeping them fresh for 3-4 days. Separate layers with parchment paper to prevent sticking and maintain crispy texture.
Quick Freeze Method: Wrap individual cutlets in plastic wrap, then place in freezer bags. Frozen cutlets stay delicious for up to 2 months, perfect for fast weeknight meals.
Reheat Like a Pro: Bring refrigerated cutlets back to life by warming in the oven at 350F for 10-12 minutes. Avoid microwaving to keep the crispy breading intact and prevent sogginess.
Meal Prep Magic: Prepare a double batch during weekend cooking. Pack cooled cutlets with salads, in sandwiches, or alongside roasted vegetables for convenient grab-and-go lunches throughout the week.
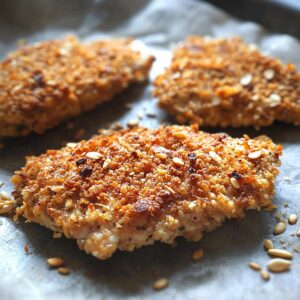
Crispy baked chicken cutlets from Italy offer a healthier alternative to traditional fried versions. Golden-brown breading and tender meat create a simple, delicious meal for family dinners you’ll savor to the last bite.
Ingredients
Scale
4 chicken breasts (boneless, skinless, pounded to ½ in/1.27 cm thick)
1 ½ cups (135 g) breadcrumbs (plain or Italian-style)
½ cup (50 g) Parmesan cheese (grated)
1 cup (120 g) all-purpose flour
2 eggs (large)
1 tbsp water
1 tsp garlic powder
1 tsp onion powder
1 tsp dried Italian seasoning
½ tsp salt
½ tsp black pepper
Cooking spray or olive oil spray
Instructions
Preparation: Preheat the oven to 400F (200C) and line a baking sheet with parchment paper, creating an ideal cooking environment for crispy chicken cutlets.
Breading Station: Arrange three shallow containers – one with flour, another with whisked egg and water, and the third combining breadcrumbs and Parmesan cheese – forming a strategic coating assembly.
Coating Process: Dredge each chicken cutlet thoroughly in flour, then dip into the egg mixture, allowing excess to drip off before generously rolling in the seasoned breadcrumb mixture, ensuring complete and even coverage.
Baking Technique: Carefully place the breaded cutlets on the prepared baking sheet, maintaining space between pieces for optimal air circulation, and lightly spritz with cooking spray to enhance golden browning.
Culinary Transformation: Slide the baking sheet into the preheated oven, rotating midway through cooking to promote uniform crispness and even heating.
Final Check: Confirm the chicken has reached a safe internal temperature of 165F (74C), typically achieved in 20-25 minutes, resulting in a perfectly crisp and juicy chicken cutlet.
Notes
Prep with Precision: Ensure all ingredients are at room temperature before starting to guarantee even coating and consistent cooking results.
Crumb Control: Use panko breadcrumbs for extra crispiness, or mix regular breadcrumbs with crushed cornflakes for a more textured exterior.
Moisture Management: Pat chicken cutlets completely dry with paper towels before breading to prevent soggy coating and promote better adhesion.
Temperature Tactics: Let baked cutlets rest for 5 minutes after cooking to lock in juices and maintain optimal tenderness, preventing dry meat.
Recipe Testing and Development, Kitchen Hacks and Time-Saving Tips, Flavor Pairing and Ingredient Selection, Engaging Food Writing and Storytelling
Education
Johnson & Wales University
Program: Bachelor of Science in Culinary Arts
Focus: A hands-on curriculum emphasizing farm-to-table cooking, local ingredient sourcing, and creative menu development. Students gained real-world restaurant experience, learning both classic techniques and modern approaches to sustainable cooking.
John Nicholson honed his skills at Johnson & Wales University, learning how to use fresh, local ingredients and down-to-earth techniques to make cooking simple and satisfying.
His recipes blend Southern comfort flavors with a modern touch, inviting everyone to cook with ease and confidence.
Living in Charleston, John takes cues from the city’s lively food scene, local markets, and seasonal produce. He’s all about making meals stress-free through easy tips, flavor pairings, and fun experiments in the kitchen

John Nicholson
Lead Writer & Recipe Developer
Expertise
Recipe Testing and Development, Kitchen Hacks and Time-Saving Tips, Flavor Pairing and Ingredient Selection, Engaging Food Writing and Storytelling
Education
Johnson & Wales University
John Nicholson honed his skills at Johnson & Wales University, learning how to use fresh, local ingredients and down-to-earth techniques to make cooking simple and satisfying.
His recipes blend Southern comfort flavors with a modern touch, inviting everyone to cook with ease and confidence.
Living in Charleston, John takes cues from the city’s lively food scene, local markets, and seasonal produce. He’s all about making meals stress-free through easy tips, flavor pairings, and fun experiments in the kitchen