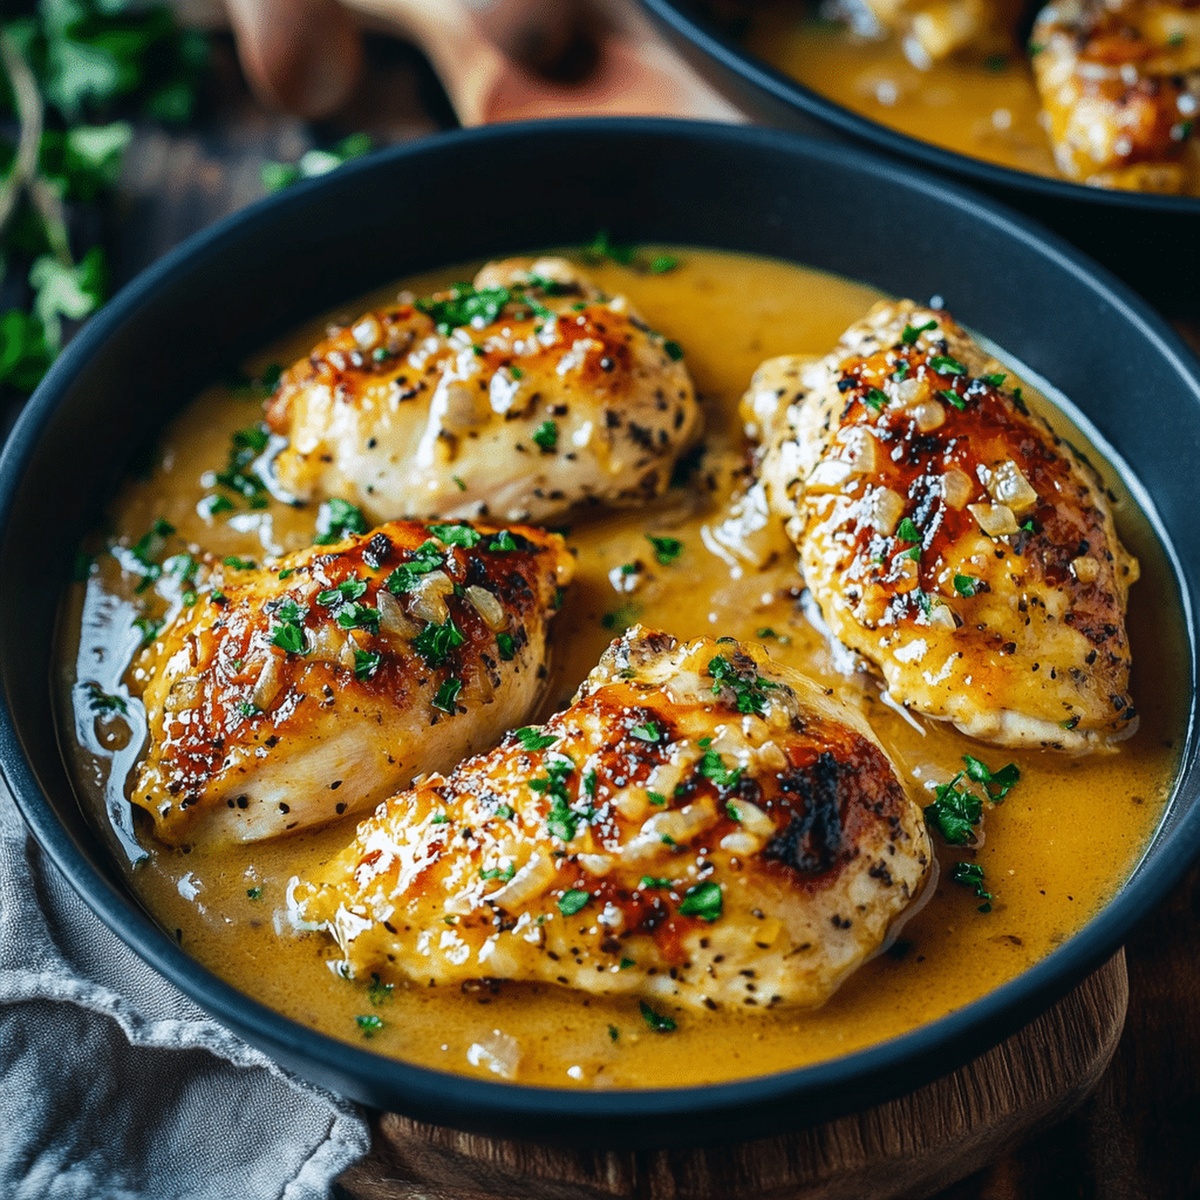
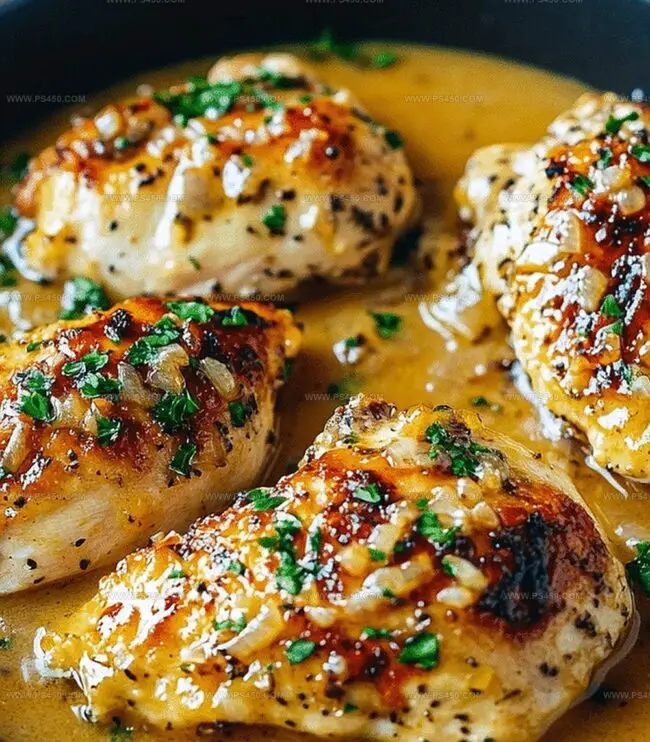
Honey Dijon Chicken Recipe with Crispy Baked Edges
Tender chicken breasts coated in a golden honey dijon glaze promise a delightful culinary adventure that will make your taste buds dance.
The perfect blend of sweet and tangy flavors creates a mouthwatering experience for dinner.
This simple recipe delivers restaurant-quality results with minimal effort.
Bold Dijon mustard cuts through the richness of honey, creating a balanced and irresistible coating.
The baking method ensures a crispy exterior while keeping the chicken incredibly juicy.
Each bite offers a harmonious combination of crisp texture and robust flavor.
Prepare to elevate your weeknight dinner with this crowd-pleasing chicken dish that’s sure to become a family favorite.
Quick Recipe Overview

Honey Dijon Chicken Recipe: What Goes In
For The Chicken Base:For The Flavor Builders:For The Moisture And Binding:Best Tools to Prep Honey Dijon Chicken
Your Honey Dijon Chicken Cooking Plan
Crank the oven to a toasty 400F and prep a baking dish with a quick spray of cooking oil or parchment paper.
Mix Dijon mustard, golden honey, crushed garlic, and silky olive oil in a bowl until it becomes a smooth, glossy sauce that’ll make your taste buds dance.
Nestle chicken breasts in the baking dish and shower them with a sprinkle of salt and pepper. Lavish the golden sauce all over, making sure every inch gets some love.
Slide the dish into the hot oven and let it work its for 20-25 minutes. The chicken should turn gorgeous and golden, reaching a safe internal temp of 165F. For an extra wow factor, flip on the broiler for a quick 2-3 minute caramelization party.
Pull out your sizzling masterpiece, crown it with fresh herbs, and get ready to devour a meal that’ll make everyone at the table swoon.
Useful Tweaks for Honey Dijon Chicken Recipe
Smart Ways to Serve Honey Dijon Chicken
Keep Honey Dijon Chicken Fresh Longer
FAQs
Dijon mustard provides a sharp, tangy flavor that complements the sweetness of honey. It adds depth and complexity to the sauce, creating a balanced taste profile that elevates the chicken’s overall flavor.
Yes, you can substitute chicken breasts with boneless chicken thighs. Just adjust the cooking time slightly, as thighs might require a few extra minutes to cook through completely.
To keep the chicken moist, don’t overcook it and use the internal temperature method. Remove the chicken from the oven when it reaches 165F (74C), and let it rest for a few minutes before serving to help retain its juices.
The recipe can be gluten-free if you use a gluten-free Dijon mustard. Always check the labels of your ingredients to confirm they meet your dietary requirements.
Print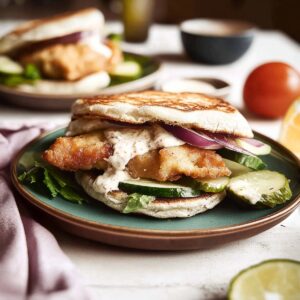
Fried Fish Sandwich Recipe
- Total Time: 20 minutes
- Yield: 4 1x
Description
Crave-worthy “Fried Fish Sandwich” delivers crispy golden perfection between soft brioche buns. Homemade tartar sauce and flaky fish create a delightful symphony of flavors you’ll savor with each satisfying bite.
Ingredients
Fish:
- 4 white fish fillets (cod, haddock, or tilapia)
Coating and Seasoning:
- 1 cup (240 milliliters) all-purpose flour
- 1 teaspoon (5 grams) salt
- ½ teaspoon (2.5 grams) black pepper
- 1 teaspoon (5 grams) garlic powder
- 1 teaspoon (5 grams) paprika
- 1 teaspoon (5 grams) Old Bay seasoning (optional)
- 1 cup (240 milliliters) buttermilk (or milk with 1 teaspoon vinegar)
- 1 large egg
- 1 cup (100 grams) panko breadcrumbs (or cornmeal for extra crunch)
Additional Components:
- Vegetable oil, for frying
- 4 brioche or sandwich buns, toasted
- ½ cup (120 milliliters) tartar sauce (or mayonnaise)
- 1 cup (50 grams) shredded lettuce
- 1 tomato, sliced
- ½ cup (50 grams) pickles or sliced onions (optional)
Instructions
- Craft a seasoned flour blend by combining dry ingredients, creating a flavor-packed coating that will elevate the fish’s taste profile.
- Whisk buttermilk and egg together in a separate vessel, forming a smooth, adhesive base that helps breadcrumbs cling perfectly to the fish.
- Systematically transform each fish fillet into a crispy masterpiece by first dredging through the seasoned flour, ensuring complete coverage.
- Immerse the floured fillet into the buttermilk mixture, allowing excess liquid to drip off before transitioning to the final breading stage.
- Gently press panko breadcrumbs onto the fillet, creating a textured exterior that will deliver a satisfying crunch when fried.
- Prepare the skillet by heating vegetable oil to an optimal temperature, creating a golden-brown cooking environment for the delicate fish.
- Carefully lower the breaded fillets into the shimmering oil, monitoring their transformation into a crisp, amber-hued delicacy.
- Fry each side until achieving a rich, golden color and ensuring the fish is thoroughly cooked, typically 3-4 minutes per side.
- Transfer the fried fillets to a paper towel-lined plate, allowing excess oil to drain and maintaining the crispy texture.
Notes
- Choose fish with firm texture like cod, halibut, or tilapia to ensure the best crispy coating and prevent breaking during frying.
- Maintain consistent oil temperature around 350F to achieve golden-brown, evenly cooked fish without absorbing excess oil.
- Pat fish fillets completely dry before breading to help breadcrumbs adhere better and create a crunchier exterior.
- For gluten-free option, swap wheat flour with cornstarch or rice flour, and use gluten-free panko breadcrumbs to maintain crispy texture.
- Prep Time: 10 minutes
- Cook Time: 10 minutes
- Category: Lunch, Dinner, Snacks
- Method: Frying
- Cuisine: American
Nutrition
- Serving Size: 4
- Calories: 550
- Sugar: 3 g
- Sodium: 800 mg
- Fat: 25 g
- Saturated Fat: 4 g
- Unsaturated Fat: 20 g
- Trans Fat: 0 g
- Carbohydrates: 60 g
- Fiber: 2 g
- Protein: 25 g
- Cholesterol: 90 mg
Emily Morgan
Food Critic & Kitchen Tips Specialist
Expertise
Global Food Exploration & Critique, Simple Kitchen Hacks & Time-Saving Tips, Presentation & Plating Techniques, Culinary Research & Storytelling.
Education
New York University
Emily Morgan has journeyed across the globe, collecting culinary secrets that turn everyday ingredients into impressive meals.
Based in Seattle and armed with a Journalism degree from NYU, she blends thorough research with a flair for presentation, ensuring every dish looks just as good as it tastes.
Focusing on fresh flavors, simple methods, and a bit of fun, Emily shows home cooks how to elevate their daily cooking without fancy gadgets or complex steps.