Crunchy Bacon Cheddar Chicken Tenders Recipe Everyone Loves
Tangy seasoned crispy cheddar bacon chicken tenders spark joy at every dinner table.
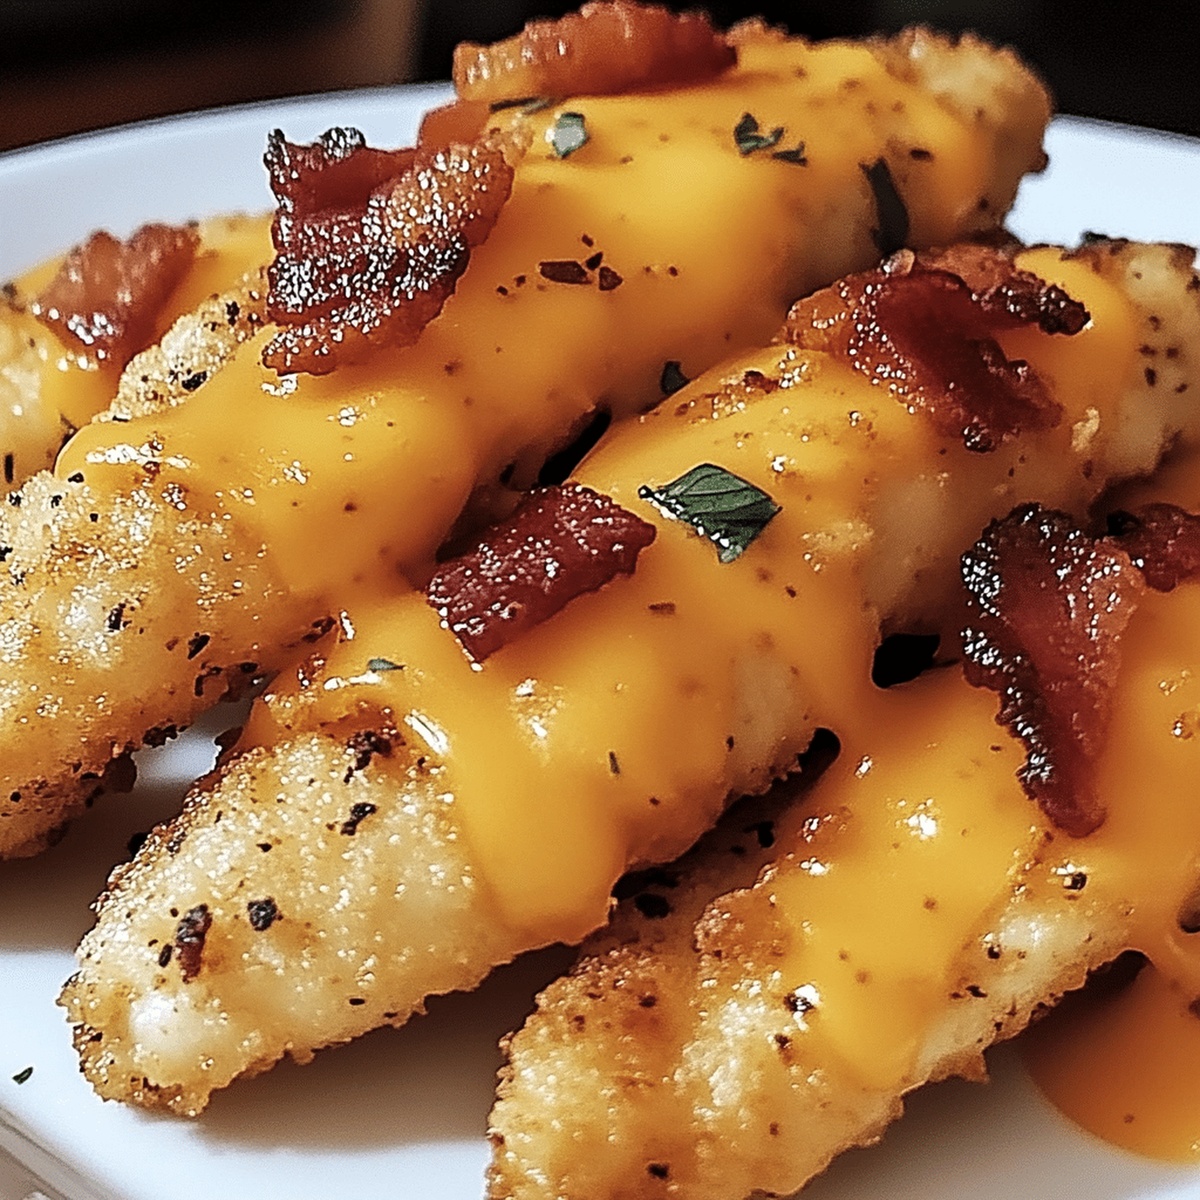
Bacon lovers rejoice as this simple recipe combines golden-brown chicken with sharp cheddar and smoky bacon bits.
Lean protein meets indulgent flavors in a meal that satisfies deep cravings.
Each tender promises a delightful crunch that makes taste buds dance with excitement.
The crispy coating seals in moisture, creating a perfect balance of textures.
Melted cheese and crisp bacon elevate these chicken tenders from ordinary to extraordinary.
Serve these mouthwatering morsels and watch them disappear in minutes.
Quick Recipe Overview
Ingredients That Define Cheddar Bacon Chicken Tenders
For Proteins:For Coating and Binding:For Seasoning and Flavor Enhancers:Prep Tools to Make Cooking Simple
Fry or Bake: Tenders From Start to Finish
Pat chicken tenders completely dry to help breading stick perfectly.
Sprinkle chicken with salt, pepper, garlic powder, onion powder, and paprika for a zesty taste.
Set up three separate dishes: first with flour, second with beaten egg, third with crunchy mixture of breadcrumbs, crispy bacon bits, and sharp cheddar cheese.
Dunk each tender first in flour, then egg, finishing with bacon-cheese breadcrumb mixture. Press coating gently to ensure maximum crunch.
Heat oil in skillet over medium temperature. Carefully place breaded tenders in hot oil, cooking 3-4 minutes per side until golden and crispy. Check internal temperature reaches 165°F.
Transfer tenders to paper towel-lined plate to remove extra oil. Serve immediately with tangy ranch, sweet BBQ, or zesty honey mustard sauce for dipping.
Swap In Flavors for a New Take on a
How to Serve These Tenders to a Crowd
Keep Leftovers Tasting Fresh and Crisp
FAQs
Patting the chicken dry helps the flour and breading stick better, creating a crispier coating that won’t fall off during cooking.
Yes, you can use pre-cooked bacon, but freshly cooked and crumbled bacon will provide a more robust flavor and crunchier texture for the breading.
You can substitute breadcrumbs with crushed crackers, panko, or even crushed cornflakes to achieve a similar crispy coating.
Use a meat thermometer to check that the internal temperature of the chicken reaches 165°F, which ensures the chicken is safe to eat and fully cooked through.
Print
Crispy Cheddar Bacon Chicken Tenders Recipe
- Total Time: 40 minutes
- Yield: 5 1x
Description
Cheddar bacon chicken tenders blend crispy, cheesy goodness with savory bacon-wrapped protein. Comfort classics meet gourmet delights in this simple yet irresistible meal you’ll crave.
Ingredients
- 1 pound (454 grams) chicken tenders
- 2 large eggs
- 1 cup (120 grams) all-purpose flour
- 1 cup (60 grams) panko breadcrumbs
- 1 cup (100 grams) shredded sharp cheddar cheese
- 1 cup (100 grams) cooked bacon, finely crumbled
- 1 tsp garlic powder
- 1 tsp smoked paprika
- ½ tsp salt
- ½ tsp black pepper
- Cooking spray or oil (if baking)
Instructions
- Preparation: Thoroughly blot chicken tenders with paper towels to ensure maximum moisture removal for optimal breading adherence.
- Seasoning: Massage tenders comprehensively with salt, pepper, garlic powder, onion powder, and paprika, ensuring profound flavor infusion across every surface.
- Breading Setup: Arrange three distinct stations – first with flour, second with whisked eggs, third with a dynamic blend of breadcrumbs, crumbled bacon, and shredded cheddar cheese.
- Coating Process: Systematically dredge each tender through flour for a delicate base, immerse in egg wash for binding, then generously coat with bacon-cheese breadcrumb mixture, pressing gently to secure a robust crust.
- Cooking: Heat skillet to medium temperature, add oil, and strategically place breaded tenders, allowing each side to caramelize into a golden-brown finish for 3-4 minutes, ensuring internal temperature reaches 165°F for complete food safety.
- Finishing: Rest cooked tenders on paper towel-lined plate to absorb excess oil, preserving their crisp exterior and maintaining textural integrity.
- Serving: Plate chicken tenders accompanied by complementary dipping sauces such as ranch, BBQ, or honey mustard to elevate the overall gastronomic experience.
Notes
- Dry Thoroughly: Ensure chicken tenders are completely dry with paper towels to achieve a crispy, perfectly adhered breading that won’t become soggy.
- Season Generously: Massage seasonings deeply into chicken for maximum flavor penetration, creating a more complex and rich taste profile throughout the meat.
- Breading Technique Matters: Press breadcrumb mixture gently but firmly onto chicken to create a solid, crunchy coating that locks in moisture and prevents falling off during cooking.
- Temperature Control: Use medium heat to prevent burning while ensuring the chicken cooks evenly, golden brown exterior matches a perfectly cooked interior with crispy bacon bits.
- Prep Time: 15 minutes
- Cook Time: 25 minutes
- Category: Lunch, Dinner, Snacks
- Method: Frying
- Cuisine: American
Nutrition
- Serving Size: 5
- Calories: 486
- Sugar: 1 g
- Sodium: 800 mg
- Fat: 24 g
- Saturated Fat: 9 g
- Unsaturated Fat: 14 g
- Trans Fat: 0 g
- Carbohydrates: 37 g
- Fiber: 2 g
- Protein: 31 g
- Cholesterol: 160 mg
John Nicholson
Lead Writer & Recipe Developer
Expertise
Recipe Testing and Development, Kitchen Hacks and Time-Saving Tips, Flavor Pairing and Ingredient Selection, Engaging Food Writing and Storytelling
Education
Johnson & Wales University
John Nicholson honed his skills at Johnson & Wales University, learning how to use fresh, local ingredients and down-to-earth techniques to make cooking simple and satisfying.
His recipes blend Southern comfort flavors with a modern touch, inviting everyone to cook with ease and confidence.
Living in Charleston, John takes cues from the city’s lively food scene, local markets, and seasonal produce. He’s all about making meals stress-free through easy tips, flavor pairings, and fun experiments in the kitchen