Garlic Chicken Wraps Recipe That’s Crispy and Filling
Tender chicken meets a crispy garlic twist in these mouthwatering wraps that will revolutionize your weeknight dinner routine.
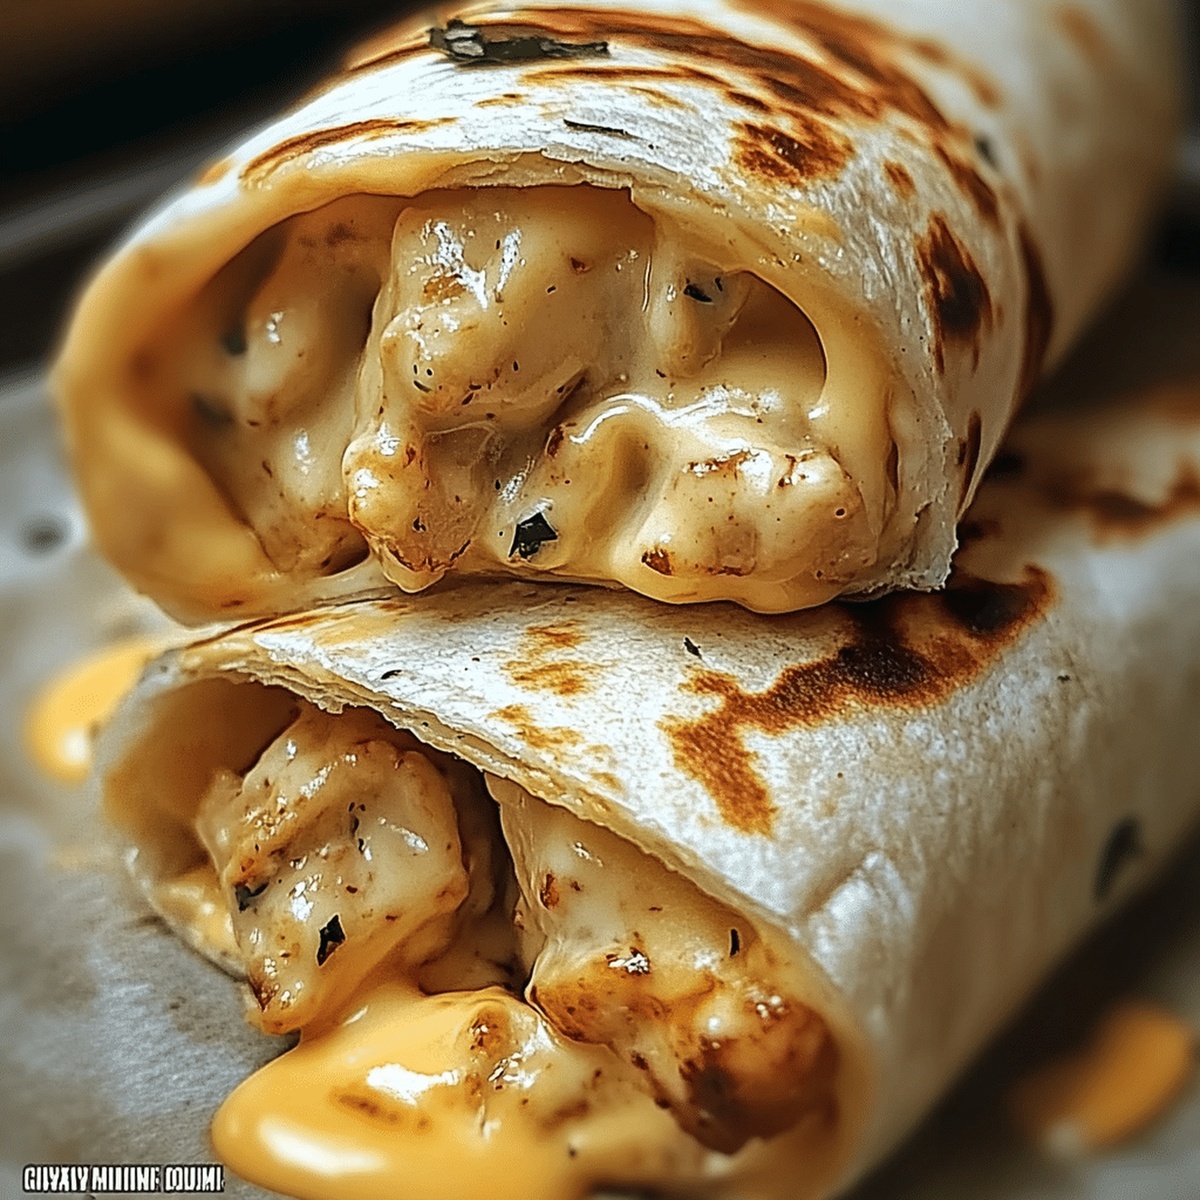
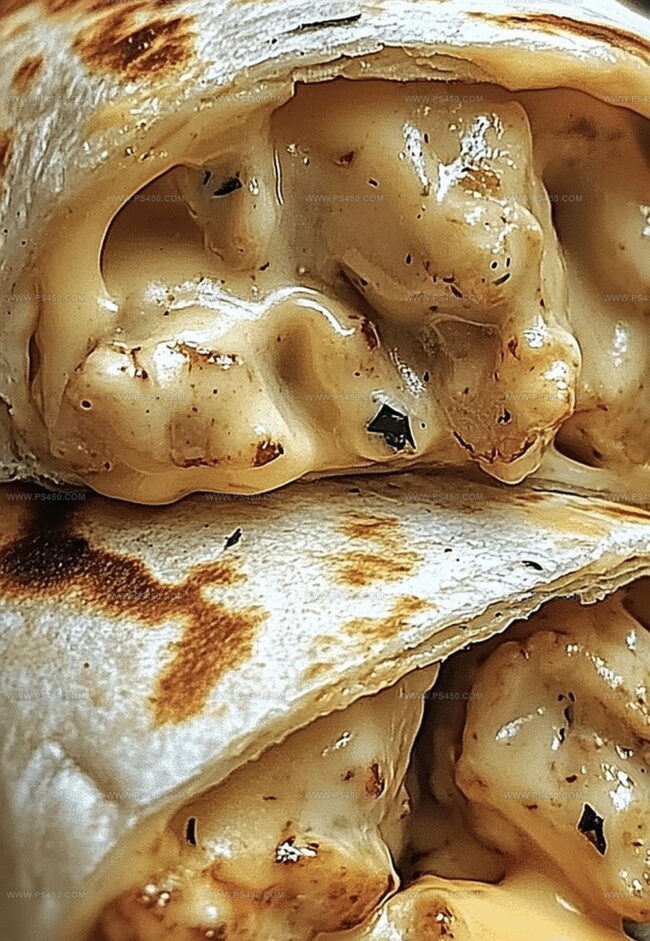
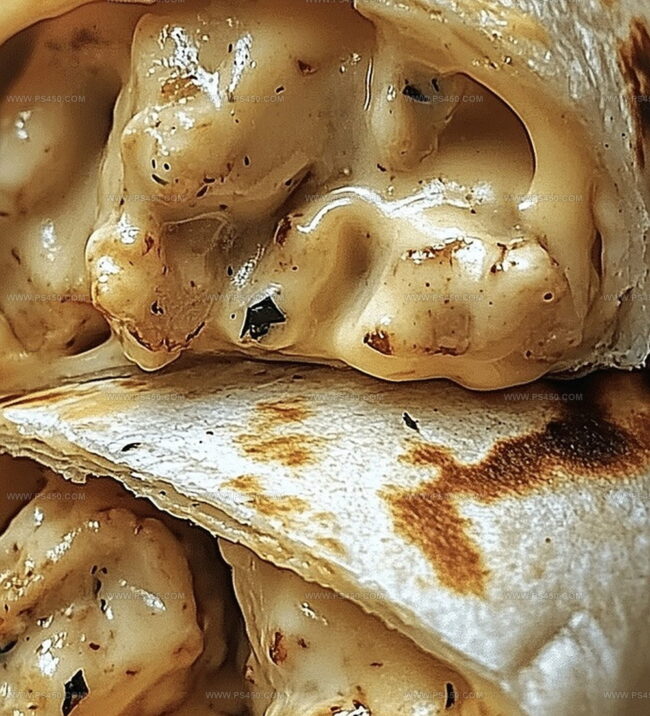
The crispy garlic chicken wraps blend savory flavors with a satisfying crunch that keeps you coming back for more.
Juicy chicken pieces are seasoned with a perfect balance of garlic and spices, creating a meal that’s both simple and extraordinary.
Each bite promises a delightful combination of textures and robust flavors that dance across your palate.
Fresh ingredients and a quick preparation method make these wraps an ideal solution for busy evenings.
The golden, crispy exterior gives way to a succulent interior that transforms an ordinary meal into something spectacular.
Serve these wraps and watch as everyone around the table devours them with pure delight.
Quick Recipe Overview
Ingredients That Make Cheesy Garlic Chicken Wraps So Tasty
For Protein Base:For Wrap Components:For Seasoning and Cooking Enhancers:Equipment for Preparing Cheesy Garlic Chicken Wraps Fast
Wrap and Cook Cheesy Garlic Chicken in Just Minutes
Grab a skillet and warm some olive oil over medium heat. Toss in minced garlic and let it dance for half a minute. Add chicken slices with garlic powder, Italian seasoning, salt, and pepper. Cook until chicken turns perfectly golden and tender, about 6-8 minutes. Transfer chicken to a side plate.
Spread out soft tortillas and create a mouthwatering base with a generous sprinkle of cheese. Top with the juicy cooked chicken. Feel free to add extra goodies like fresh spinach or creamy avocado.
Fold tortilla edges inward and roll tightly, tucking in all the delectable fillings. Press gently to seal.
Return skillet to heat with a touch more oil. Place wraps seam-side down, cooking until each side turns a beautiful golden brown, about 2-3 minutes per side. Brush with melted butter and dust with a light sprinkle of garlic powder for an extra flavor kick.
Slice wraps diagonally and plate immediately. Pair with your favorite dipping sauce for an irresistible meal that’ll make taste buds dance.
Add-Ons to Spice Up Cheesy Garlic Chicken Wraps
Serve Chicken Wraps for Lunch, Dinner, or Snacks
Store Cheesy Garlic Chicken Wraps in Foil or Containers
FAQs
Yes, you can easily swap the cheese. Cheddar, mozzarella, or pepper jack work great and add different flavor profiles to the wrap.
Definitely! You can cook the chicken and prepare the wraps ahead of time. Store them in the refrigerator and quickly reheat in a skillet or air fryer when ready to eat.
Absolutely. Simply use gluten-free tortillas instead of regular ones. Everything else in the recipe remains the same.
Try marinating the chicken in a mixture of olive oil, garlic, and herbs for 30 minutes before cooking. This will enhance the overall taste and tenderness of the meat.
Print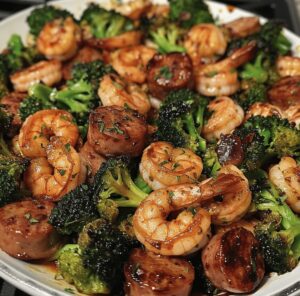
Honey Garlic Shrimp, Sausage & Broccoli Recipe
- Total Time: 25 minutes
- Yield: 4 1x
Description
Culinary magic unfolds with honey garlic shrimp, sausage & broccoli, blending sweet and savory notes in one irresistible skillet. Sizzling ingredients promise a quick, delectable meal that satisfies hunger and delights taste buds with minimal effort.
Ingredients
Main Protein Ingredients:
- 1 lb (450g) large shrimp, peeled and deveined
- 8 oz (225g) smoked sausage, sliced
Vegetable Ingredients:
- 2 cups broccoli florets
Seasoning and Sauce Ingredients:
- ¼ cup (60ml) soy sauce
- ¼ cup (85g) honey
- 2 cloves garlic, minced
- 1 tablespoon vegetable oil
- 1 teaspoon fresh ginger, grated (optional, for extra flavor)
- ½ teaspoon red pepper flakes (optional, for spice)
Instructions
- Craft a vibrant sauce by blending soy sauce, honey, minced garlic, grated ginger, and a pinch of red pepper flakes in a mixing bowl. Let the mixture rest while preparing other components.
- Heat a spacious skillet over medium-high temperature and introduce a splash of vegetable oil. Sear sliced sausage until golden brown and crispy, approximately 3-4 minutes.
- Incorporate broccoli florets into the skillet, allowing them to sizzle and become tender-crisp. Gently maneuver the vegetables to ensure even cooking.
- Transfer the caramelized sausage and broccoli to a separate plate, keeping them warm and ready for the next stage.
- In the same skillet, drizzle remaining oil and carefully place shrimp. Cook each side until they transform into a delicate pink hue and appear translucent.
- Reunite the sausage and broccoli with the seared shrimp in the skillet. Cascade the prepared sauce over the ingredients, thoroughly coating each morsel.
- Simmer the combined ingredients, allowing the sauce to thicken and envelop the proteins and vegetables with a glossy sheen.
- Plate the aromatic medley atop steamed rice or delicate noodles. Garnish with delicate green onion slivers or a sprinkle of toasted sesame seeds for an elegant finish.
Notes
- Adjust spice levels by controlling red pepper flakes for personal heat preference.
- Swap protein options easily by substituting shrimp with chicken or tofu for dietary needs.
- Prevent overcooking seafood by watching shrimp color and removing immediately when pink and opaque.
- Maximize flavor absorption by letting sauce simmer briefly, allowing ingredients to soak up sweet and savory notes.
- Prep Time: 10 minutes
- Cook Time: 15 minutes
- Category: Lunch, Dinner
- Method: Sautéing
- Cuisine: Asian
Nutrition
- Serving Size: 4
- Calories: 410
- Sugar: 18g
- Sodium: 900mg
- Fat: 20g
- Saturated Fat: 6g
- Unsaturated Fat: 14g
- Trans Fat: 0g
- Carbohydrates: 36g
- Fiber: 2g
- Protein: 24g
- Cholesterol: 220mg
John Nicholson
Lead Writer & Recipe Developer
Expertise
Recipe Testing and Development, Kitchen Hacks and Time-Saving Tips, Flavor Pairing and Ingredient Selection, Engaging Food Writing and Storytelling
Education
Johnson & Wales University
John Nicholson honed his skills at Johnson & Wales University, learning how to use fresh, local ingredients and down-to-earth techniques to make cooking simple and satisfying.
His recipes blend Southern comfort flavors with a modern touch, inviting everyone to cook with ease and confidence.
Living in Charleston, John takes cues from the city’s lively food scene, local markets, and seasonal produce. He’s all about making meals stress-free through easy tips, flavor pairings, and fun experiments in the kitchen