Crunchy Longhorn Steakhouse Parmesan Chicken Recipe to Wow
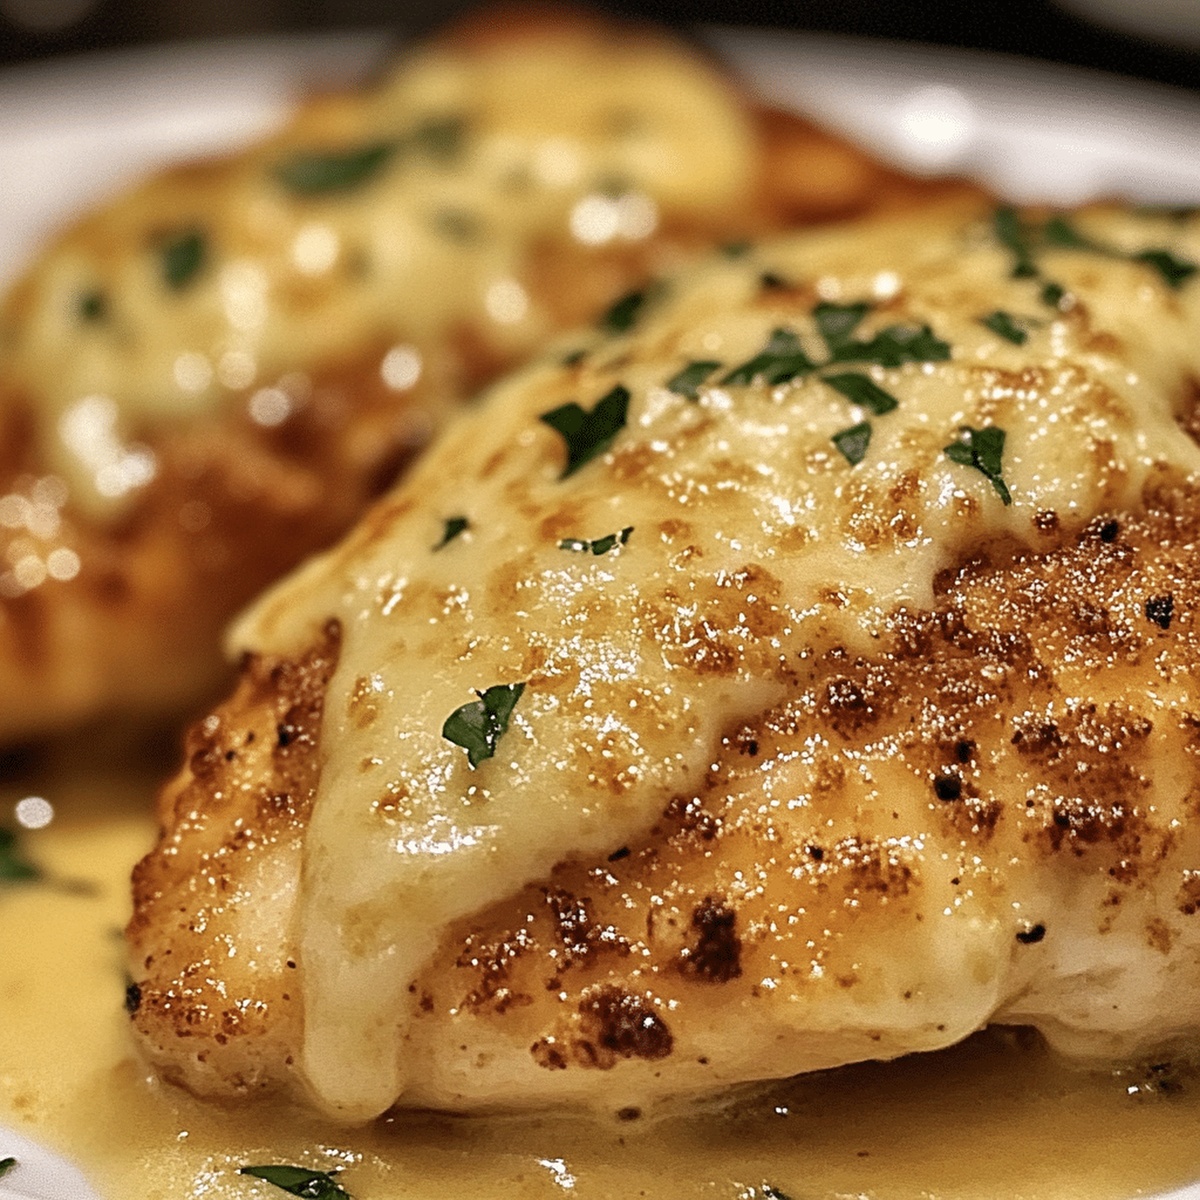
Golden, juicy chicken meets a crispy parmesan coating in this longhorn steakhouse parmesan chicken recipe that brings restaurant-quality flavors straight to your kitchen.
The secret lies in the perfectly seasoned breadcrumb mixture that creates an irresistible crunchy exterior.
Tender chicken breasts are carefully dredged and fried to achieve a beautiful golden-brown color that promises maximum flavor in every bite.
Butter and parmesan cheese blend seamlessly to create a rich, savory experience that elevates this dish from ordinary to extraordinary.
Each forkful delivers a delightful crunch and melt-in-your-mouth texture that will have everyone at the table asking for seconds.
This restaurant-inspired recipe proves you can create five-star dining right at home with just a few simple ingredients and some culinary passion.
Quick Recipe Overview
What Makes This Copycat Longhorn Parmesan Chicken Work
For Chicken Preparation:For Breading Components:For Sauce and Cooking Elements:Tools That Match the Restaurant Experience at Home
Bake It Just Right With This Home Version
Mix together a crunchy blend of panko breadcrumbs, Parmesan cheese, and aromatic spices. Create a three-part dipping station that transforms plain chicken into a crispy masterpiece. Coat each chicken piece thoroughly, pressing the breading firmly to lock in maximum flavor.
Heat olive oil in a skillet and carefully fry the breaded chicken until it turns a gorgeous golden brown. Each side needs about 3-4 minutes of love to develop that irresistible crispy exterior that’ll make taste buds dance.
Transfer the golden chicken to the oven and let it finish cooking. Bake until the internal temperature hits 165F, ensuring a juicy, perfectly cooked chicken that’s crisp on the outside and tender on the inside.
Melt butter and sauté garlic until it releases itsal aroma. Pour in heavy cream and let it simmer gently. Stir in Parmesan cheese until the sauce becomes smooth and luxurious. Season with a pinch of salt and pepper to elevate the flavor profile.
Drizzle the velvety Parmesan sauce over the crispy chicken. Add a sprinkle of fresh parsley for a pop of color and freshness. Pair with your favorite sides and get ready to enjoy a restaurant-quality meal right at home.
Add Custom Flavors for Your Twist on the
How to Plate It Like a Pro
Store It So You Can Enjoy It Again Later
FAQs
The combination of panko breadcrumbs, Parmesan cheese, garlic powder, onion powder, and dried basil creates a crispy, well-seasoned coating that adds texture and rich flavor to the chicken.
While you can use regular breadcrumbs, panko creates a lighter, crispier texture. Panko breadcrumbs are larger and flakier, which helps achieve that signature crunchy coating that makes this chicken special.
Ensure you pat the chicken dry before breading, follow the three-step dredging process (flour, egg, breadcrumbs), and press the breadcrumbs firmly onto the chicken to help the coating adhere better during frying and baking.
Frying creates a golden, crispy exterior, while baking ensures the chicken is cooked through completely. This two-step method helps maintain the crispy coating while guaranteeing the chicken reaches the safe internal temperature of 165F.
Print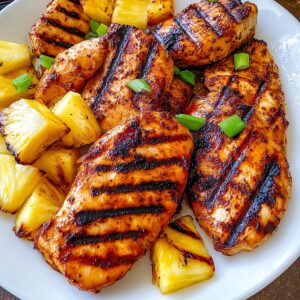
Tropical Aloha Chicken And Pineapple Recipe
- Total Time: 30 minutes
- Yield: 5 1x
Description
Hawaiian-inspired grilled aloha chicken combines sweet and savory flavors in a tropical delight. Marinated chicken and caramelized pineapple slices create a perfect summer meal you’ll crave again and again.
Ingredients
- 4 chicken breasts (boneless, skinless)
- ½ cup (120 ml / 4 fl oz) soy sauce
- ½ cup (120 ml / 4 fl oz) pineapple juice
- 1 fresh pineapple (peeled, cored, and sliced into rings)
- ⅓ cup (66 g) brown sugar
- ¼ cup (60 ml / 2 fl oz) ketchup
- 2 tbsps (30 ml / 1 fl oz) rice vinegar
- 2 tbsps (30 ml / 1 fl oz) apple cider vinegar
- 2 garlic cloves (minced)
- 1 tbsp (15 ml / 0.5 fl oz) sesame oil
- 1 tbsp (15 ml / 0.5 fl oz) olive oil
- 1 tsp grated fresh ginger
- ¼ tsp black pepper
- Pinch of salt
Instructions
- Marinade Creation: Whisk soy sauce, pineapple juice, brown sugar, ketchup, vinegar, sesame oil, minced garlic, grated ginger, and cracked black pepper in a bowl until seamlessly blended, creating a complex flavor profile.
- Marinating Process: Thoroughly coat chicken pieces in the prepared marinade, ensuring complete coverage. Seal in an airtight container and refrigerate for at least two hours, allowing flavors to deeply penetrate the meat.
- Grill Preparation: Preheat grill to medium-high heat, establishing an optimal cooking surface for achieving caramelized exterior and juicy interior.
- Grilling Technique: Extract chicken from marinade, reserving a small amount for basting. Position chicken on hot grill, cooking 5-7 minutes per side. Periodically brush with reserved marinade to intensify flavor and maintain moisture.
- Temperature and Doneness: Verify chicken reaches 165°F internal temperature. Look for golden-brown grill marks and a tempting aroma indicating perfect cooking.
- Pineapple Grilling: Lightly oil pineapple slices and grill 2-3 minutes per side, developing beautiful caramelized edges and subtle char lines.
- Serving Presentation: Remove chicken and pineapple from grill, letting meat rest briefly. Arrange on serving platter, showcasing the harmonious blend of sweet, smoky, and savory Hawaiian-inspired flavors.
Notes
- Marinate Smartly: Allow chicken to soak in marinade for at least 2 hours, preferably overnight, to ensure deep flavor penetration and tenderize the meat.
- Monitor Grill Temperature: Maintain medium-high heat to achieve perfect caramelization without burning the chicken or pineapple, creating beautiful grill marks and preserving juiciness.
- Check Doneness Precisely: Use a meat thermometer to confirm chicken reaches 165°F internally, preventing undercooked meat while maintaining tender texture.
- Prevent Cross-Contamination: Always use separate utensils and cutting boards for raw chicken, and discard remaining marinade that has touched raw meat to ensure food safety.
- Prep Time: 15 minutes
- Cook Time: 15 minutes
- Category: Lunch, Dinner
- Method: Grilling
- Cuisine: Hawaiian
Nutrition
- Serving Size: 5
- Calories: 320
- Sugar: 12 g
- Sodium: 800 mg
- Fat: 10 g
- Saturated Fat: 1.5 g
- Unsaturated Fat: 7 g
- Trans Fat: 0 g
- Carbohydrates: 30 g
- Fiber: 1 g
- Protein: 30 g
- Cholesterol: 75 mg
John Nicholson
Lead Writer & Recipe Developer
Expertise
Recipe Testing and Development, Kitchen Hacks and Time-Saving Tips, Flavor Pairing and Ingredient Selection, Engaging Food Writing and Storytelling
Education
Johnson & Wales University
John Nicholson honed his skills at Johnson & Wales University, learning how to use fresh, local ingredients and down-to-earth techniques to make cooking simple and satisfying.
His recipes blend Southern comfort flavors with a modern touch, inviting everyone to cook with ease and confidence.
Living in Charleston, John takes cues from the city’s lively food scene, local markets, and seasonal produce. He’s all about making meals stress-free through easy tips, flavor pairings, and fun experiments in the kitchen