
Pepperoni Pizza Roll Recipe That’s Great for Game Night
Weeknight dinners demand quick, crowd-pleasing solutions like these delectable pepperoni pizza rolls that combine classic comfort food flavors.
Melted cheese and spicy pepperoni nestle inside golden-brown pastry, creating an irresistible handheld snack.
Each bite bursts with zesty marinara and savory meat that dance across your taste buds.
Simple ingredients transform ordinary evenings into delightful culinary experiences.
These rolls pack serious flavor without complicated preparation.
The crispy exterior gives way to a molten center that will have everyone reaching for seconds.
You’ll want to make extra because these addictive little bites disappear faster than you can plate them.
Quick Recipe Overview

Pepperoni Pizza Rolls Ingredient Rundown
For Base Ingredients:For Flavor Enhancers:For Finishing Touches:Tools That Make Pepperoni Pizza Rolls a Breeze
How to Roll and Bake Pepperoni Pizza Rolls

Crank the oven to a toasty 375F (190C), getting it primed and ready for some seriously delicious pizza.
Grab your pizza dough and roll it out on a flour-dusted surface. Stretch it nice and wide, aiming for a rectangular shape that’ll make your mouth water.
Splash some pizza sauce across the dough, leaving a tiny border around the edges. Scatter pepperoni slices like confetti, then blanket everything with a generous snowfall of mozzarella cheese. Sprinkle some zesty Italian herbs for an extra flavor punch.
Start from one edge and gently roll the dough into a tight log. Squeeze the seams closed so none of those tasty fillings escape during baking.
Grab a sharp knife and cut the log into bite-sized rounds. Nestle these little flavor bombs into a greased baking dish, giving them just enough space to breathe.
Slide the dish into the oven and let the pizza rolls transform for 15-20 minutes. Watch for that gorgeous golden-brown color and bubbling cheese that screams “eat me!”
Pull out your crispy, cheesy creation and let them cool briefly. Serve with extra pizza sauce for dipping and get ready for a taste explosion!
Flavor Fillings for Pepperoni Pizza Rolls
Serve Pepperoni Pizza Rolls as a Fun Appetizer
Best Way to Keep Pepperoni Pizza Rolls Warm
FAQs
Yes, homemade pizza dough works perfectly. Just ensure it’s rolled out thinly and evenly for the best results.
You can prepare the rolls and refrigerate them before baking. When ready to serve, bake them directly from the refrigerator, adding a few extra minutes to the cooking time.
Thin-sliced pepperoni is ideal as it distributes more evenly and cooks more consistently throughout the rolls. Regular or turkey pepperoni both work well.
Absolutely! After slicing, you can freeze the unbaked rolls on a baking sheet, then transfer to a freezer bag. When ready to eat, bake directly from frozen, adding 5-7 minutes to the cooking time.
Print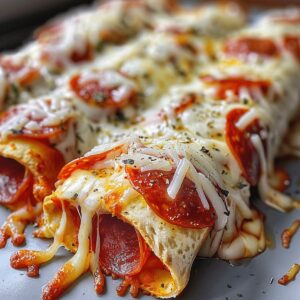
Crispy Pepperoni Pizza Rolls Recipe
- Total Time: 33 minutes
- Yield: 9 1x
Description
Pepperoni pizza rolls combine classic Italian flavors with convenient snack-sized portions. Crispy pastry wraps around spicy pepperoni and melted cheese, creating a perfect handheld treat for casual gatherings and quick meals you can enjoy anytime.
Ingredients
- 1 tube (13.8 oz / 391 g) refrigerated or homemade pizza dough
- 1.5 cups shredded mozzarella cheese
- 0.5 cup sliced pepperoni
- 0.5 cup pizza sauce
- 0.25 cup grated Parmesan cheese
- 1 tsp Italian seasoning
- 0.25 tsp garlic powder
- 2 tbsps unsalted butter, melted
- Additional pizza sauce for dipping
Instructions
- Oven Preparation: Ignite the oven to 375F (190C), establishing an optimal baking environment for crispy, savory rolls.
- Dough Transformation: Stretch pizza dough across a baking surface, creating a thin, uniform canvas for layering ingredients.
- Sauce Foundation: Spread pizza sauce evenly, leaving a narrow perimeter to prevent overflow during baking.
- Protein Layer: Arrange pepperoni slices in a strategic grid, covering the sauced surface with overlapping spicy medallions.
- Cheese Coverage: Blanket the pepperoni with mozzarella, ensuring complete ingredient integration and melty potential.
- Flavor Enhancement: Dust the surface with Italian seasoning and garlic powder to elevate the taste profile.
- Rolling Technique: Tightly compress the dough from one edge to another, encapsulating pepperoni and cheese in a compact log.
- Seam Securing: Pinch the dough’s edges to seal the internal ingredients, preventing escape during baking.
- Portioning: Slice the rolled dough into precise 1-inch segments, creating uniform bite-sized pizza rolls.
- Baking Arrangement: Place rolls in a greased dish with minimal spacing, brushing tops with olive oil for a golden sheen.
- Final Baking: Cook for 15-20 minutes until rolls achieve a burnished exterior with bubbling, molten cheese.
- Serving Preparation: Rest rolls briefly after removing from oven, then present with complementary pizza sauce for dipping.
Notes
Prevent Soggy Rolls: Pat pepperoni slices with paper towels to remove excess oil, ensuring a crisp texture and preventing moisture from making the dough soggy.
Control Cheese Leakage: Use shredded mozzarella sparingly and avoid overfilling to minimize cheese escaping during baking, maintaining neat, compact rolls.
Maximize Flavor Depth: Experiment with mixed cheeses like provolone or adding red pepper flakes for a personalized spice kick that elevates the basic recipe.
Dietary Adaptation: Substitute regular dough with gluten-free alternatives and use turkey pepperoni for a lighter version that accommodates various nutritional needs.
- Prep Time: 15 minutes
- Cook Time: 18 minutes
- Category: Snacks, Appetizer, Lunch
- Method: Baking
- Cuisine: Italian
Nutrition
- Serving Size: 9
- Calories: 250
- Sugar: 2 g
- Sodium: 600 mg
- Fat: 12 g
- Saturated Fat: 7 g
- Unsaturated Fat: 3 g
- Trans Fat: 0 g
- Carbohydrates: 30 g
- Fiber: 1 g
- Protein: 10 g
- Cholesterol: 30 mg
John Nicholson
Lead Writer & Recipe Developer
Expertise
Recipe Testing and Development, Kitchen Hacks and Time-Saving Tips, Flavor Pairing and Ingredient Selection, Engaging Food Writing and Storytelling
Education
Johnson & Wales University
John Nicholson honed his skills at Johnson & Wales University, learning how to use fresh, local ingredients and down-to-earth techniques to make cooking simple and satisfying.
His recipes blend Southern comfort flavors with a modern touch, inviting everyone to cook with ease and confidence.
Living in Charleston, John takes cues from the city’s lively food scene, local markets, and seasonal produce. He’s all about making meals stress-free through easy tips, flavor pairings, and fun experiments in the kitchen