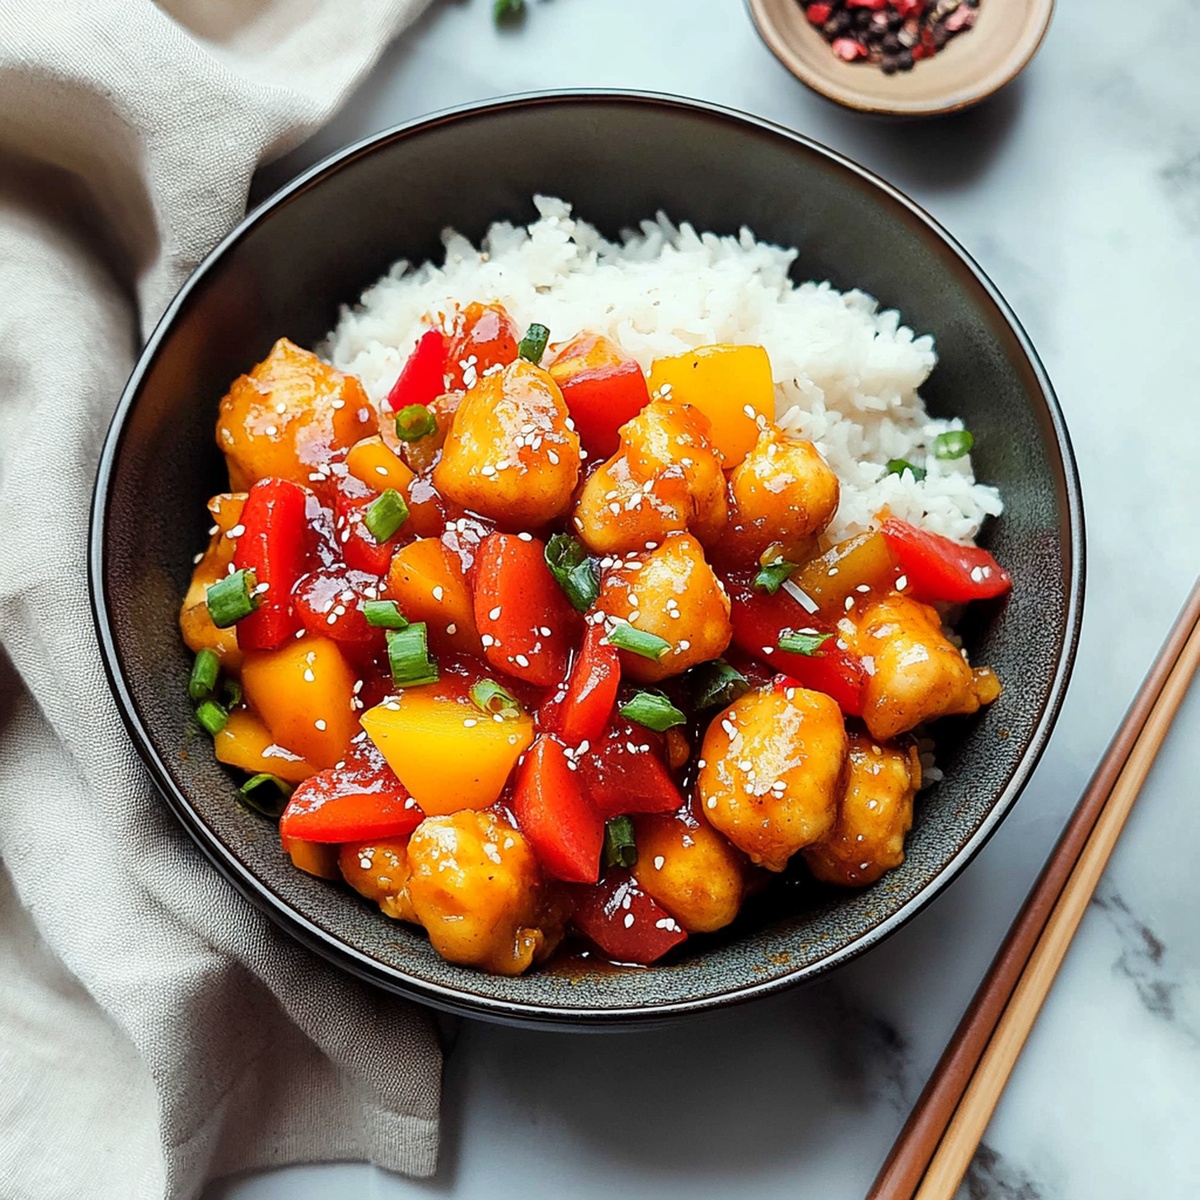
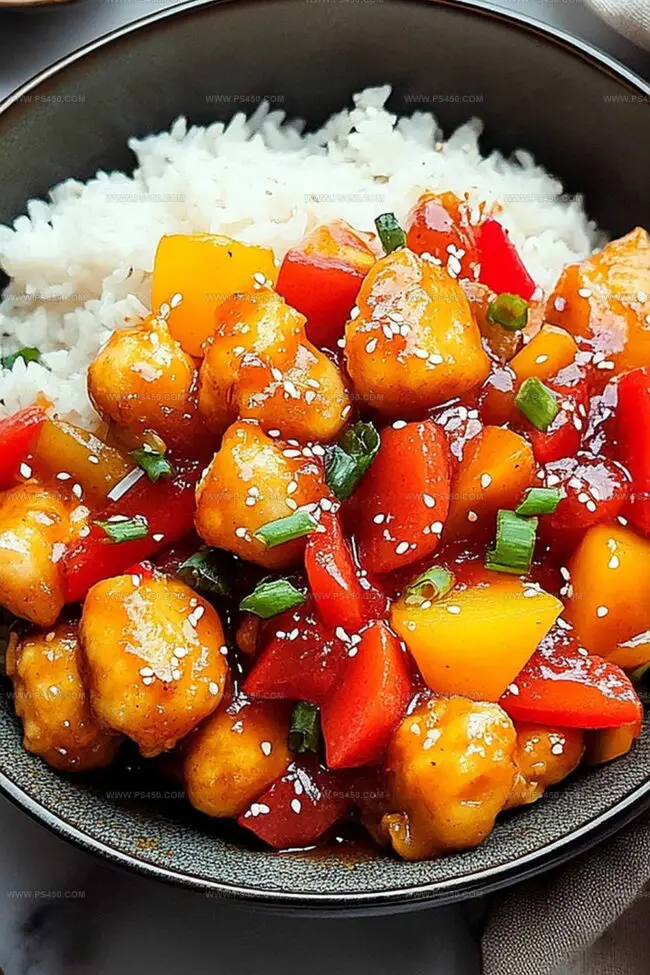
Sweet and Sour Chicken Recipe That Brings the Flavor
Crispy golden chicken pieces dancing in a tangy sweet and sour sauce never fail to make taste buds sing with joy.
Vibrant colors and bold flavors come together in this irresistible sweet and sour chicken recipe that promises restaurant-quality deliciousness right in your kitchen.
Each bite offers a perfect balance of crunch and zesty sauce that will have everyone at the table asking for seconds.
The magic happens when tender chicken meets a glossy, bright coating that sparkles with sweet and sour notes.
This classic dish brings excitement to your dinner routine with its simple yet impressive preparation.
You’ll love how quickly these crispy morsels come together, transforming an ordinary meal into something extraordinary.
Gather your ingredients and get ready to create a meal that celebrates bold, mouth-watering flavors.
Quick Recipe Overview
Sweet and Sour Chicken Ingredients List
For Chicken Preparation:For Sauce Components:For Vegetable and Fruit Additions:Tools To Prep Sweet and Sour Chicken
Step-By-Step Sweet and Sour Chicken Instructions

Sprinkle salt and pepper on chicken pieces. Coat each piece in cornstarch, then dunk in beaten eggs to create a crispy outer layer.
Heat oil in a large skillet until shimmering. Carefully drop chicken pieces into hot oil, cooking until they turn a beautiful golden brown. This should take about 3-4 minutes per side. Transfer to paper towels to drain excess oil.
Combine all sauce ingredients in a bowl, whisking until smooth and well-blended. The mixture should look glossy and have a vibrant color.
Toss bell peppers and onions into a clean skillet with a splash of oil. Cook until they soften slightly and start to caramelize. Add pineapple chunks for a burst of sweetness.
Pour the sauce over the vegetables, stirring constantly. Watch as it transforms and thickens before your eyes. Gently add the crispy chicken, coating each piece in the tangy sauce.
Let everything mingle in the pan for a few minutes, ensuring the chicken is heated through and beautifully coated. The sauce should cling to the chicken like a delicious glaze.
Plate over fluffy white rice or alongside your favorite noodles. Grab your chopsticks and dig into this flavor-packed meal that’s sure to impress!
Helpful Tips For Sweet and Sour Chicken
Serve Sweet and Sour Chicken Deliciously
Store & Reheat Sweet and Sour Chicken
Print
Heavenly Sugar Cookies With Cream Cheese Frosting Recipe
- Total Time: 30 minutes
- Yield: 13 1x
Description
Delicate soft sugar cookies with cream cheese frosting offer classic comfort from midwestern kitchens. Sweet layers of nostalgia blend buttery cookie textures with rich, tangy frosting that pulls you back to cherished family gatherings.
Ingredients
- 4 cups powdered sugar
- 8 oz (226 g) cream cheese
- 1 ½ cups granulated sugar
- 2 ½ cups all-purpose flour
- 1 cup unsalted butter (for frosting)
- 1 cup unsalted butter (for cake)
- 2 large eggs
- 1 teaspoon baking powder
- 1 teaspoon vanilla extract (for frosting)
- 2 teaspoons vanilla extract (for cake)
- ½ teaspoon salt
- sprinkles (optional)
- food coloring (optional)
Instructions
- Mix Foundation: Whip butter and sugar until fluffy and pale, blending eggs and vanilla and almond extracts thoroughly to create a smooth base.
- Create Dough: Sift flour, baking powder, and salt, then delicately incorporate into wet ingredients, mixing until just combined to maintain tender cookie texture.
- Chill Preparation: Wrap dough in plastic and refrigerate for one hour to solidify structure and intensify flavor profile.
- Prepare Workspace: Preheat oven to 350F (175C), line baking sheets with parchment paper, and dust work surface with flour. Roll chilled dough to quarter-inch thickness.
- Shape and Bake: Cut desired cookie shapes, positioning them on prepared trays with adequate spacing. Bake 8-10 minutes until edges set but not browned, allowing brief cooling on tray before transferring to wire rack.
- Craft Frosting: Blend cream cheese and butter until silky, gradually introducing powdered sugar to develop creamy consistency. Enhance with vanilla extract and adjust texture with milk, adding optional food coloring for visual interest.
- Finish Cookies: Once completely cooled, lavishly spread frosting across cookies and decorate with sprinkles as desired.
Notes
Chill Dough Thoroughly: Refrigerate for at least 1 hour to prevent spreading and ensure cookies maintain their shape during baking.
Avoid Overmixing: Gently fold dry ingredients to prevent tough, dense cookies by maintaining a light, tender texture.
Perfect Rolling Technique: Roll dough to consistent 1/4-inch thickness for even baking and uniform cookie appearance.
Customize Creatively: Experiment with different extract flavors like lemon or orange to personalize the cookie’s taste profile and add unique character.
- Prep Time: 20 minutes
- Cook Time: 10 minutes
- Category: Desserts, Snacks
- Method: Baking
- Cuisine: American
Nutrition
- Serving Size: 13
- Calories: 265
- Sugar: 30 g
- Sodium: 150 mg
- Fat: 14 g
- Saturated Fat: 8 g
- Unsaturated Fat: 4 g
- Trans Fat: 0 g
- Carbohydrates: 35 g
- Fiber: 0.5 g
- Protein: 2 g
- Cholesterol: 45 mg
John Nicholson
Lead Writer & Recipe Developer
Expertise
Recipe Testing and Development, Kitchen Hacks and Time-Saving Tips, Flavor Pairing and Ingredient Selection, Engaging Food Writing and Storytelling
Education
Johnson & Wales University
John Nicholson honed his skills at Johnson & Wales University, learning how to use fresh, local ingredients and down-to-earth techniques to make cooking simple and satisfying.
His recipes blend Southern comfort flavors with a modern touch, inviting everyone to cook with ease and confidence.
Living in Charleston, John takes cues from the city’s lively food scene, local markets, and seasonal produce. He’s all about making meals stress-free through easy tips, flavor pairings, and fun experiments in the kitchen