
Chex Mix Recipe That Everyone Will Snack On
Snacking just got a whole lot more exciting with this irresistible homemade crunchy Chex mix that packs a serious flavor punch.
Every handful delivers a perfect blend of textures and tastes that dance across your palate.
Crispy cereal pieces mingle with savory seasonings, creating an addictive treat you can’t stop munching.
The mix combines classic ingredients with a twist that makes it stand out from store-bought versions.
Salty, spicy, and utterly delectable, this recipe transforms simple pantry staples into a crowd-pleasing snack.
Prepare to impress everyone from game-day guests to late-night snackers with this foolproof crowd-pleaser that comes together in no time.
Grab a bowl and get ready to experience snack nirvana.
Quick Recipe Overview
Chex Mix Ingredient Essentials
For Crunchy Base:For Seasoning Blend:For Optional Customization:Equipment for Making Homemade Chex Snack Mix
How to Assemble Your Own Chex Mix Blend
Crank your oven to a cozy 250F, getting ready for some serious snack.
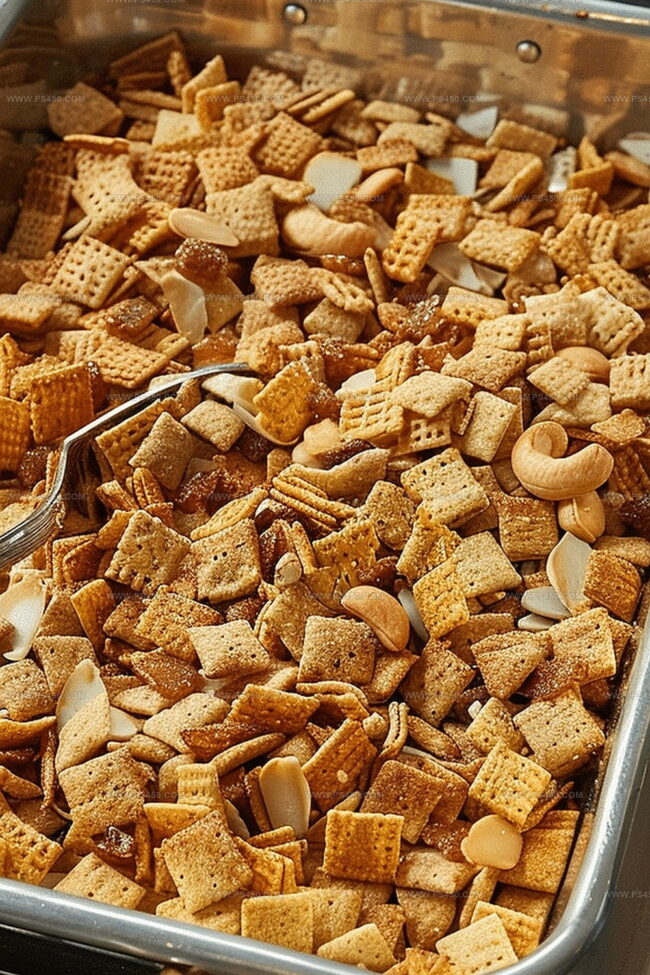
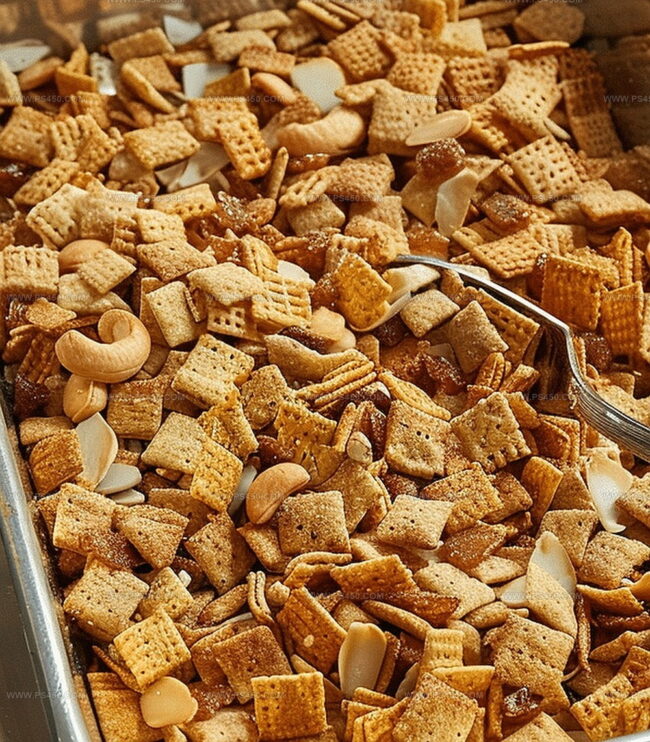
Toss your cereal and crunchy friends into a massive mixing bowl, creating a delicious base that’ll make taste buds dance.
Melt butter and blend it with zesty Worcestershire sauce, sprinkle in garlic and onion powders, and season with a dash of salt – your flavor weapon is ready.
Drizzle your flavor potion over the crunchy mixture, gently folding everything until each morsel is perfectly coated with deliciousness.
Spread your mixture across a baking sheet in an even layer, then slide into the oven. Every 15 minutes, give it a gentle stir to ensure every bite gets golden and crisp.
Let your snack masterpiece cool completely, then dive into a crunchy, savory adventure that’ll keep for weeks in an airtight container.
Chex Mix Flavor Adjustments That Pop
Serve Chex Mix for Snacks or Parties
Storing Your Homemade Chex Mix Crisp
FAQs
Yes, you can mix and match Rice, Corn, and Wheat Chex based on your preference or what’s available.
Use gluten-free Chex cereal and replace regular pretzels with gluten-free pretzels to make the entire mix gluten-free.
Add a pinch of cayenne pepper or red pepper flakes to the seasoned butter mixture for an extra kick of heat.
Absolutely! Kids can help measure ingredients, mix dry cereals, and stir the seasoned butter, making it a fun family cooking activity.
Print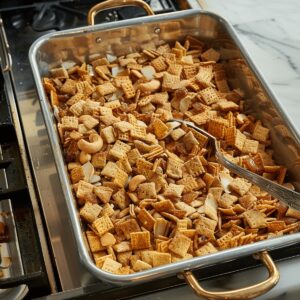
Crunchy Chex Mix Recipe
- Total Time: 1 hour 10 minutes
- Yield: 13 1x
Description
Classic chex mix delivers a crunchy snack perfect for gatherings. Savory seasonings and crisp cereals combine with nuts and pretzels for an irresistible treat you’ll devour quickly.
Ingredients
- 1 cup mixed nuts (or peanuts, almonds, or cashews) (150 grams, 5.29 oz)
- 1 cup bagel chips or rye chips, broken into bite-sized pieces (30 grams, 1.06 oz)
- 1 cup pretzels (30 grams, 1.06 oz)
- 3 cups wheat chex cereal (90 grams, 3.17 oz)
- 3 cups corn chex cereal (90 grams, 3.17 oz)
- 3 cups rice chex cereal (90 grams, 3.17 oz)
- 6 tbsps unsalted butter, melted (85 grams, 3 oz)
- 2 tbsps Worcestershire sauce
- 1 ½ tsps seasoned salt
- ¾ tsp garlic powder
- ½ tsp onion powder
Instructions
- Prep Station: Position oven rack in center and preheat to 250F (120C), ensuring even roasting temperature.
- Ingredient Assembly: Combine Rice Chex, Corn Chex, Wheat Chex, pretzels, bagel chips, and mixed nuts in a large mixing bowl, creating a diverse crunchy foundation.
- Seasoning Fusion: Whisk melted butter with Worcestershire sauce, seasoned salt, garlic powder, and onion powder until smooth, generating a robust flavor profile.
- Coating Technique: Gently pour seasoning over dry ingredients, folding carefully to ensure uniform coverage without crushing delicate cereal components.
- Roasting Process: Spread mixture evenly on baking sheet, creating a single-layer landscape for consistent toasting and achieving optimal crispness.
- Transformation Stage: Roast in oven for approximately one hour, stirring every 15 minutes to promote golden-brown coloration and maintain balanced crunchiness.
- Cooling and Preservation: Remove from oven, allow complete cooling at room temperature, then transfer to airtight container where snack will retain its crisp texture for up to two weeks.
Notes
- Prevent Burning: Stir the mix every 15 minutes during roasting to ensure even golden-brown coloration and prevent any pieces from over-browning or becoming bitter.
- Customize Seasonings: Experiment with different spice blends like ranch, BBQ, or spicy cayenne to create unique flavor profiles that match your taste preferences.
- Control Moisture: Use a paper towel to blot excess butter before baking to achieve maximum crispness and prevent soggy texture.
- Storage Strategy: Store in a completely airtight container at room temperature to maintain crunchiness and preserve flavor for up to two weeks.
- Prep Time: 10 minutes
- Cook Time: 1 hour
- Category: Snacks
- Method: Baking
- Cuisine: American
Nutrition
- Serving Size: 13
- Calories: 190
- Sugar: 1 g
- Sodium: 290 mg
- Fat: 9 g
- Saturated Fat: 2 g
- Unsaturated Fat: 7 g
- Trans Fat: 0 g
- Carbohydrates: 24 g
- Fiber: 2 g
- Protein: 4 g
- Cholesterol: 10 mg
John Nicholson
Lead Writer & Recipe Developer
Expertise
Recipe Testing and Development, Kitchen Hacks and Time-Saving Tips, Flavor Pairing and Ingredient Selection, Engaging Food Writing and Storytelling
Education
Johnson & Wales University
John Nicholson honed his skills at Johnson & Wales University, learning how to use fresh, local ingredients and down-to-earth techniques to make cooking simple and satisfying.
His recipes blend Southern comfort flavors with a modern touch, inviting everyone to cook with ease and confidence.
Living in Charleston, John takes cues from the city’s lively food scene, local markets, and seasonal produce. He’s all about making meals stress-free through easy tips, flavor pairings, and fun experiments in the kitchen