
Snackable Joy: Kid-Friendly No-Bake Clusters Recipe
Chocolate and peanut butter create magic when blended into irresistible no-bake clusters that children absolutely adore.
Sweet treats often spark joy in every household kitchen.
These simple clusters combine creamy textures with rich flavors kids crave.
No complicated cooking techniques stand between you and this delectable snack.
Parents love how quickly these clusters come together with minimal ingredients.
The recipe demands just a few pantry staples and minimal effort.
Prepare to delight young taste buds with these quick and scrumptious clusters that promise smiles and satisfied hunger.
Quick Recipe Overview
Kid-Friendly No-Bake Cluster Ingredients You’ll Love
For Base And Crunch:For Sweet Binding:For Extra Texture And Sweetness:Tools That Make No-Bake Clusters Fast and Fun
How to Mix and Shape Kid-Friendly No-Bake Clusters
Grab your favorite chocolate chips and peanut butter – we’re about to make somethingal happen in the kitchen!
Zap your chocolate chips in the microwave, stirring every 30 seconds until they’re super smooth. Swirl in the peanut butter until they become best friends.
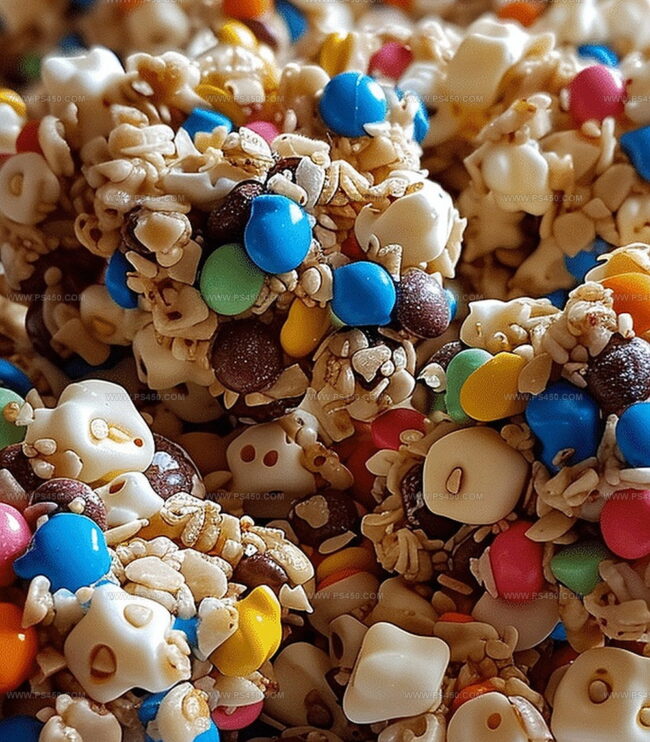
Dump your crispy cereal, fluffy marshmallows, and crunchy pretzels into a big bowl. Pour the chocolate mixture over them and gently stir until everything gets a delicious chocolate hug.
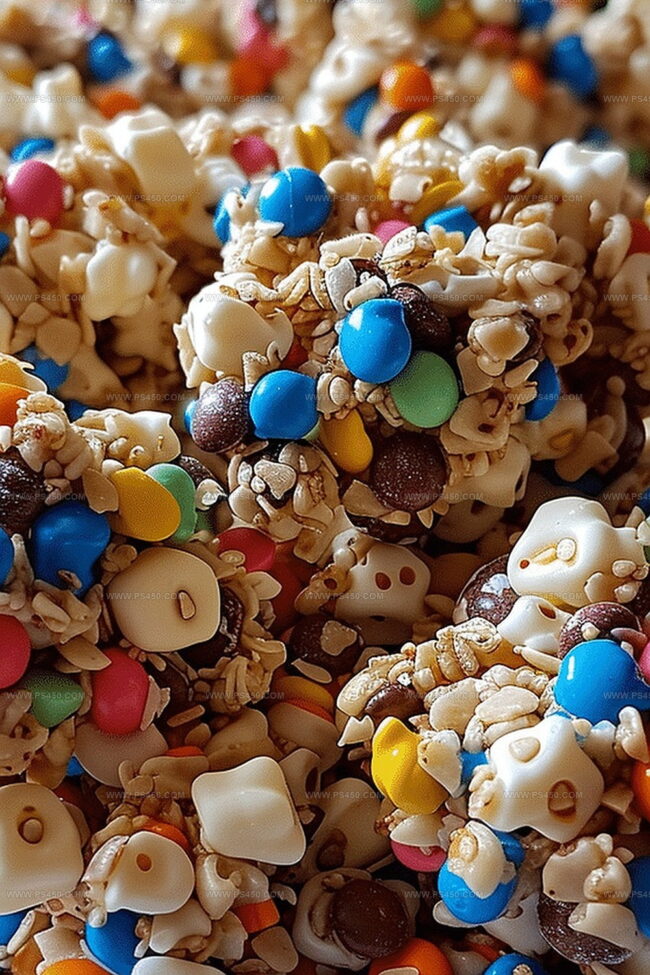
Spread some parchment paper on a baking sheet. Scoop out spoonfuls of your chocolatey mixture, making little mountain-like clusters that look totally irresistible.
Pop your clusters in the fridge for about 25 minutes until they’re firm and ready to munch. Store them in a container and get ready for a snack attack!
Add-Ins to Make No-Bake Clusters Extra Special
Serve Kid-Friendly Clusters at Lunches or Parties
How to Store Kid-Friendly Clusters So They Stay Yummy
FAQs
If your child has a nut allergy, skip the peanut butter or replace it with sunflower seed butter. Always check ingredient labels and consult with a pediatrician about potential allergens.
Absolutely! You can swap the cereal with similar crunchy options like rice crispy cereal, corn flakes, or cheerios. Just ensure the cereal is similar in size and texture for best results.
Use dark chocolate instead of milk chocolate, choose whole grain cereals, and add some dried fruit like raisins or chopped nuts for extra nutrition. You can also reduce the amount of chocolate to cut down on sugar.
No special equipment is needed! Just a microwave-safe bowl, a large mixing bowl, a spoon, and a baking sheet with parchment paper. A cookie scoop is helpful but not essential for shaping the clusters.
Print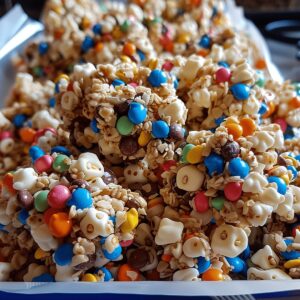
Delightful Kid-Friendly No-Bake Clusters Recipe
- Total Time: 40 minutes
- Yield: 13 1x
Description
Mexican chocolate no-bake clusters offer a delightful blend of rich cocoa and cinnamon. Sweet morsels combine crisp rice, melted chocolate, and warm spices for a quick family treat.
Ingredients
- 2 cups (340 g) semi-sweet or milk chocolate chips
- ½ cup (128 g) creamy peanut butter (optional, can substitute with sunflower butter)
- 2 cups (50 g) crispy rice or cornflake cereal
- ½ cup (60 g) chopped pretzels or nuts (optional)
- 1 cup (50 g) mini marshmallows
Instructions
- Melt Chocolate: Utilize a microwave-safe bowl to gently liquefy chocolate chips, stirring intermittently to achieve a silky, uniform texture without scorching.
- Create Binding Mixture: Integrate peanut butter into the molten chocolate, whisking until the combination transforms into a lustrous, homogeneous blend.
- Construct Base Layer: In a capacious mixing vessel, amalgamate cereal, mini marshmallows, and pretzels, establishing a crisp foundational mixture.
- Combine and Coat: Cascade the chocolate-peanut butter elixir over the dry ingredients, meticulously folding with a spatula to ensure comprehensive and even coverage.
- Prepare Workspace: Line a baking sheet with parchment paper, creating an optimal surface for cluster formation and preventing unwanted adhesion.
- Shape Clusters: Employ a cookie scoop or spoon to methodically portion and deposit the mixture, crafting consistent, symmetrical morsels.
- Set and Solidify: Relocate the baking sheet to the refrigerator, allowing clusters to firm up and stabilize for approximately 25 minutes.
- Serve and Store: Extract clusters from the refrigerator, serving immediately or preserving in an airtight container at room temperature for a softer consistency, or chilled for enhanced crunch.
Notes
- Choose Quality Chocolate: Select high-quality chocolate chips that melt smoothly and provide rich flavor, avoiding low-grade varieties that might separate or become grainy.
- Watch Chocolate Melting: Microwave chocolate in 15-second intervals, stirring carefully to prevent burning and ensure a glossy, even texture throughout the mixture.
- Customize Mix-Ins: Swap pretzels or marshmallows with alternatives like crushed graham crackers, dried fruit, or nuts to create personalized flavor combinations and accommodate dietary preferences.
- Temperature Control: Chill clusters precisely 20-25 minutes for optimal texture – too short leaves them soft, while over-chilling can make them too hard and less enjoyable for kids.
- Prep Time: 10 minutes
- Cook Time: 30 minutes
- Category: Snacks, Desserts
- Method: Blending
- Cuisine: American
Nutrition
- Serving Size: 13
- Calories: 132
- Sugar: 9 g
- Sodium: 60 mg
- Fat: 7 g
- Saturated Fat: 3.5 g
- Unsaturated Fat: 3.5 g
- Trans Fat: 0 g
- Carbohydrates: 15 g
- Fiber: 0.5 g
- Protein: 2 g
- Cholesterol: 0 mg
John Nicholson
Lead Writer & Recipe Developer
Expertise
Recipe Testing and Development, Kitchen Hacks and Time-Saving Tips, Flavor Pairing and Ingredient Selection, Engaging Food Writing and Storytelling
Education
Johnson & Wales University
John Nicholson honed his skills at Johnson & Wales University, learning how to use fresh, local ingredients and down-to-earth techniques to make cooking simple and satisfying.
His recipes blend Southern comfort flavors with a modern touch, inviting everyone to cook with ease and confidence.
Living in Charleston, John takes cues from the city’s lively food scene, local markets, and seasonal produce. He’s all about making meals stress-free through easy tips, flavor pairings, and fun experiments in the kitchen