
No-Bake Funfetti Oreo Icebox Cake Recipe with Creamy Layers
Sweet layers of creamy delight dance with a funfetti oreo icebox cake magic that promises pure dessert bliss.
Childhood memories swirl through each decadent bite, creating a nostalgic treat that sparks joy.
No baking required means this dessert comes together effortlessly for anyone craving something cool and indulgent.
Oreo cookies provide a perfect crumbly base that melts into silky cream layers.
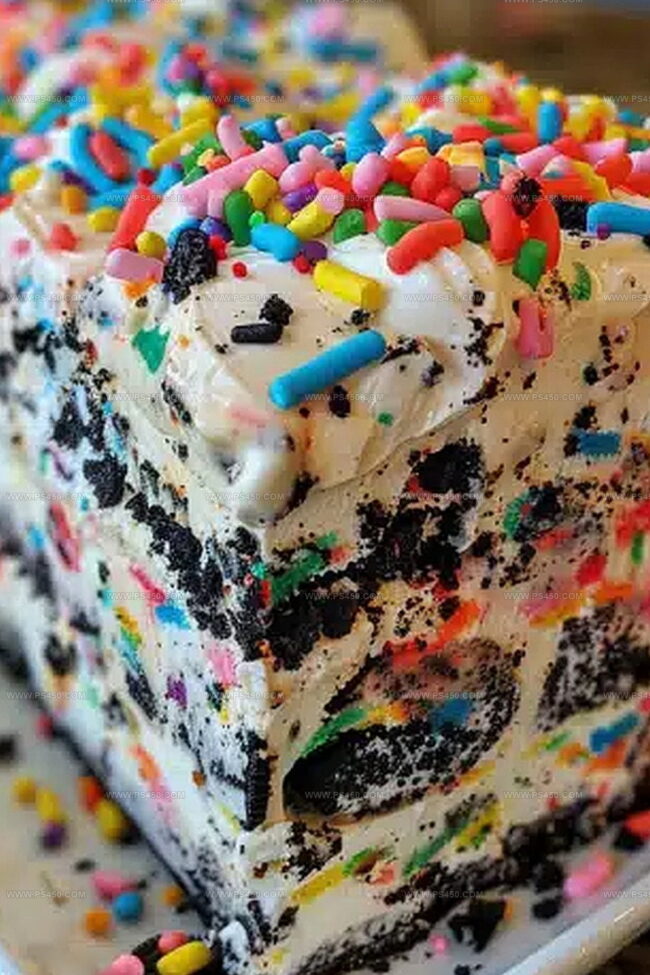
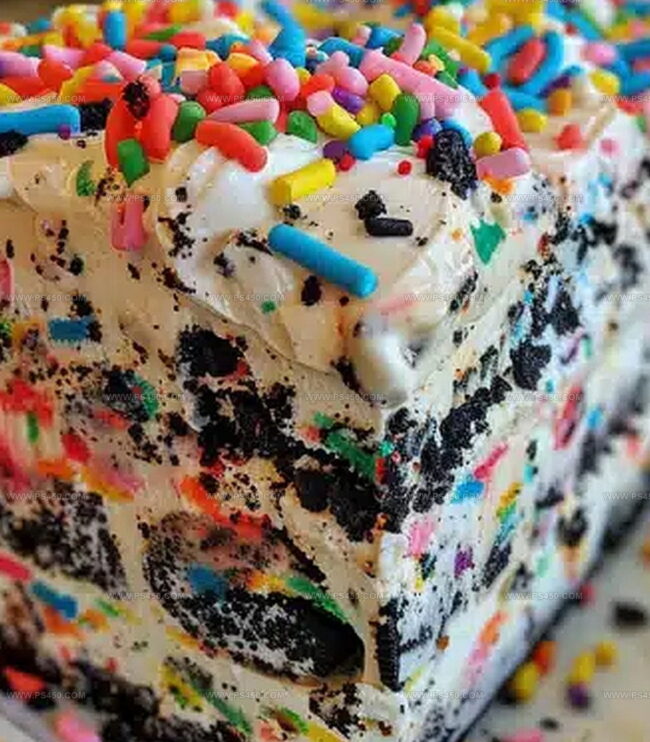
Colorful sprinkles add whimsy and excitement to every single serving.
Chilled and refreshing, this icebox cake delivers a simple yet spectacular dessert experience.
Whip up this crowd-pleasing treat and watch smiles spread across everyone’s faces.
Quick Recipe Overview
Funfetti Oreo Icebox Cake Ingredient List
For Whipped Cream and Binding Base:For Cookie Layer:For Decorative Elements:Kitchen Tools to Layer and Chill This Cake
Steps to Make No-Bake Funfetti Oreo Cake
Create a fluffy cloud of whipped cream by blending heavy cream with sweet powdered sugar and a splash of vanilla. Gently fold in the colorful cake mix until you have a dreamy, sprinkle-filled mixture that’s smooth and irresistible.
Spread a generous dollop of the creamy mixture across the bottom of your dish. Arrange Golden Oreos in a tempting single layer, then lavish them with more of the sprinkle-packed cream. Scatter a handful of colorful sprinkles between each layer for extra fun.
Keep building your masterpiece by alternating Oreos and creamy layers. Make sure to end with a spectacular topping of whipped cream and a burst of sprinkles that’ll make everyone’s eyes light up.
Wrap your creation in plastic and tuck it into the refrigerator. Let it rest and mingle for at least 4 hours or overnight. This is when the cookies get deliciously soft and the flavors blend into pure happiness.
Slice into your chilled dessert and watch as everyone’s faces light up. Each bite is a celebration of creamy, crunchy, sprinkle-filled joy that’ll have everyone asking for seconds.
Variations That Add Extra Crunch or Flavor
How to Present This Cake for Birthdays or Events
Storage Tips for Icebox Cake to Stay Perfect
FAQs
Yes, you can substitute regular chocolate Oreos for Golden Oreos. The flavor will be slightly different but still delicious.
Absolutely! Kids love the colorful sprinkles and sweet taste of this no-bake dessert. It’s a fun treat that’s easy to make and enjoyable for all ages.
Soft peaks are formed when you lift the whisk and the cream forms a peak that gently falls over. It should look fluffy but not stiff or too runny.
Yes, this icebox cake is perfect for making in advance. You can prepare it up to 2 days before serving, and it will actually taste better as the cookies soften in the whipped cream.
Print
Dreamy Funfetti Oreo Icebox Cake
- Total Time: 4 hours 15 minutes
- Yield: 9 1x
Description
Creamy No-Bake Funfetti Oreo Icebox Cake blends childhood nostalgia with playful dessert magic. Colorful sprinkles and chocolate cookies create a delightful treat you’ll enjoy chilling and sharing with friends.
Ingredients
- 1 package (14.3 oz/406 g) Golden Oreos (or Birthday Cake Oreos)
- 2 cups (480 ml) heavy whipping cream
- 1 ½ cups (180 g) Funfetti cake mix, dry (do not prepare as a batter)
- ½ cup (60 g) powdered sugar
- 1 tsp vanilla extract
- ¼ cup (40 g) sprinkles (plus extra for garnish)
Instructions
- Whip Cream: Vigorously whip heavy cream with powdered sugar and vanilla extract until soft, billowy peaks form, creating a luxurious base for the dessert.
- Funfetti Fusion: Gently fold dry Funfetti cake mix into the whipped cream, creating a speckled, creamy mixture that adds vibrant character to the dessert.
- Layer Foundation: Spread a delicate layer of Funfetti cream across the bottom of a rectangular dish, establishing the first stratum of the icebox cake.
- Oreo Arrangement: Systematically place Golden Oreos in a single, precise layer over the cream base, ensuring complete coverage and a uniform texture.
- Cream and Sprinkle: Drape a generous layer of Funfetti cream over the Oreos, meticulously sprinkling colorful confetti sprinkles to enhance visual and textural appeal.
- Repeat Layering: Continue alternating between Oreo layers and Funfetti cream, building height and complexity with each successive tier, creating a stunning architectural dessert.
- Final Flourish: Crown the dessert with a lavish spread of remaining Funfetti cream, generously adorning the top with an abundant cascade of vibrant sprinkles.
- Chill and Set: Wrap the assembled dessert securely in plastic wrap, allowing it to rest and meld in the refrigerator for a minimum of four hours or preferably overnight.
- Serve and Enjoy: Carefully slice the chilled icebox cake to reveal its stunning stratified interior, presenting cold for maximum textural enjoyment and visual delight.
Notes
- Whip Cream Carefully: Avoid over-beating heavy cream to prevent butter-like texture; stop when soft peaks form for perfect fluffy consistency.
- Balance Sprinkle Distribution: Spread confetti sprinkles evenly between layers to ensure colorful visual appeal and consistent flavor throughout the dessert.
- Chill Thoroughly: Allow minimum 4-hour refrigeration time, but overnight chilling helps cookies soften and flavors meld more effectively.
- Customize Diet Options: Substitute Golden Oreos with gluten-free cookies for celiac-friendly version; use dairy-free whipped cream alternative for vegan adaptation.
- Prep Time: 15 minutes
- Cook Time: 4 hours (or overnight)
- Category: Desserts, Snacks
- Method: None
- Cuisine: American
Nutrition
- Serving Size: 9
- Calories: 384
- Sugar: 25 g
- Sodium: 133 mg
- Fat: 24 g
- Saturated Fat: 14 g
- Unsaturated Fat: 10 g
- Trans Fat: 0 g
- Carbohydrates: 41 g
- Fiber: 0 g
- Protein: 3 g
- Cholesterol: 76 mg
John Nicholson
Lead Writer & Recipe Developer
Expertise
Recipe Testing and Development, Kitchen Hacks and Time-Saving Tips, Flavor Pairing and Ingredient Selection, Engaging Food Writing and Storytelling
Education
Johnson & Wales University
John Nicholson honed his skills at Johnson & Wales University, learning how to use fresh, local ingredients and down-to-earth techniques to make cooking simple and satisfying.
His recipes blend Southern comfort flavors with a modern touch, inviting everyone to cook with ease and confidence.
Living in Charleston, John takes cues from the city’s lively food scene, local markets, and seasonal produce. He’s all about making meals stress-free through easy tips, flavor pairings, and fun experiments in the kitchen