Oreo Pudding Cups Recipe That’s Creamy and Crowd-Friendly
Dessert enthusiasts adore this classic oreo cookie pudding cups that blend nostalgic flavors with creamy indulgence.
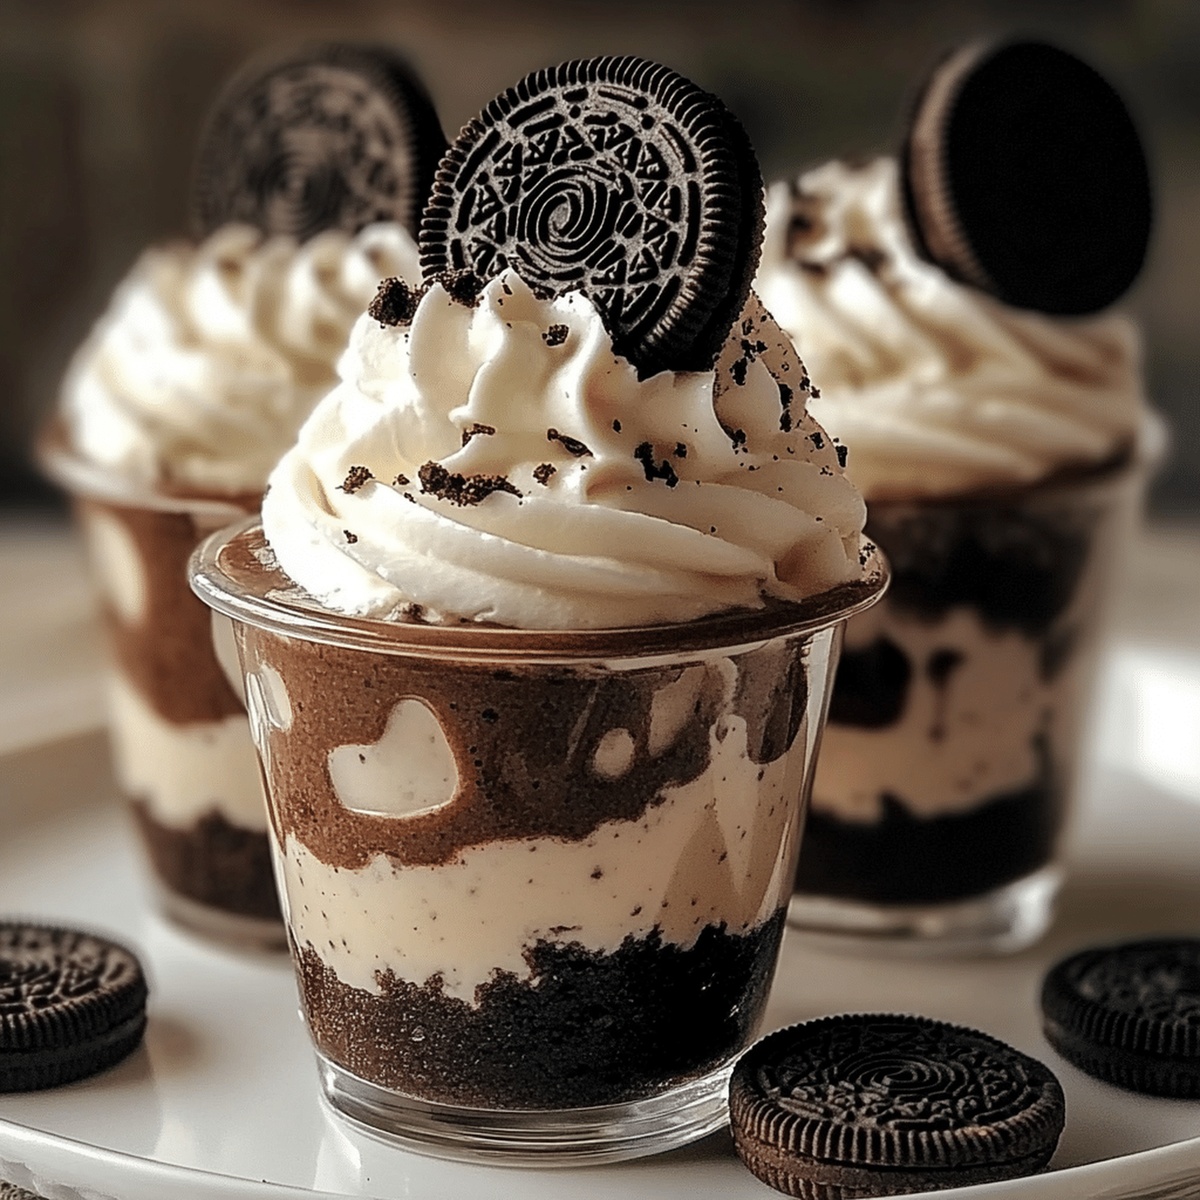
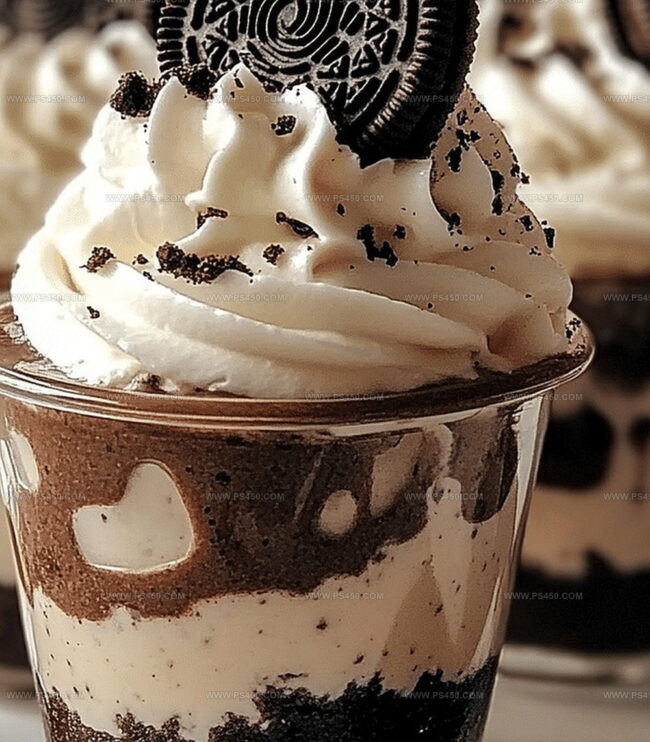
Layers of rich chocolate pudding and crushed cookies create a delightful texture that melts in your mouth.
Each spoonful promises a delectable journey through sweet, velvety goodness.
The recipe combines simple ingredients with minimal effort to produce an irresistible treat.
Smooth pudding mingles with crunchy cookie crumbs, offering a perfect balance of softness and crunch.
Cool and refreshing, these pudding cups serve as an ideal summer dessert or quick sweet fix.
Dive into this delicious creation and let your taste buds celebrate pure dessert bliss.
Quick Recipe Overview

What You’ll Mix Into Oreo Cookie Pudding Cups
For Base Layer:For Creamy Layers:For Garnish:Tools for Crafting Oreo Pudding Layers
Build Your Oreo Cookie Pudding Cups in Steps
Create Oreo Cookie Crumble Base
Smash Oreo cookies into fine crumbs using a food processor or by placing them in a sealed bag and rolling with a rolling pin until perfectly crumbly.
Mix chocolate pudding with cold milk, whisking vigorously until the mixture transforms into a silky, thick chocolate dream that will make your taste buds dance.
Beat softened cream cheese with powdered sugar until super smooth, then gently fold in whipped topping to create a cloud-like, decadent filling.
Start by sprinkling a generous layer of Oreo crumbs at the bottom of each serving cup. Carefully spread the cream cheese mixture over the crumbs, then top with a luscious layer of chocolate pudding. Repeat layers if your cup has space.
Crown each pudding cup with a fluffy dollop of whipped topping. Sprinkle extra Oreo crumbs on top or perch a mini Oreo as the perfect finishing touch.
Refrigerate the pudding cups for at least an hour, allowing the flavors to mingle and intensify. Serve cold and watch everyone swoon with delight.
Tips for the Creamiest Oreo Cookie Dessert
Serve These Pudding Cups Chilled or Dressed Up
Storage Tips for Keeping Oreo Cookie Pudding Cups Fresh
FAQs
Absolutely! These pudding cups are super fun for children to both make and eat. Kids love the chocolatey layers and crunchy Oreo crumbs, making it a perfect dessert for family gatherings or children’s parties.
Yes, these pudding cups are great for preparing in advance. You can assemble them up to 24 hours before serving and keep them refrigerated. This makes them perfect for meal prep or entertaining guests.
Not really. You’ll just need a food processor or rolling pin to crush the Oreos, mixing bowls, and individual serving cups or glasses. A piping bag can help create neat layers, but it’s optional.
Try using clear glass cups to show off the beautiful layers. You can also add extra garnishes like chocolate shavings, a drizzle of chocolate sauce, or a sprinkle of crushed Oreos on top to make them look more elegant and festive.
Print
Dreamy Oreo Cookie Pudding Cups Recipe
- Total Time: 1 hour 15 minutes
- Yield: 7 1x
Description
Delightful Oreo Cookie Pudding Cups bring chocolate cookie crumbles and creamy pudding together in a simple dessert. Cool layers of smooth pudding and crushed cookies create a classic treat you will devour with pure satisfaction.
Ingredients
- 20 Oreo cookies
- 1 box (3.9 oz / 110 g) instant chocolate pudding mix
- 2 cups (480 ml) cold milk
- 4 oz (113 g) cream cheese, softened
- 1 cup (240 ml) whipped topping (such as Cool Whip)
- ½ cup (60 g) powdered sugar
- Extra Oreo cookies for garnish
- Optional toppings: mini Oreos, chocolate shavings, or crushed Oreos
Instructions
- Crumb Creation: Pulverize Oreo cookies into fine granules using a food processor or by sealing in a bag and crushing with a rolling pin, creating a delicate cookie base.
- Pudding Preparation: Whisk pudding mix with cold milk until the mixture transforms into a thick, silky chocolate emulsion with a glossy, uniform texture.
- Cream Cheese Fusion: Blend softened cream cheese with powdered sugar until smooth, then fold in whipped topping to achieve a light, airy cream cheese mixture.
- Layer Assembly: In clear serving glasses, establish a foundational layer of Oreo crumbs, providing a crunchy textural element to the dessert.
- Creamy Stratification: Spread the cream cheese mixture evenly over the cookie crumbs, ensuring complete coverage and a luxurious smooth surface.
- Chocolate Infusion: Cascade the rich chocolate pudding over the cream cheese layer, creating a tantalizing contrast of flavors and textures.
- Decorative Finishing: Top each pudding cup with a billowing swirl of whipped topping, then embellish with additional crushed Oreos or a whole mini Oreo for visual appeal.
- Chilling Sequence: Refrigerate the assembled desserts for at least one hour, allowing the layers to set and the flavors to harmonize into a perfectly chilled, indulgent treat.
Notes
- Crush Oreos Precisely: Use a food processor or sealed bag method for consistent, fine crumbs that create a uniform base texture.
- Whisk Pudding Carefully: Vigorous whisking prevents lumps and ensures a smooth, creamy chocolate pudding consistency.
- Layer Strategically: Build layers gently to maintain distinct texture boundaries between cookie crumbs, cream cheese, and pudding.
- Chill Thoroughly: Refrigerate for at least one hour to allow flavors to blend and layers to set, enhancing overall taste and texture.
- Prep Time: 15 minutes
- Cook Time: 1 hour
- Category: Desserts, Snacks
- Method: Blending
- Cuisine: American
Nutrition
- Serving Size: 7
- Calories: 360
- Sugar: 24 g
- Sodium: 300 mg
- Fat: 18 g
- Saturated Fat: 9 g
- Unsaturated Fat: 8 g
- Trans Fat: 0 g
- Carbohydrates: 46 g
- Fiber: 1 g
- Protein: 4 g
- Cholesterol: 30 mg
John Nicholson
Lead Writer & Recipe Developer
Expertise
Recipe Testing and Development, Kitchen Hacks and Time-Saving Tips, Flavor Pairing and Ingredient Selection, Engaging Food Writing and Storytelling
Education
Johnson & Wales University
John Nicholson honed his skills at Johnson & Wales University, learning how to use fresh, local ingredients and down-to-earth techniques to make cooking simple and satisfying.
His recipes blend Southern comfort flavors with a modern touch, inviting everyone to cook with ease and confidence.
Living in Charleston, John takes cues from the city’s lively food scene, local markets, and seasonal produce. He’s all about making meals stress-free through easy tips, flavor pairings, and fun experiments in the kitchen