
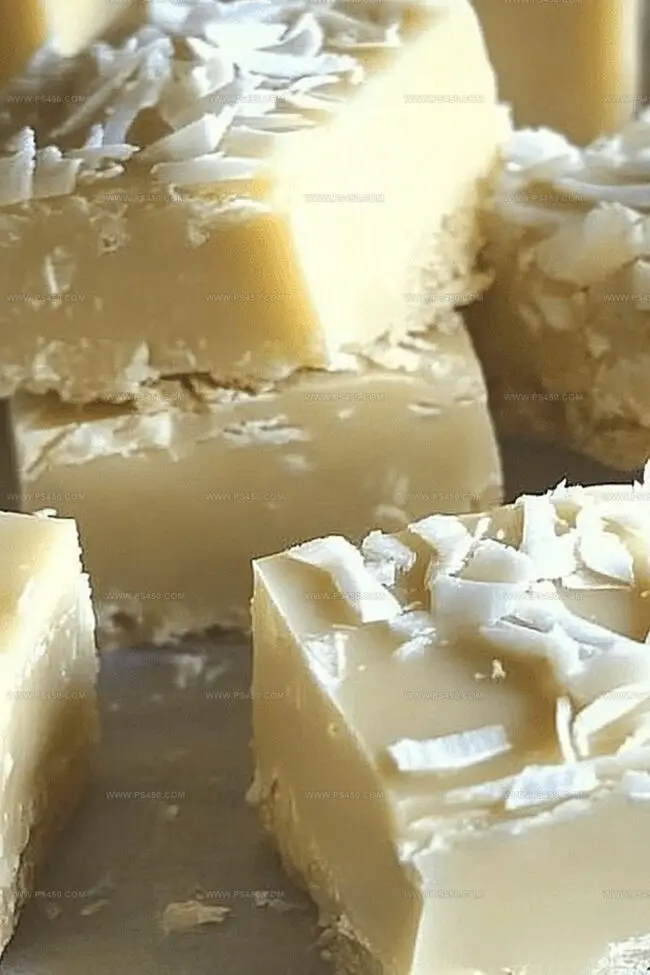
White Chocolate Coconut Fudge Recipe That’s Soft and Sweet
Decadent and creamy white chocolate coconut fudge melts hearts with its irresistible charm.
Sweet memories of tropical vacations dance through each velvety bite.
The rich, silky texture promises pure indulgence for dessert enthusiasts.
Coconut and white chocolate create a luxurious partnership that whispers pure bliss.
Smooth, melt-in-your-mouth pieces invite you to savor every delectable moment.
Crafted with simple ingredients, this fudge transforms an ordinary afternoon into a delightful escape.
Prepare to be swept away by this delectable treat that beckons with its sweet, tropical allure.
Quick Recipe Overview
White Chocolate Coconut Fudge: What You’ll Need
For Base Ingredients:For Flavor Enhancers:For Binding and Texture:Fudge-Making Gear for the Creamiest Coconut Squares
Instructions for Melting and Setting White Chocolate Coconut Fudge

Line an 8-inch square pan with parchment paper, ensuring smooth edges and a light grease to help future removal.
Gently melt white chocolate chips with sweetened condensed milk in a saucepan, stirring constantly over low heat until silky and glossy.
Fold shredded coconut, butter, vanilla extract, and a hint of salt into the melted chocolate mixture, blending until harmoniously combined.
Transfer the luscious mixture into the prepared pan, spreading evenly with a spatula. Chill in the refrigerator for 2 hours until completely set.
Lift the set fudge from the pan using parchment edges, slice into bite-sized squares, and savor the creamy, tropical treat. Store in a sealed container in the refrigerator for lasting freshness.
Pro Tips for Coconut Texture and Sweetness
How to Serve Fudge in Clean, Neat Pieces
Store Coconut Fudge So It Doesn’t Dry Out
FAQs
White chocolate fudge is surprisingly easy to prepare. With just a few ingredients and simple steps, even beginner bakers can successfully create this sweet treat in under 15 minutes.
Yes, you can use unsweetened coconut. However, you might want to add a bit more sweetened condensed milk or a touch of powdered sugar to maintain the desired sweetness level.
When stored in an airtight container in the refrigerator, this fudge can stay fresh for up to 7-10 days. Just make sure to keep it chilled to maintain its texture and prevent melting.
High-quality white chocolate chips or baking bars work best. Look for brands with a higher cocoa butter content for smoother melting and richer flavor. Avoid using white chocolate candy melts as they might not provide the same creamy texture.
Print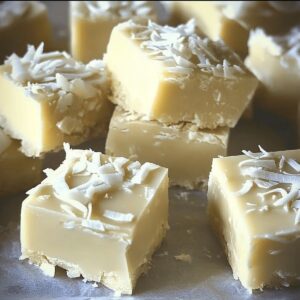
Dreamy White Chocolate Coconut Fudge Recipe
- Total Time: 2 hours 10 minutes
- Yield: 17 1x
Description
Mexican white chocolate coconut fudge blends tropical flavors in a creamy, luxurious dessert. Rich ingredients and simple steps create a melt-in-mouth experience you’ll want to savor again and again.
Ingredients
- 2 cups (473 ml) white chocolate chips
- 1 cup (237 ml) unsweetened shredded coconut
- 1 can (14 oz / 396 g) sweetened condensed milk
- 1 tsp (5 ml) coconut extract
- ¼ tsp (1.25 ml) salt
- Additional shredded coconut (optional)
Instructions
- Preparation: Line a square baking dish with parchment paper, allowing excess to hang over edges. Lightly spray with cooking spray to prevent adhesion.
- Melting: Construct a double boiler method by combining white chocolate chips and sweetened condensed milk in a saucepan. Gently melt over low heat, stirring continuously to achieve a smooth, glossy consistency without burning.
- Blending: Fold shredded coconut, softened butter, vanilla extract, and salt into the molten chocolate mixture. Stir until ingredients harmonize into a luscious, fragrant blend with uniform texture.
- Setting: Pour the velvety fudge into the prepared pan, spreading evenly with a spatula to create a flawless surface. Tap pan lightly to eliminate potential air pockets.
- Chilling: Refrigerate for two hours or until completely solidified, allowing flavors to intensify and texture to become firm and compact.
- Finishing: Extract fudge from pan using parchment paper overhang. Transfer to a cutting board and slice into precise, uniform squares with a clean, sharp knife between each cut.
- Serving: Enjoy immediately or preserve in a sealed container within the refrigerator to maintain optimal quality and taste.
Notes
Manage Chocolate Melting: Keep heat extremely low to prevent burning, stirring constantly for smooth, glossy consistency without seizing or separating.
Control Coconut Distribution: Fold shredded coconut gently to ensure even spread, preventing clumping and maintaining uniform texture throughout the fudge.
Optimize Cooling Technique: Allow fudge to set completely in refrigerator, preferably on a flat surface, to achieve perfect cutting consistency and clean slice edges.
Adapt for Dietary Needs: Substitute sweetened condensed milk with coconut cream for vegan version, use dairy-free white chocolate chips to create allergen-friendly alternative that maintains rich, creamy texture.
- Prep Time: 10 minutes
- Cook Time: 2 hours
- Category: Desserts, Snacks
- Method: Baking
- Cuisine: American
Nutrition
- Serving Size: 17
- Calories: 174
- Sugar: 21 g
- Sodium: 40 mg
- Fat: 8 g
- Saturated Fat: 7 g
- Unsaturated Fat: 1 g
- Trans Fat: 0 g
- Carbohydrates: 23 g
- Fiber: 1 g
- Protein: 2 g
- Cholesterol: 7 mg
John Nicholson
Lead Writer & Recipe Developer
Expertise
Recipe Testing and Development, Kitchen Hacks and Time-Saving Tips, Flavor Pairing and Ingredient Selection, Engaging Food Writing and Storytelling
Education
Johnson & Wales University
John Nicholson honed his skills at Johnson & Wales University, learning how to use fresh, local ingredients and down-to-earth techniques to make cooking simple and satisfying.
His recipes blend Southern comfort flavors with a modern touch, inviting everyone to cook with ease and confidence.
Living in Charleston, John takes cues from the city’s lively food scene, local markets, and seasonal produce. He’s all about making meals stress-free through easy tips, flavor pairings, and fun experiments in the kitchen