Easter Bunny Cake Recipe That’s Perfectly Festive
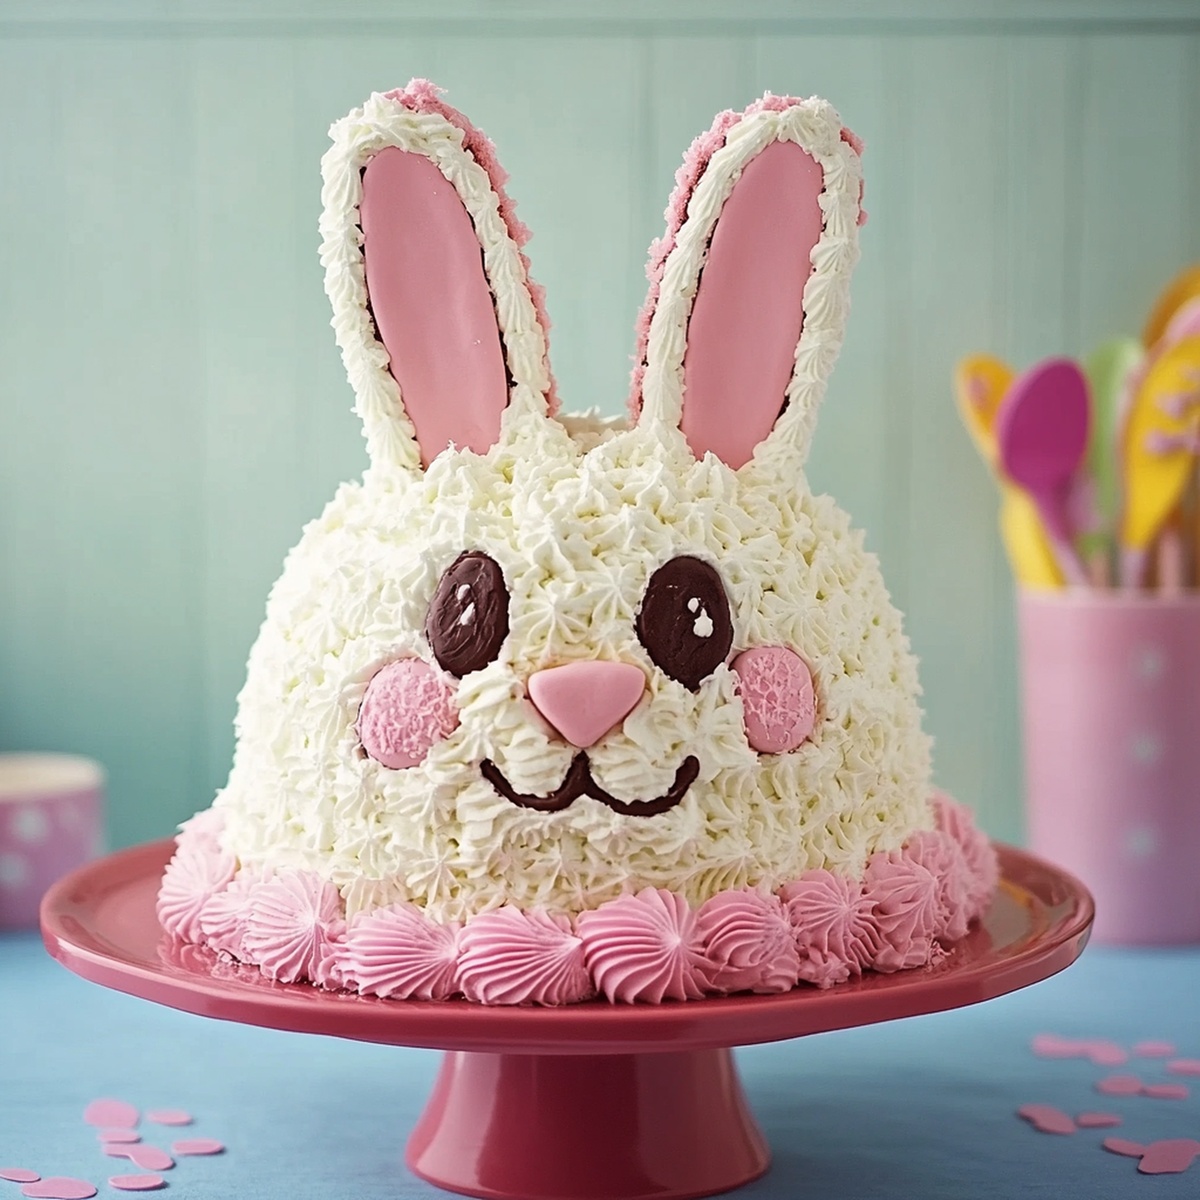
My grandma’s beloved easter bunny cake always brings smiles around our kitchen table.
Sweet memories flood back when I mix these classic ingredients together.
Kids absolutely adore decorating this playful dessert with colorful candies and frosting.
Pastel sprinkles make the cake look magical and festive for spring celebrations.
Soft, fluffy layers create the perfect bunny shape that delights everyone.
Marshmallows and coconut flakes add whimsical texture to this charming treat.
You’ll fall in love with how simple yet spectacular this recipe becomes.
Gather your mixing bowls and let’s create something delightful that will make everyone’s eyes light up!
Why Easter Bunny Cake Is The Cutest Dessert On The Table
Ingredients You’ll Need For Easter Bunny Cake
Cake Base Ingredients:Frosting and Decoration Ingredients:Decorative Accent Ingredients:How To Shape And Decorate Easter Bunny Cake Easily
Step 1: Prepare Baking Setup
Warm up the oven to a cozy 350°F. Grab two round cake pans and give them a light coating of grease and flour. This will help your cake slide out perfectly later.
Step 2: Mix Cake Batter
Whip up the cake mix using:Blend everything until smooth and creamy. Pour the batter evenly into the prepared pans, making sure they’re equally filled.
Step 3: Bake and Cool
Pop the pans into the oven for about 25-30 minutes. Check doneness by inserting a toothpick – it should come out clean. Let the cakes rest in the pans for 10 minutes, then transfer to a cooling rack.
Step 4: Create Bunny Shape
Place one cake layer as the bunny’s head on a large serving tray. Carefully slice the second cake into unique pieces:Arrange the ears above the head and position the bow tie underneath.
Step 5: Apply Crumb Coat
Spread a thin layer of frosting all over the cake. This helps trap any loose crumbs. Chill in the refrigerator for 10-15 minutes to set.
Step 6: Cover with Frosting
Generously spread a smooth layer of frosting over the entire bunny cake, ensuring complete coverage.
Step 7: Add Furry Texture
Sprinkle shredded coconut over the frosted cake to create a fluffy, furry appearance.
Step 8: Decorate Bunny Features
Create the bunny’s face using:Step 9: Create Grass Effect
Optional: Sprinkle green-tinted coconut around the base of the cake to mimic a grassy landscape.
Enjoy your adorable Easter Bunny Cake!
Helpful Tips For A Neat Easter Bunny Cake
How To Store Easter Bunny Cake Without Ruining The Look
Tasty Pairings With Easter Bunny Cake
Creative Ideas To Decorate Your Easter Bunny Cake Differently
Answers To FAQs About Easter Bunny Cake
The cake is moderately easy and perfect for beginner bakers. The recipe uses a cake mix, which simplifies the process, and the shaping and decorating steps are straightforward and fun for all ages.
Absolutely! You can substitute the cake mix with your favorite homemade cake recipe. Just ensure you prepare enough batter to fill two 8-inch round pans and adjust baking time accordingly.
No worries! You can use white frosting with texture or white sprinkles to create a similar fluffy effect. Alternatively, you can pipe frosting in a textured pattern to mimic fur.
Yes, this cake is perfect for a family activity. Kids can help with placing candies for eyes and nose, arranging the licorice whiskers, and sprinkling coconut or decorative elements, making it a fun Easter project.
Print
Easter Bunny Cake Recipe
- Total Time: 1 hour
- Yield: 12 1x
Description
Sweet Easter memories come alive with this adorable Easter Bunny Cake, perfect for family gatherings. Delightful layers of moist cake, fluffy frosting, and playful decorations create a whimsical centerpiece you’ll cherish.
Ingredients
Cake Base:
- 1 box (15.25 ounces / 432 grams) white or vanilla cake mix
- 3 large eggs
- 1 cup (240 milliliters) water
- ½ cup (120 milliliters) vegetable oil
Frosting and Coating:
- 2 cups (16 ounces / 454 grams) vanilla frosting
- 1 ½ cups (120 grams) sweetened shredded coconut
Decorative Elements:
- Jelly beans
- Candy-coated chocolates
- Red licorice strings
- Pink construction paper or pink sprinkles
- Optional: Green-tinted coconut or green sprinkles
Instructions
- Prepare the baking vessel by coating two 8-inch circular pans with grease and flour. Whisk together cake mix ingredients following package guidelines, ensuring smooth incorporation of liquid and egg components. Distribute batter uniformly across prepared pans, maintaining equal volume.
- Slide pans into a preheated 350F (175C) oven. Bake for approximately 25-30 minutes, monitoring doneness by inserting a clean toothpick into the cake’s center. Allow cakes to rest in pans for 10 minutes before transferring to a cooling rack.
- Position one cake layer centrally on a spacious serving platter, establishing the bunny’s foundational head shape. Strategically slice the second cake layer, creating distinctive ear and bow tie configurations. Carve two gently curved ear sections from outer cake edges, preserving the central portion for the bow tie.
- Meticulously apply an initial thin frosting layer, sealing cake crumbs and creating a smooth base. Refrigerate briefly to stabilize the initial coating. Generously spread a uniform frosting layer, completely enveloping the cake’s surface.
- Transform the cake’s appearance by sprinkling shredded coconut, generating a soft, furry texture. Enhance facial features using jelly beans or candy-coated chocolates for eyes and nose. Craft delicate whiskers and mouth using slender red licorice strands.
- Elevate the aesthetic by adding pink-tinted coconut or sprinkles to ear regions. Optional: scatter green-tinted coconut around the cake’s base, simulating a verdant landscape. Carefully arrange decorative elements to capture playful bunny characteristics.
Notes
- Prep in Advance: Bake cake layers a day ahead and store wrapped in plastic to prevent drying out, ensuring maximum moisture and easier decorating process.
- Smooth Frosting Technique: Use an offset spatula or bench scraper for even, clean frosting application, rotating the cake stand while creating smooth surfaces.
- Coconut Coverage: Gently press shredded coconut onto frosting to create an even, fluffy fur-like texture without leaving bare spots.
- Allergy-Friendly Modifications: Swap traditional cake mix for gluten-free or dairy-free alternatives, using applesauce or mashed banana as egg replacements for dietary restrictions.
- Prep Time: 30 minutes
- Cook Time: 30 minutes
- Category: Desserts
- Method: Baking
- Cuisine: American
Nutrition
- Serving Size: 12
- Calories: 380
- Sugar: 34 g
- Sodium: 350 mg
- Fat: 18 g
- Saturated Fat: 2.5 g
- Unsaturated Fat: 0 g
- Trans Fat: 0 g
- Carbohydrates: 51 g
- Fiber: 0 g
- Protein: 3 g
- Cholesterol: 40 mg


Emily Morgan
Food Critic & Kitchen Tips Specialist
Expertise
Global Food Exploration & Critique, Simple Kitchen Hacks & Time-Saving Tips, Presentation & Plating Techniques, Culinary Research & Storytelling.
Education
New York University
Emily Morgan has journeyed across the globe, collecting culinary secrets that turn everyday ingredients into impressive meals.
Based in Seattle and armed with a Journalism degree from NYU, she blends thorough research with a flair for presentation, ensuring every dish looks just as good as it tastes.
Focusing on fresh flavors, simple methods, and a bit of fun, Emily shows home cooks how to elevate their daily cooking without fancy gadgets or complex steps.