
Royal Delight: Elegant Birthday Cheesecake Recipe for Celebrations
Creamy cheesecake with a delicate birthday twist has been my secret dessert weapon for years.
Rich cream cheese blends perfectly with subtle vanilla notes.
The decadent layers promise pure celebration on a plate.
Soft, velvety textures melt across your palate with each forkful.
Guests always marvel at this delightful centerpiece that feels both indulgent and sophisticated.
Each slice carries the warmth of special moments and sweet memories.
Your taste buds will dance with pure dessert delight.
Quick Recipe Overview
Birthday Cheesecake: Must-Have Ingredients
For Crust:For Filling:For Topping:Tools You’ll Need for Birthday Cheesecake
Birthday Cheesecake: Directions for Success
Crush graham crackers into fine bits and blend with sweet sugar and melted butter. Press the mixture firmly into the bottom of a springform pan, creating a solid foundation for your dreamy dessert.
Dial your oven to a cozy 325°F, getting ready to transform simple ingredients into a celebration-worthy treat.
Use a spoon or smooth glass to pack down the crumb mixture, ensuring a compact and even surface that will hold your creamy filling perfectly.
Slide the pan into the preheated oven and let the crust bake for 8-10 minutes, developing a golden, toasty flavor that will complement the rich cheesecake to follow.
Birthday Cheesecake: Cooking Tips & Variations
How to Serve Birthday Cheesecake Like a Pro
Meal Planning & Storing Birthday Cheesecake
FAQs
You’ll need graham cracker crumbs, sugar, and melted butter. These three simple ingredients create a delicious, crispy base for your birthday cheesecake.
Use the back of a spoon or a flat-bottomed glass to press the mixture firmly and evenly into the springform pan. This helps create a solid, compact crust that won’t crumble when you slice the cheesecake.
Pre-baking the crust for 8-10 minutes helps set the graham cracker base and prevents it from becoming soggy when you add the cheesecake filling. It also enhances the crust’s flavor and texture.
A 9-inch springform pan is recommended because it allows you to easily remove the cheesecake without damaging the crust. Other pan types might make removing the cheesecake more challenging.
Print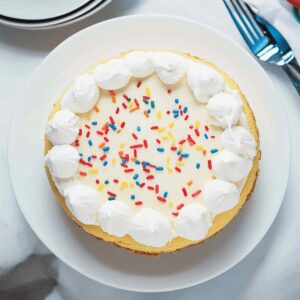
Elegant Birthday Cheesecake Recipe
- Total Time: 1 hour 30 minutes
- Yield: 13 1x
Description
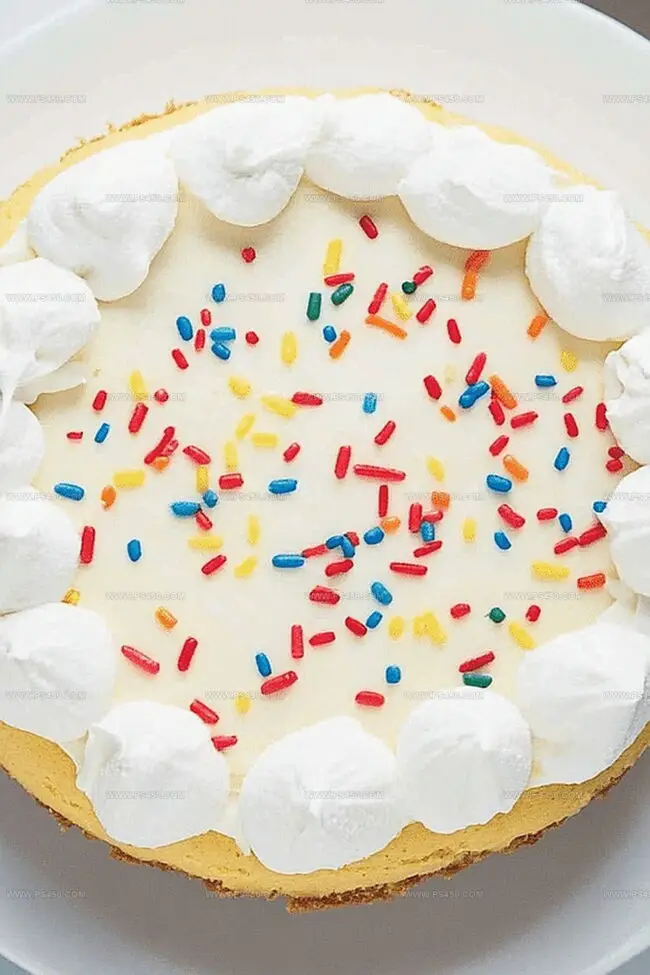
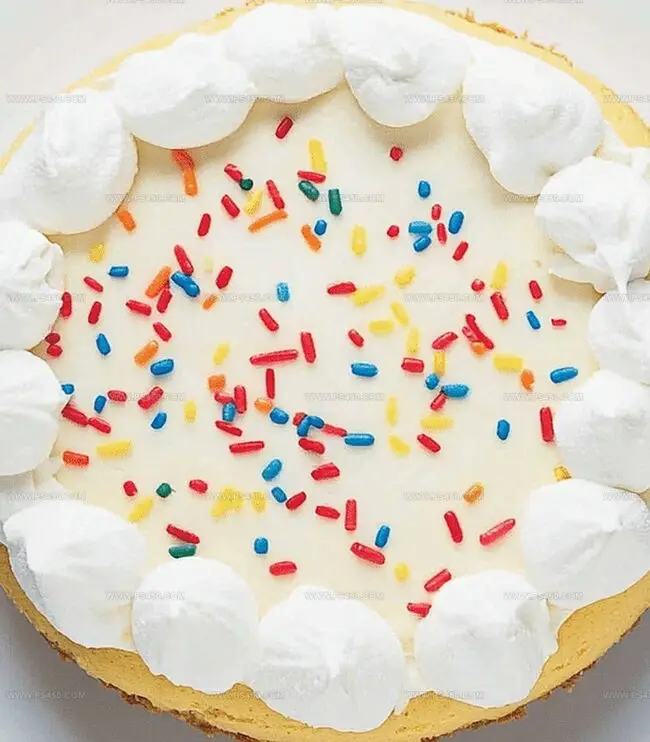
Luxurious birthday cheesecake delights with creamy layers of indulgence and festive charm. Celebration desserts rarely match this artful blend of rich cream cheese, sweet vanilla, and delicate crumb that promises pure culinary joy.
Ingredients
- 3 packages cream cheese, 8 oz (226 g), softened
- 3 large eggs
- 2 cups graham cracker crumbs (about 14 crackers)
- ½ cup unsalted butter, melted
- 1 cup granulated sugar
- ¼ cup granulated sugar
- ½ cup sour cream
- ¼ cup heavy cream
- 1 tsp vanilla extract
- ½ cup rainbow sprinkles (optional, folded into the batter)
- Whipped cream (optional)
- More rainbow sprinkles for decoration
Instructions
- Crust Preparation: Pulverize graham crackers into fine, uniform crumbs using a food processor or rolling pin, then blend thoroughly with granulated sugar and melted butter until the mixture achieves a cohesive, sand-like consistency.
- Crust Molding: Press the crumb mixture firmly into a 9-inch springform pan, using a spoon or flat-bottomed glass to create an even, compact layer that will serve as a robust foundation for the cheesecake.
- Initial Baking: Position the crust in a preheated oven at 325F (163C) and bake for 8-10 minutes, allowing the butter to integrate with the crumbs and develop a golden, slightly crisp texture.
- Cooling Phase: Extract the crust from the oven and permit it to cool completely, establishing a stable base that will support the upcoming cheesecake layers.
Notes
- Crush Crackers Precisely: Aim for ultra-fine, uniform crumbs to prevent a lumpy or uneven crust that could crumble when serving.
- Pack Crust Firmly: Press the crumb mixture tightly and evenly using a flat-bottomed glass or spoon to create a solid, compact base that won’t fall apart.
- Control Baking Temperature: Watch the crust carefully during the 8-10 minute bake to achieve a golden color without burning, which can create a bitter taste.
- Cool Completely: Let the crust cool entirely before adding filling to prevent moisture buildup and ensure a crisp, stable foundation for the cheesecake.
- Prep Time: 20 minutes
- Cook Time: 70 minutes
- Category: Desserts
- Method: Baking
- Cuisine: American
Nutrition
- Serving Size: 13
- Calories: 400
- Sugar: 30 g
- Sodium: 300 mg
- Fat: 28 g
- Saturated Fat: 17 g
- Unsaturated Fat: 8 g
- Trans Fat: 0 g
- Carbohydrates: 34 g
- Fiber: 1 g
- Protein: 6 g
- Cholesterol: 95 mg
John Nicholson
Lead Writer & Recipe Developer
Expertise
Recipe Testing and Development, Kitchen Hacks and Time-Saving Tips, Flavor Pairing and Ingredient Selection, Engaging Food Writing and Storytelling
Education
Johnson & Wales University
John Nicholson honed his skills at Johnson & Wales University, learning how to use fresh, local ingredients and down-to-earth techniques to make cooking simple and satisfying.
His recipes blend Southern comfort flavors with a modern touch, inviting everyone to cook with ease and confidence.
Living in Charleston, John takes cues from the city’s lively food scene, local markets, and seasonal produce. He’s all about making meals stress-free through easy tips, flavor pairings, and fun experiments in the kitchen