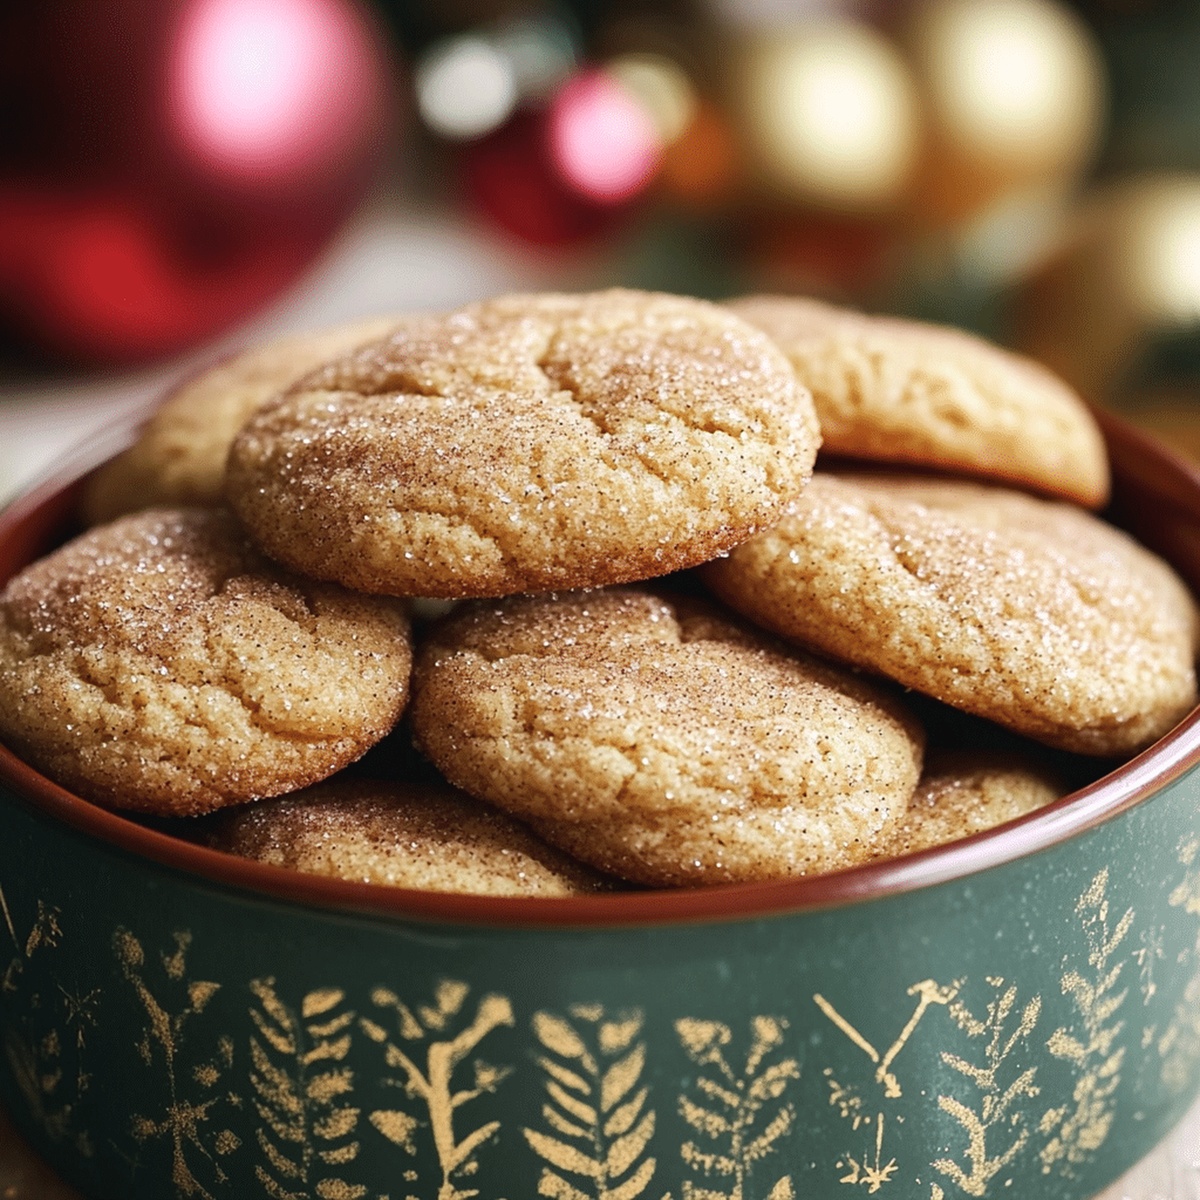
Jolly Red & White Christmas Snickerdoodles Recipe For Santa
Soft, pillowy cookies dusted with cinnamon sugar bring warmth to holiday cinnamon snickerdoodles celebrations.
These classic treats sparkle with festive charm and nostalgia.
Sweet memories of childhood baking flood back with each delightful bite.
Delicate and crisp edges give way to a tender, melt-in-your-mouth center.
The blend of butter, sugar, and warm spices creates an irresistible aroma that fills the kitchen.
Baking these cookies connects generations through a simple, beloved recipe.
Serve these delectable snickerdoodles and watch smiles spread across happy faces.
Quick Recipe Overview

Christmas Snickerdoodles: Ingredient List
For Base Dry Ingredients:For Wet Ingredients:For Coating:Tools You’ll Need for Holiday Snickerdoodles
How to Bake Christmas Snickerdoodles Right

Crank your oven to a toasty 350F. Grab two baking sheets and line them with parchment paper, creating a smooth runway for your festive cookies.
Grab a mixing bowl and blend flour, cream of tartar, baking soda, salt, cinnamon, and nutmeg. Give it a quick whisk to marry all those delicious flavors.
In another bowl, beat butter and sugar until they transform into a fluffy cloud. Drop in eggs one by one, then splash in vanilla. Mix until everything looks dreamy and smooth.
Slowly fold dry ingredients into your creamy mixture. Stir gently – no aggressive mixing allowed! Stop when everything just comes together.
Mix extra sugar and cinnamon in a small bowl. Roll dough into tiny balls, then tumble each one in the spicy sugar coating. Feel free to sprinkle some festive sparkles for extra cheer.
Arrange cookie balls on prepared sheets, giving them breathing room. Slide into the oven and bake 8-10 minutes until edges turn golden and tops look beautifully crackled.
Let cookies rest on baking sheets briefly, then transfer to cooling racks. Grab a mug of something warm and enjoy your delicious holiday treats!
Flavor Ideas for Holiday Snickerdoodle Fans
Serving Christmas Snickerdoodles with Cheer
Best Ways to Store Christmas Snickerdoodles
FAQs
Snickerdoodles are unique because they’re rolled in a cinnamon-sugar mixture before baking, which creates a distinctive crackly exterior and sweet, spicy flavor that sets them apart from regular sugar cookies.
Yes, you can prepare the Snickerdoodle dough in advance. Wrap it tightly in plastic wrap and refrigerate for up to 3 days. When ready to bake, let the dough sit at room temperature for about 15 minutes to soften slightly.
Cream of tartar gives Snickerdoodles their signature tangy flavor and helps create a soft, chewy texture. It also helps the cookies develop their characteristic cracked top during baking.
Snickerdoodles are typically soft and chewy with slightly crisp edges. The key to achieving this texture is not overbaking and removing them from the oven when they’re just golden around the edges.
Print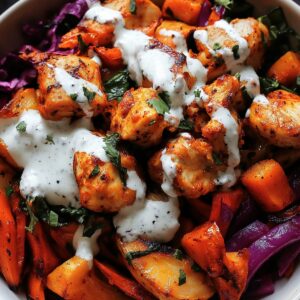
Healthy Spicy Chicken And Roasted Vegetable Bowls Recipe
- Total Time: 35 minutes
- Yield: 4 1x
Description
Spicy chicken and roasted vegetable bowls deliver a nutritious punch of flavor with Mediterranean-inspired zest. Crisp vegetables and tender chicken mingle in a balanced meal that satisfies hunger while nourishing the body with wholesome ingredients.
Ingredients
Protein:
- 2 boneless, skinless chicken breasts (or thighs)
Vegetables:
- 1 cup broccoli florets
- 1 medium zucchini, sliced
- 1 red bell pepper, sliced
- ½ red onion, sliced
- 1 cup baby spinach or mixed greens (optional)
- ½ avocado, sliced
Spices and Seasonings:
- 1 tablespoon olive oil (for chicken)
- 1 teaspoon smoked paprika
- 1 teaspoon chili powder
- ½ teaspoon garlic powder
- ½ teaspoon cumin
- ½ teaspoon salt
- ¼ teaspoon black pepper
- ¼ teaspoon red pepper flakes (optional for extra heat)
- Juice of ½ lime
- 1 tablespoon olive oil (for vegetables)
- ½ teaspoon salt
- ¼ teaspoon black pepper
- ½ teaspoon garlic powder
- ½ teaspoon chili powder
Dressing and Toppings:
- 1 cup cooked quinoa, brown rice, or cauliflower rice
- 2 tablespoons olive oil
- 1 tablespoon fresh lime juice
- 1 teaspoon honey (or maple syrup for vegan)
- ½ teaspoon chili powder
- ¼ teaspoon garlic powder
- ¼ teaspoon salt
Instructions
- Craft a vibrant marinade by combining olive oil, smoked paprika, chili powder, garlic powder, cumin, salt, black pepper, red pepper flakes, and lime juice. Thoroughly coat chicken breasts, allowing flavors to penetrate for 10-15 minutes.
- Preheat the oven to 400F (200C) and prepare a parchment-lined baking sheet. Toss broccoli, zucchini, bell pepper, and red onion with a harmonious blend of olive oil, seasonings, ensuring even coverage.
- Position vegetable medley on the baking sheet, spreading them out to guarantee crisp, caramelized edges. Roast for 20-25 minutes, rotating midway to promote uniform cooking.
- Meanwhile, sear marinated chicken in a hot skillet or grill pan over medium-high heat. Cook until golden and internal temperature reaches 165F (75C), about 5-6 minutes per side. Allow chicken to rest briefly before slicing.
- Whisk together a zesty dressing using olive oil, lime juice, honey, chili powder, garlic powder, and salt, creating a tangy complement to the dish.
- Construct nutrient-packed bowls by layering quinoa or rice as a foundation. Arrange roasted vegetables and sliced chicken atop the grains, then scatter fresh spinach leaves.
- Drizzle the chili-lime dressing generously over the bowl. Garnish with creamy avocado slices, fresh cilantro, toasted sesame seeds, and a dollop of Greek yogurt for added richness.
- Serve immediately while ingredients are warm, or prepare in advance for a delectable meal-prep option that promises robust flavors and nutritional balance.
Notes
- Customize the marinade by swapping spices to match your flavor preferences, such as using smoked paprika for a deeper smoky taste or adding more red pepper flakes for extra heat.
- Prep chicken in advance by marinating overnight to intensify flavors and save time during meal preparation, ensuring juicier and more flavorful meat.
- Swap quinoa with cauliflower rice for a lower-carb option that keeps the dish light and nutritious while maintaining a similar texture.
- Experiment with different protein alternatives like tofu, shrimp, or lean turkey to accommodate various dietary needs and keep the meal exciting and versatile.
- Prep Time: 10 minutes
- Cook Time: 25 minutes
- Category: Lunch, Dinner
- Method: Roasting
- Cuisine: American
Nutrition
- Serving Size: 4
- Calories: 450
- Sugar: 5 g
- Sodium: 600 mg
- Fat: 20 g
- Saturated Fat: 3 g
- Unsaturated Fat: 15 g
- Trans Fat: 0 g
- Carbohydrates: 45 g
- Fiber: 8 g
- Protein: 30 g
- Cholesterol: 90 mg
John Nicholson
Lead Writer & Recipe Developer
Expertise
Recipe Testing and Development, Kitchen Hacks and Time-Saving Tips, Flavor Pairing and Ingredient Selection, Engaging Food Writing and Storytelling
Education
Johnson & Wales University
John Nicholson honed his skills at Johnson & Wales University, learning how to use fresh, local ingredients and down-to-earth techniques to make cooking simple and satisfying.
His recipes blend Southern comfort flavors with a modern touch, inviting everyone to cook with ease and confidence.
Living in Charleston, John takes cues from the city’s lively food scene, local markets, and seasonal produce. He’s all about making meals stress-free through easy tips, flavor pairings, and fun experiments in the kitchen