Jolly Festive Elf Hats Holiday Treats Recipe for Fun Baking
Sweet and whimsical elf hats holiday treats sweeten every seasonal gathering with playful charm.
Delicate sugar cookies adorned with colorful frosting create magical memories.
Bakers love crafting these charming treats that sparkle with festive spirit.
Each bite promises a delightful crunch and nostalgic winter wonder.
Kids adore decorating these playful cookies with vibrant icing and sprinkles.
Festive gatherings come alive with these adorable desserts that capture the joy of holiday celebrations.
These tiny treats will delight everyone at your next Christmas party.
Quick Recipe Overview
Ingredients for the Fun and Festive Elf Hats
For Base:For Hat Decoration:For Finishing Touches:Holiday Tools You’ll Want for These Sweet Treats
Assemble These Colorful Elf Hats Like a Pro
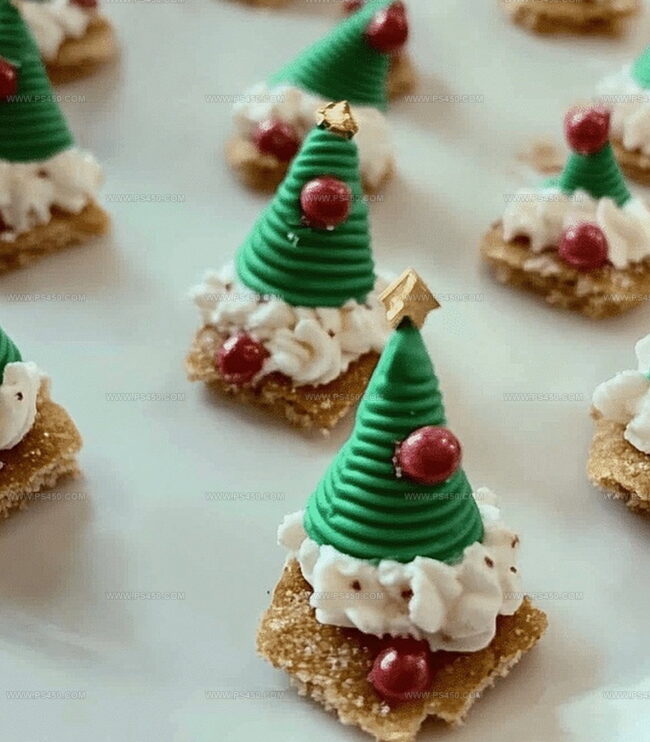
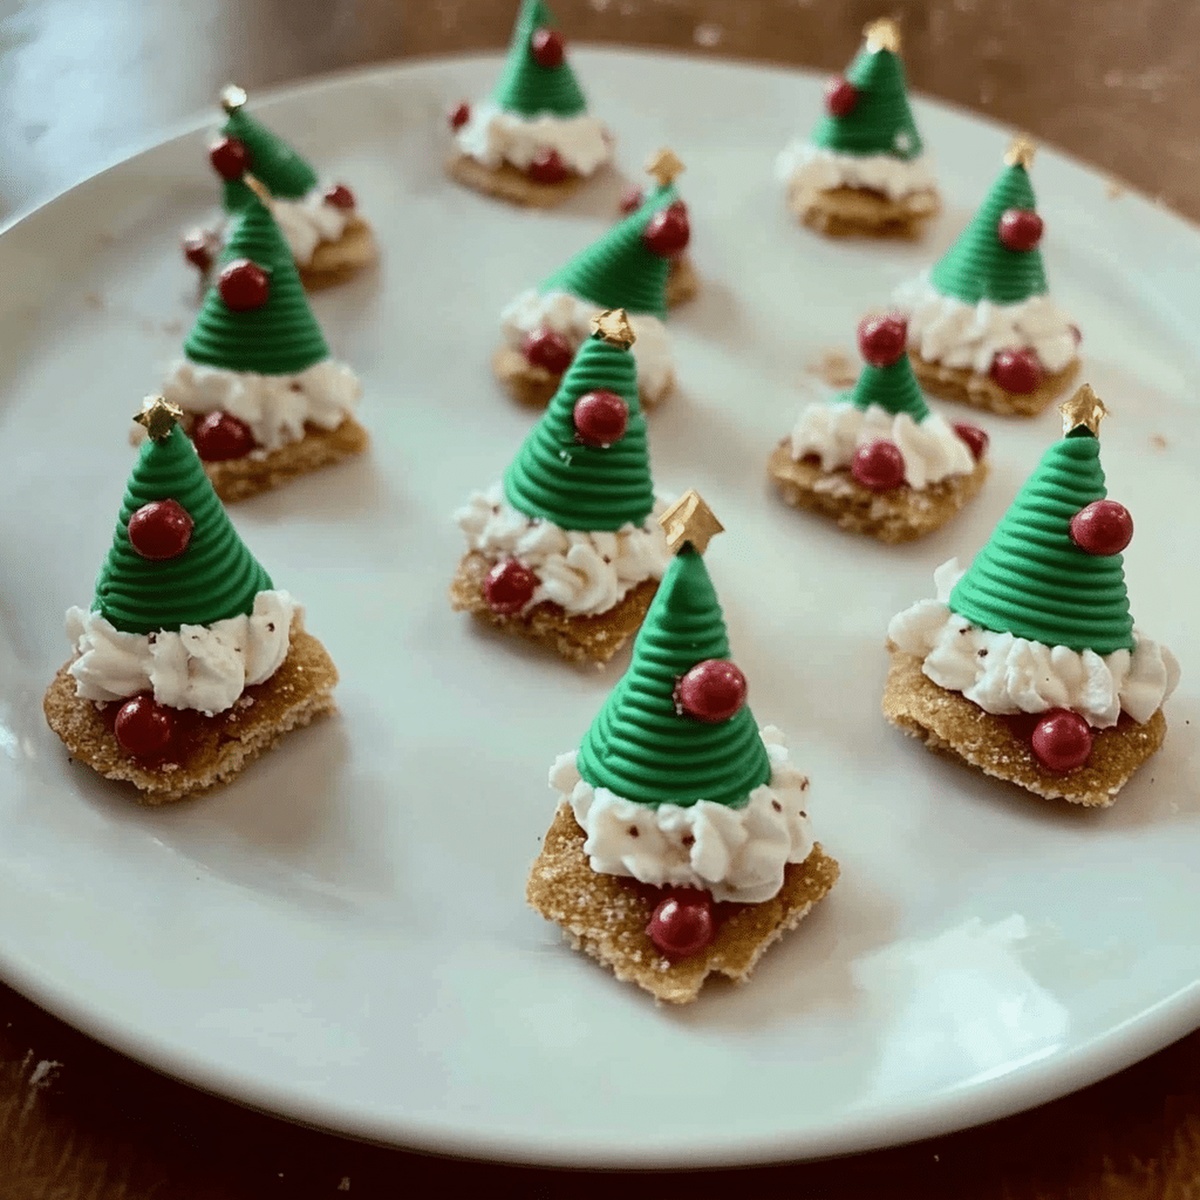
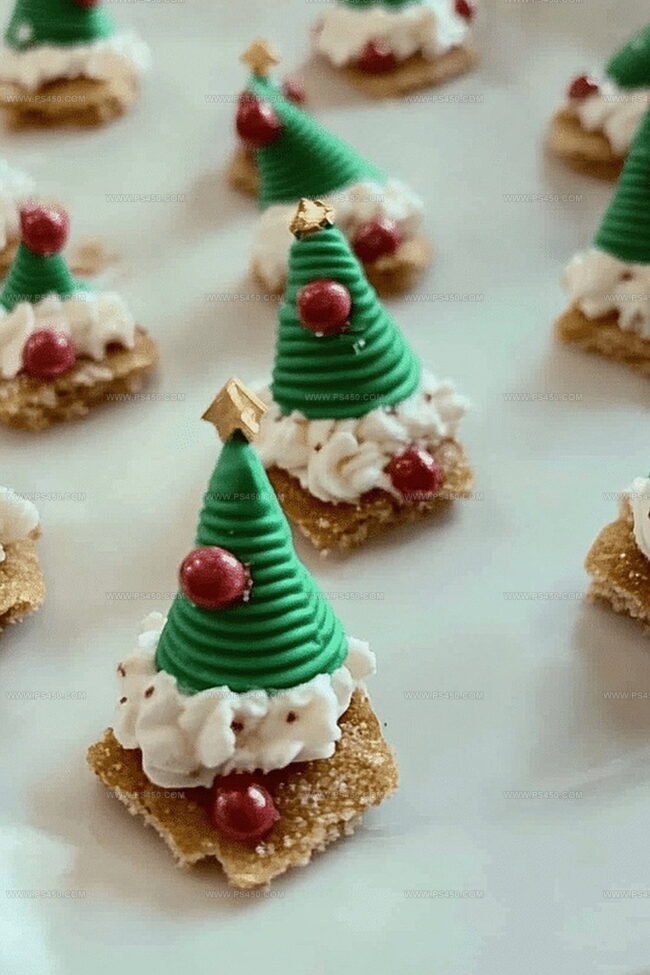
Grab your favorite sugar or shortbread cookies and arrange them on a clean surface. A thin layer of frosting can help decorations stick firmly.
Use vibrant green icing to transform the cookie into a pointy elf hat. Carefully pipe the icing to create a smooth, cone-like design that covers the entire cookie top.
Position a bright red candy or gumdrop at the hat’s tip, creating the classic elf hat pom-pom that brings whimsy to your treat.
Pipe delicate white frosting around the hat’s base, adding a soft, fluffy border that gives your creation a winter wonderland feel. Make the trim wavy or straight depending on your style.
Dust your elf hats with edible sparkles or festive sprinkles, adding a touch of extra cheer and shimmer to your delightful desserts.
Allow your elf hats to rest for 15-20 minutes, letting the icing set perfectly. Now they’re ready to delight friends and family with their adorable holiday charm!
Decorating Tips for Maximum Holiday Joy
Serve Elf Hats at Parties or Pack for Gifts
Storage Tips to Keep Them Crisp and Cute
FAQs
Absolutely! Kids will love decorating these colorful elf hats and can easily help with adding candies, sprinkles, and white trim under adult supervision.
No special skills required. This recipe is perfect for beginners and can be done with store-bought cookies and simple decorating techniques.
Sugar cookies and shortbread cookies are ideal. They provide a sturdy base and complement the festive decorations perfectly.
Very simple! With green icing for the hat, a red candy for the pom-pom, white trim, and optional sprinkles, anyone can create adorable elf hats with minimal effort.
Print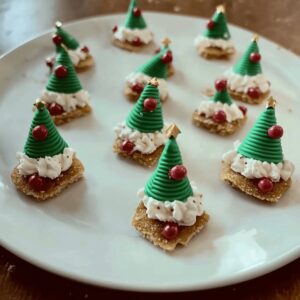
Festive Elf Hats Holiday Treats Recipe
- Total Time: 1 hour 10 minutes
- Yield: 9 1x
Description
Magical Elf Hat cookies bring festive cheer to holiday dessert tables. Sweet chocolate-dipped sugar cookies decorated with red and green frosting create whimsical seasonal delights for winter celebrations.
Ingredients
- 1 can (20 oz / 567 g) crushed pineapple, undrained
- 1 tub (8 oz / 227 g) whipped topping, thawed
- 1 box (3.4 oz / 96 g) instant pistachio pudding mix
- 1 cup mini marshmallows
- ½ cup chopped walnuts
- Maraschino cherries
- Extra chopped nuts
Instructions
- Preparation: Arrange cookies on a clean, flat surface, ensuring a stable base for decorating.
- Base Coating: Spread a thin layer of frosting across the cookie, creating a smooth foundation for the elf hat design.
- Hat Formation: Pipe vibrant green icing in a precise conical shape, covering the cookie’s surface and extending downward to craft the signature pointed hat silhouette.
- Detailing: Smooth the green icing using a spatula or piping tool, achieving a polished and uniform appearance with crisp, clean edges.
- Accent Placement: Crown the hat’s peak with a bright red candy or gumdrop, capturing the playful essence of a traditional elf hat’s pom-pom.
- Trim Work: Add a delicate white frosting border around the green icing’s base, introducing a whimsical winter-inspired dimension with either a wavy or smooth finish.
- Final Embellishment: Dust the elf hat with edible glitter or decorative elements, elevating the festive aesthetic and adding a magical touch.
- Setting and Serving: Allow the decorated treats to rest for 15-20 minutes, enabling the icing to set, then serve or store in a cool, dry location to maintain their charming holiday appeal.
Notes
- Master Icing Consistency: Ensure frosting is neither too runny nor too thick for smooth, precise application and perfect hat shape.
- Control Piping Technique: Practice steady hand movement to create uniform, clean conical hat shape without messy edges or uneven surfaces.
- Strategic Color Selection: Choose vivid green and red shades that complement each other for maximum visual holiday appeal and festive charm.
- Temperature and Setting: Allow adequate cooling time and store in controlled environment to maintain crisp icing details and prevent structural breakdown.
- Prep Time: 10 minutes
- Cook Time: 1 hour
- Category: Snacks, Desserts
- Method: Blending
- Cuisine: American
Nutrition
- Serving Size: 9
- Calories: 170
- Sugar: 15 g
- Sodium: 45 mg
- Fat: 8 g
- Saturated Fat: 1 g
- Unsaturated Fat: 7 g
- Trans Fat: 0 g
- Carbohydrates: 24 g
- Fiber: 1 g
- Protein: 2 g
- Cholesterol: 0 mg
John Nicholson
Lead Writer & Recipe Developer
Expertise
Recipe Testing and Development, Kitchen Hacks and Time-Saving Tips, Flavor Pairing and Ingredient Selection, Engaging Food Writing and Storytelling
Education
Johnson & Wales University
John Nicholson honed his skills at Johnson & Wales University, learning how to use fresh, local ingredients and down-to-earth techniques to make cooking simple and satisfying.
His recipes blend Southern comfort flavors with a modern touch, inviting everyone to cook with ease and confidence.
Living in Charleston, John takes cues from the city’s lively food scene, local markets, and seasonal produce. He’s all about making meals stress-free through easy tips, flavor pairings, and fun experiments in the kitchen