
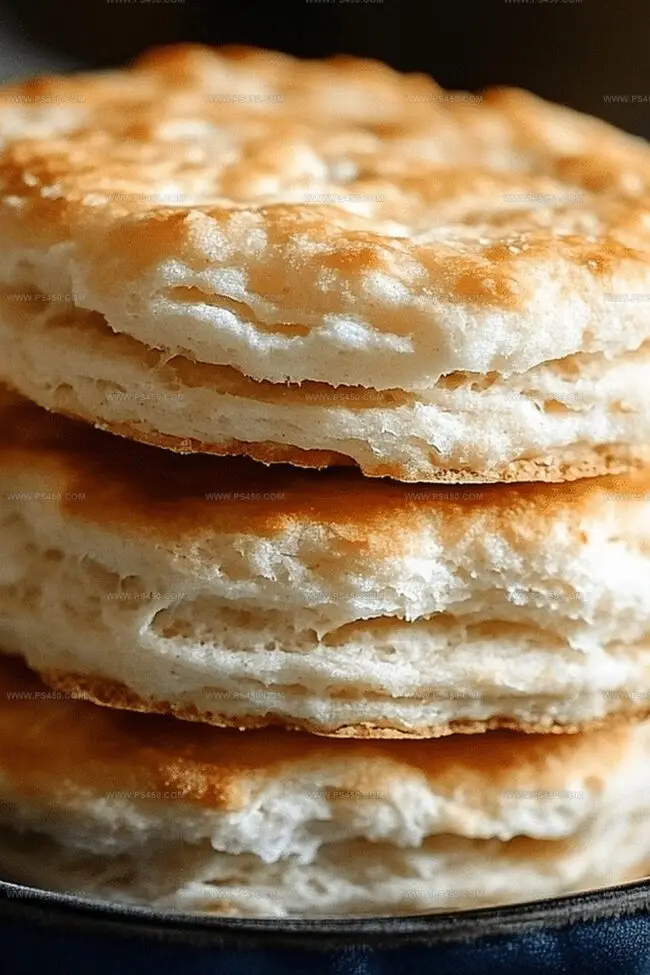
Fluffy Cloud-Like Homemade Biscuits Recipe to Bake
Southern comfort meets pure delight in these golden buttermilk homemade biscuits that promise a warm, flaky embrace.
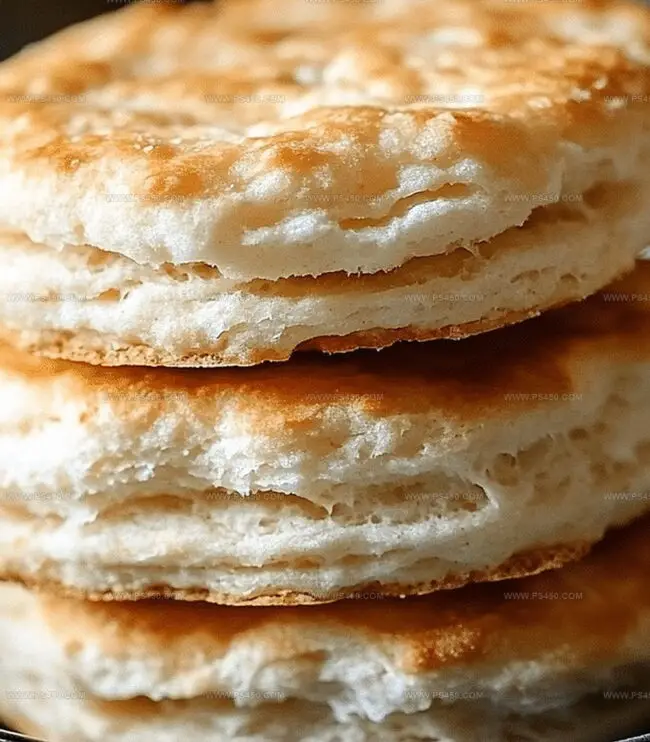
Fresh from the oven, these tender biscuits will melt in your mouth with their irresistible texture.
Crafted with simple ingredients and a touch of love, these biscuits bring the essence of traditional Southern cooking to your kitchen.
The rich, buttery layers practically whisper comfort and nostalgia with every bite.
Perfectly crisp on the outside and soft on the inside, these biscuits are a testament to classic, unpretentious baking.
The aroma alone will draw everyone to the table, eager to savor these heavenly pillows of deliciousness.
Serve them alongside gravy, jam, or enjoy them straight from the baking sheet – these biscuits are sure to become your new breakfast favorite.
Quick Recipe Overview
Everything in the homemade biscuits Mix
For Dry Mix Ingredients:For Fat Component:For Liquid Ingredient:Tools to Make homemade biscuits
Prep & Cook: homemade biscuits
Crank your oven to a scorching 450F to create those mouthwatering layers that make biscuits irresistible.
Whisk flour, baking powder, salt, and sugar together in a roomy mixing bowl, creating the perfect base for your biscuit adventure.
Dive in with cold butter cubes, working them into the flour until you’ve got a landscape of crumbly, pea-sized bits that promise flaky deliciousness.
Gently splash in milk, stirring just until the mixture comes together. Stop mixing the moment everything looks cohesive – overmixing is the enemy of tender biscuits.
Dust your workspace with flour and coax the dough into submission. Fold it over softly a couple times to build those beautiful layers.
Flatten the dough to a thick 1-inch height. Punch out perfect circles using a cutter or the rim of a glass, pressing straight down with confidence.
Arrange biscuits close together on a baking sheet. Slide into the hot oven and bake until they’re sporting a gorgeous golden-brown tan, about 10-12 minutes.
Pull from the oven and brush with melted butter for an extra touch of decadence that’ll make everyone’s mouth water.
How to Add Flair to homemade biscuits
Ways to Present homemade biscuits with Style
Store homemade biscuits Like a Pro
FAQs
Homemade biscuits have a fresher taste, better texture, and no preservatives. You control the ingredients and can customize them to your liking, resulting in a more delicious and authentic biscuit experience.
Cold butter creates steam pockets during baking, which helps develop the signature flaky layers in biscuits. When cold butter hits the hot oven, it creates tiny air pockets that make the biscuits light and tender.
Overmixed dough will result in tough, dense biscuits. Stop mixing as soon as the ingredients are just combined. The dough should look slightly shaggy and not completely smooth, which helps maintain a tender texture.
Yes, you can prepare the biscuit dough and refrigerate it for up to 24 hours before baking. Alternatively, you can freeze cut biscuits and bake them directly from frozen, adding a few extra minutes to the baking time.
Print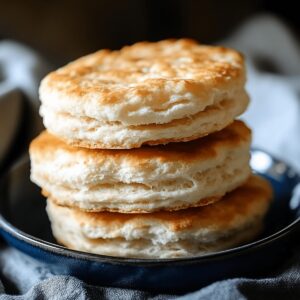
Fluffy Homemade Biscuits Recipe
- Total Time: 25 minutes
- Yield: 9 1x
Description
Classic Southern homemade biscuits deliver flaky, buttery perfection with minimal ingredients. Warm, golden layers pair beautifully with honey or jam for a comforting breakfast treat you’ll savor.
Ingredients
- 2 cups (480 ml, 16 fl oz) all-purpose flour
- ½ cup (1 stick or 113 g) cold unsalted butter, cut into small cubes
- ¾ cup (180 ml, 6 fl oz) cold milk (or buttermilk for extra flavor)
- 1 tbsp (15 ml, ½ fl oz) baking powder
- 1 tbsp (15 ml, ½ fl oz) sugar
- ½ tsp (2.5 ml, 1/12 fl oz) salt
Instructions
- Workspace Preparation: Assemble mixing bowl, pastry cutter, rolling pin, and baking sheet for seamless biscuit creation.
- Thermal Configuration: Preheat oven to 450F (232C), establishing an ideal baking environment for golden, flaky biscuits.
- Dry Ingredient Fusion: Whisk flour, baking powder, salt, and sugar in mixing bowl, ensuring uniform ingredient distribution.
- Butter Preparation: Extract chilled butter from refrigerator and dice into small, consistent pieces for optimal integration.
- Textural Development: Blend butter into flour mixture using pastry cutter or fingertips, transforming ingredients into a coarse, sandy consistency with minute butter fragments.
- Liquid Incorporation: Form a central well in the mixture, gently introducing milk while minimizing stirring to preserve dough’s tender quality.
- Dough Manipulation: Transfer mixture onto floured surface, employing delicate folding techniques to cultivate layered texture without excessive handling.
- Shaping Protocol: Roll dough to one-inch thickness, ensuring uniform depth for consistent baking performance.
- Precise Cutting: Implement biscuit cutter or glass rim, pressing vertically to maintain dough structural integrity and create clean circular shapes.
- Baking Configuration: Arrange biscuits adjacently on baking sheet, allowing minimal contact between edges to maximize rising potential.
- Thermal Transformation: Bake for 10-12 minutes until surfaces achieve a rich, golden-brown complexion.
- Finishing Touch: Optionally brush warm biscuits with melted butter to enhance flavor and aesthetic appeal.
Notes
- Chill Butter Strategically: Keep butter extremely cold and work quickly to maintain small, visible butter pieces that create signature flaky layers during baking.
- Handle Dough Gently: Minimize mixing and kneading to prevent tough, dense biscuits; treat dough with light, delicate touches to preserve tender texture.
- Check Oven Accuracy: Use an oven thermometer to verify exact temperature, as slight variations can dramatically impact biscuit rise and golden-brown coloration.
- Customize Flour Options: Experiment with alternative flours like whole wheat or gluten-free blends to accommodate dietary restrictions while maintaining similar texture and taste.
- Prep Time: 10 minutes
- Cook Time: 15 minutes
- Category: Breakfast, Snacks
- Method: Baking
- Cuisine: American
Nutrition
- Serving Size: 9
- Calories: 200
- Sugar: 2 g
- Sodium: 200 mg
- Fat: 10 g
- Saturated Fat: 6 g
- Unsaturated Fat: 4 g
- Trans Fat: 0 g
- Carbohydrates: 26 g
- Fiber: 1 g
- Protein: 3 g
- Cholesterol: 30 mg
John Nicholson
Lead Writer & Recipe Developer
Expertise
Recipe Testing and Development, Kitchen Hacks and Time-Saving Tips, Flavor Pairing and Ingredient Selection, Engaging Food Writing and Storytelling
Education
Johnson & Wales University
John Nicholson honed his skills at Johnson & Wales University, learning how to use fresh, local ingredients and down-to-earth techniques to make cooking simple and satisfying.
His recipes blend Southern comfort flavors with a modern touch, inviting everyone to cook with ease and confidence.
Living in Charleston, John takes cues from the city’s lively food scene, local markets, and seasonal produce. He’s all about making meals stress-free through easy tips, flavor pairings, and fun experiments in the kitchen