
Light as Air Peppermint Meringue Cookies Recipe – Sweet Treats!
Delicate and light, these peppermint meringue cookies dance on the palate with a whimsical blend of sweetness and cool mint.
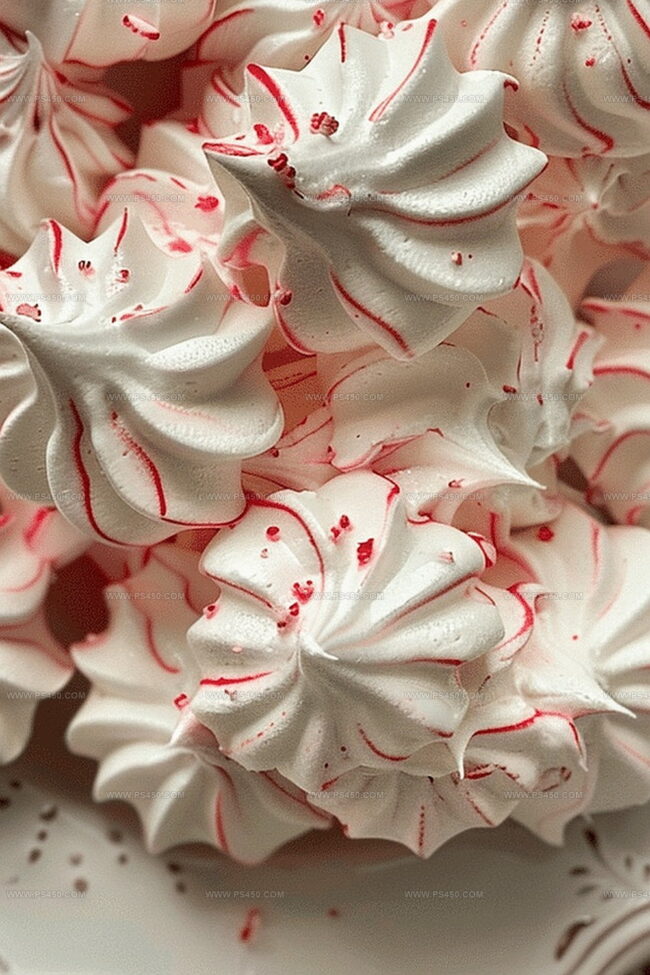
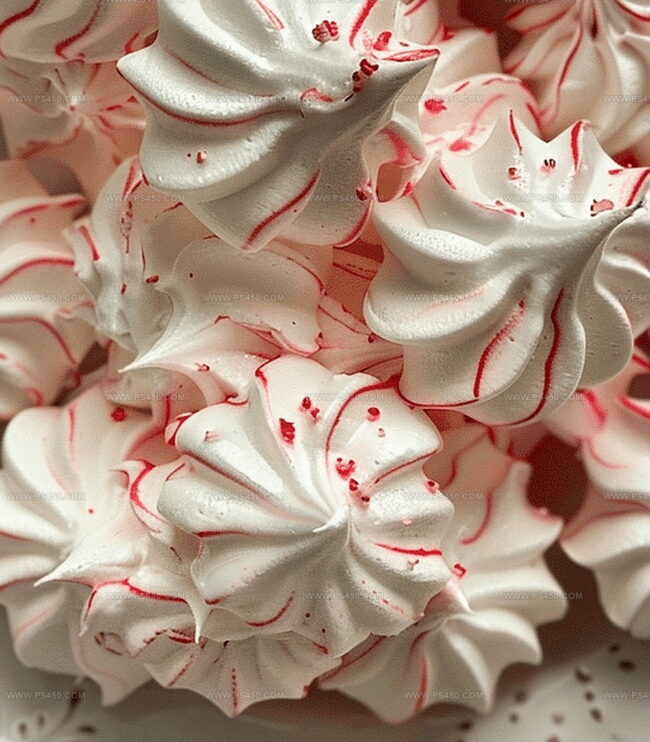
The crisp, airy texture of these delightful meringue cookies creates a festive treat that melts effortlessly in your mouth.
Each delicate morsel carries a subtle peppermint essence that whispers of winter celebrations and cozy gatherings.
Crafted with simple ingredients, this recipe transforms egg whites into a magical confection that looks as stunning as it tastes.
The gentle crunch and melt-in-your-mouth experience make these cookies a standout dessert for any occasion.
With just a few easy steps, you can create these elegant sweets that are sure to impress and delight.
Grab a whisk and let the baking magic begin – these peppermint meringue cookies are waiting to become your new favorite holiday treat.
Quick Recipe Overview
Ingredients for Mini Peppermint Meringue Cookies
For Base Ingredients:For Sweetening and Flavoring:For Decorative Topping:Tools to Whip Up Mini Peppermint Meringue Cookies with Ease
How to Make Light and Airy Mini Peppermint Meringue Cookies
Crank your oven to a low 200F and grab two baking sheets. Line them with parchment paper or silicone mats for perfect cookie placement.
Grab a sparkling clean bowl and beat egg whites until they transform into a fluffy cloud. Sprinkle in cream of tartar and salt, continuing until soft peaks emerge like little white mountains.
Slowly shower sugar into the mixture, one tablespoon at a time. Blast the mixer on high until the meringue becomes glossy and forms stiff, elegant peaks. Gently swirl in peppermint extract for a cool, refreshing twist.
Load your piping bag with the dreamy mixture. Squeeze out adorable 1-inch dollops onto the prepared sheets. Dust each meringue with crushed peppermint candy for a festive crunch.
Slide the sheets into the oven for one hour. After baking, switch off the oven and let the meringues rest inside with the door closed for another hour. This allows them to dry completely and develop their signature crisp texture.
Once cooled, tuck these delicate cookies into an airtight container. They’ll stay fresh and delightful for up to two weeks at room temperature.
Tricks to Nail the Crunch and Peppermint Kick in Meringue Cookies
Serve Mini Peppermint Meringue Cookies with Winter Charm
How to Store Mini Peppermint Meringue Cookies Without Losing Snap
FAQs
Cream of tartar stabilizes egg whites, helps create a smoother texture, and prevents sugar from crystallizing, resulting in more consistent and fluffy meringue peaks.
Look for stiff, glossy peaks that stand up straight without falling over when you lift the beater. The mixture should feel smooth and not grainy when you rub it between your fingers.
Yes, you can use a spoon to drop small dollops onto the baking sheet. However, a piping bag with a star tip creates more attractive and uniform cookies with beautiful texture and shape.
Cracking usually happens when the sugar is added too quickly or the oven temperature is too high. Always add sugar gradually and bake at a low temperature to prevent cracks and maintain a smooth surface.
Print
Fluffy Peppermint Meringue Cookies
- Total Time: 1 hour 15 minutes
- Yield: 25 1x
Description
Delightful mini peppermint meringue cookies offer a festive winter treat with crisp edges and melt-in-mouth centers. Peppermint lovers will savor these light, airy confections that balance sweet and refreshing flavors perfectly.
Ingredients
- 3 egg whites (room temperature)
- ⅔ cup (160 ml) granulated sugar
- ½ teaspoon (2.5 ml) peppermint extract
- ¼ teaspoon (1.25 ml) cream of tartar
- 1/8 teaspoon (0.6 ml) salt
- Crushed peppermint candies (for garnish)
Instructions
- Prepare Workspace: Thoroughly clean mixing bowl and beaters, eliminating any grease that might compromise egg white volume.
- Egg White Preparation: Separate whites at room temperature, enabling optimal volume and silky texture.
- Initial Whisking: Whip egg whites at medium speed until frothy, creating a light, airy base with soft peaks.
- Stabilize Meringue: Add cream of tartar and salt, continuing to whip until glossy, sturdy peaks form.
- Sugar Integration: Incrementally blend granulated sugar while increasing mixer speed, developing a luminous, structured meringue with rigid peaks.
- Flavor Infusion: Gently incorporate peppermint extract, ensuring even distribution without deflating the delicate foam.
- Piping Technique: Transfer meringue to a star-tipped piping bag, creating uniform rosettes on parchment-lined baking sheets with consistent spacing.
- Decorative Finish: Sprinkle crushed peppermint candy over meringues for a festive, crunchy embellishment.
- Drying Process: Bake in a low-temperature oven for one hour, then turn off heat, allowing meringues to dry completely and develop a crisp texture.
- Storage: Once fully cooled, store in an airtight container, preserving their delicate crunch for up to two weeks.
Notes
Maintain Pristine Equipment: Ensure absolute grease-free surfaces for egg whites to achieve maximum volume and stability.
Temperature Matters: Allow egg whites to reach room temperature before whipping, guaranteeing optimal meringue structure and smooth texture.
Precision in Technique: Gradually add sugar while whipping at high speed to create glossy, stiff peaks that hold their shape perfectly.
Storage Strategy: Keep meringues in airtight container away from humidity to preserve their delicate crispness and prevent sogginess.
- Prep Time: 15 minutes
- Cook Time: 1 hour
- Category: Desserts, Snacks
- Method: Baking
- Cuisine: American
Nutrition
- Serving Size: 25
- Calories: 18
- Sugar: 3.6 g
- Sodium: 0.3 mg
- Fat: 0 g
- Saturated Fat: 0 g
- Unsaturated Fat: 0 g
- Trans Fat: 0 g
- Carbohydrates: 4.5 g
- Fiber: 0 g
- Protein: 0.5 g
- Cholesterol: 0 mg
John Nicholson
Lead Writer & Recipe Developer
Expertise
Recipe Testing and Development, Kitchen Hacks and Time-Saving Tips, Flavor Pairing and Ingredient Selection, Engaging Food Writing and Storytelling
Education
Johnson & Wales University
John Nicholson honed his skills at Johnson & Wales University, learning how to use fresh, local ingredients and down-to-earth techniques to make cooking simple and satisfying.
His recipes blend Southern comfort flavors with a modern touch, inviting everyone to cook with ease and confidence.
Living in Charleston, John takes cues from the city’s lively food scene, local markets, and seasonal produce. He’s all about making meals stress-free through easy tips, flavor pairings, and fun experiments in the kitchen