Icy Pink Lemonade Recipe: Summer’s Dazzling Refreshment
Summer’s heat melts away with this refreshing pink lemonade that bursts with vibrant flavors and gorgeous color.
Tangy citrus meets sweet strawberry in a classic pink lemonade recipe that promises pure delight.
Fresh lemons and ripe strawberries blend into a gorgeous pink hue that catches every eye.
The bright, zesty drink delivers a cool splash of happiness in each sip.
Chilled glasses filled with this rosy beverage make any gathering more special.
Crisp and light, this drink transforms ordinary moments into something extraordinary.
Bring this crowd-pleasing pink lemonade to your next summer celebration and watch smiles bloom.
Quick Recipe Overview
Whipped Pink Lemonade Ingredient List
For Whipped Layer:For Liquid Base:For Garnish and Finishing Touches:Tools for a Fluffy Pink Lemonade Blend
Making Whipped Pink Lemonade from Scratch
Grab your mixing bowl and pour in heavy cream, sprinkle some powdered sugar, and add a splash of vanilla. Crank up your hand mixer and whirl it around until soft, pillowy peaks start dancing – this should take about 2-3 minutes ofal mixing.
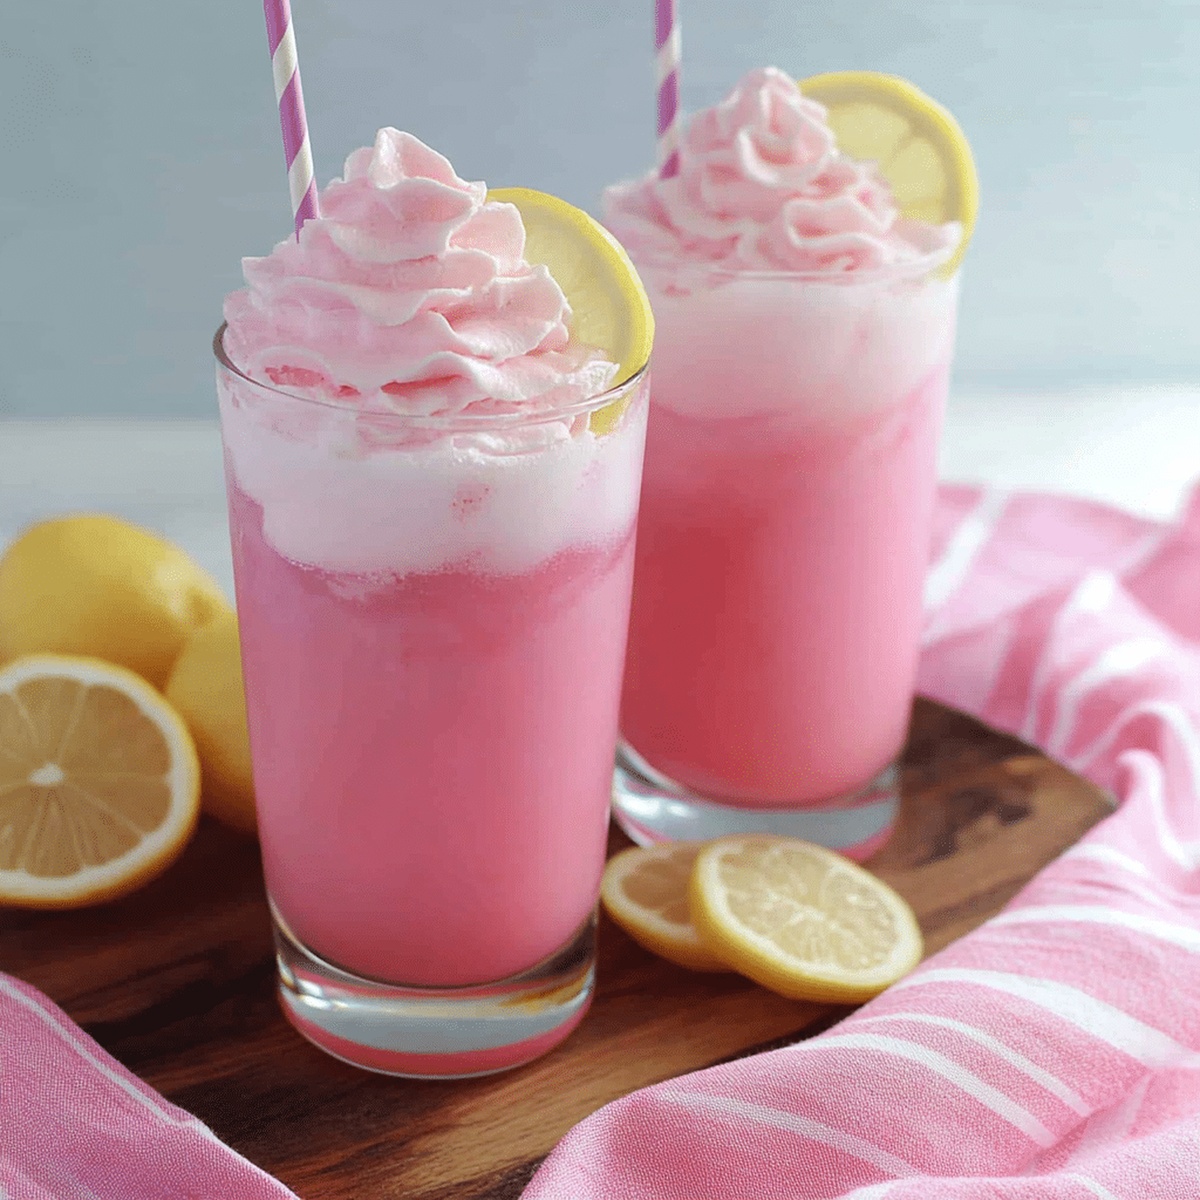
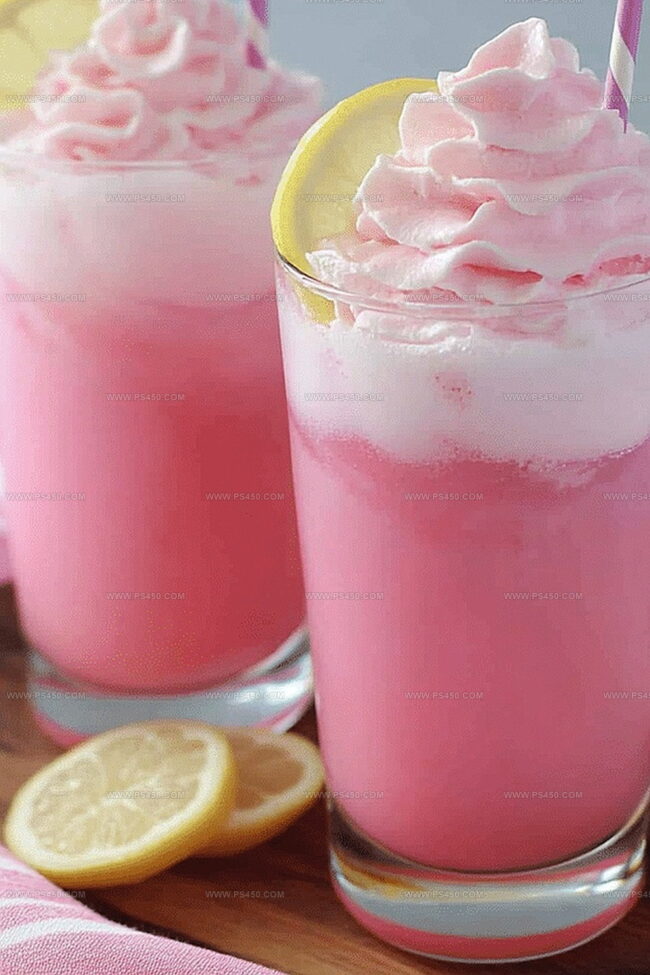
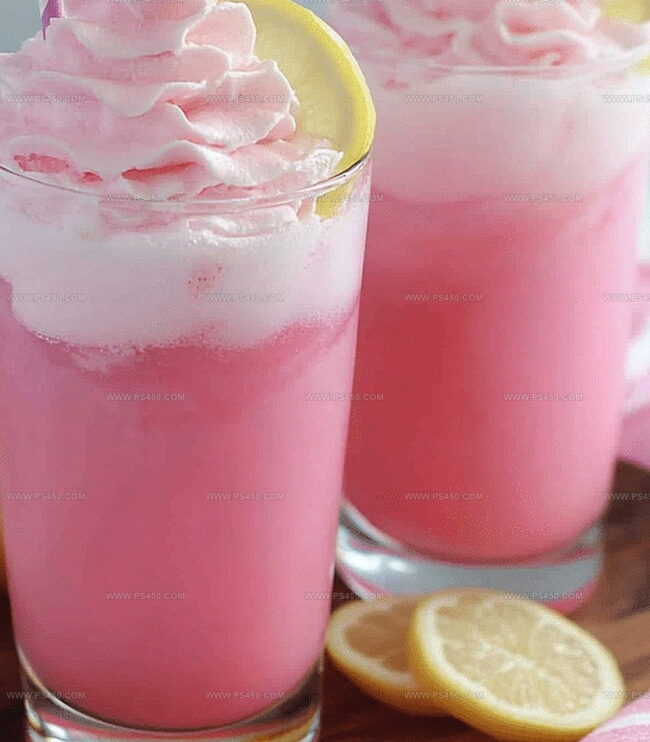
Take a tall glass and fill it generously with ice cubes. Pour pink lemonade over the ice until the glass is nearly full, leaving just enough room for your cloud-like cream topping.
Carefully dollop or beautifully pipe your whipped cream right on top of the pink lemonade. Let it sit like a luxurious crown on your cool beverage.
Toss on some bright lemon slices or scatter a few fresh berries for extra pizzazz. You can gently stir the layers together for a mixed treat or keep them beautifully separated. Sip and savor your gorgeous creation!
Flavor Add-Ins for This Sweet Drink
Serve Whipped Pink Lemonade Cold
Store Leftover Whipped Lemonade Safely
FAQs
You can substitute heavy whipping cream with coconut cream or whipped cream alternative for a dairy-free version. Just ensure it can hold soft peaks similar to traditional heavy cream.
The sweetness depends on your pink lemonade brand and added powdered sugar. Most pink lemonades are already sweet, so taste before adding extra sugar to the whipped cream to avoid an overly sugary drink.
Use medium-high speed for best results. Start slow to incorporate ingredients, then increase speed until soft peaks form. This usually takes 2-3 minutes and prevents over-beating the cream.
Absolutely! This whipped pink lemonade is kid-friendly. You can adjust sweetness and make it a fun, colorful beverage that looks impressive and tastes refreshing for all ages.
Print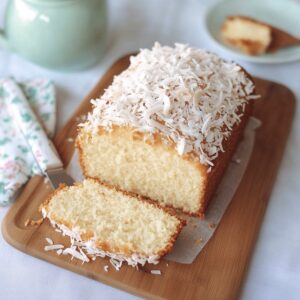
Coconut Pound Cake Recipe
- Total Time: 1 hour 30 minutes
- Yield: 12 1x
Description
Luxurious coconut pound cake delivers a tropical paradise of sweet, buttery goodness right to kitchen counters. Rich layers of coconut flavor blend perfectly with classic pound cake texture, creating a dessert that delights senses and promises pure indulgence.
Ingredients
Main Ingredients:
- 1 cup (226 grams) unsalted butter, softened
- 2 ½ cups (500 grams) granulated sugar
- 4 large eggs
- 2 ¼ cups (280 grams) all-purpose flour
- 1 cup (80 grams) shredded sweetened coconut
Liquid and Flavoring Ingredients:
- ½ cup (120 milliliters) milk
- 2 teaspoons coconut extract
- 1 teaspoon vanilla extract
- ½ cup (120 milliliters) milk (for glaze)
- 2 tablespoons (30 milliliters) unsalted butter, melted (for glaze)
Additional Dry Ingredients:
- 1 teaspoon baking powder
- ½ teaspoon kosher salt
- 1 ½ cups (180 grams) powdered sugar (for glaze)
- ⅔ cup (53 grams) shredded sweetened coconut, toasted (for topping)
Instructions
- Craft a buttery foundation by gently blending softened butter with granulated sugar until the mixture achieves a cloud-like texture and pale hue.
- Incorporate eggs methodically, beating thoroughly after each addition to ensure a silky, uniform consistency.
- Infuse aromatic essence by stirring in coconut and vanilla extracts, creating a fragrant base for the cake.
- Gradually introduce milk, stirring carefully to maintain the batter’s delicate balance.
- In a separate vessel, sift together flour, baking powder, and kosher salt, ensuring a lump-free dry mixture.
- Gently fold the dry ingredients into the wet mixture, stirring minimally to preserve the batter’s tender structure.
- Delicately fold shredded sweetened coconut throughout the batter, distributing it evenly.
- Preheat the oven to 325F (163C) and meticulously prepare a bundt or tube pan with a thorough greasing and flouring.
- Transfer the batter into the prepared pan, smoothing the surface with a spatula for an even bake.
- Bake for 60-70 minutes, monitoring until a toothpick emerges cleanly from the center.
- Allow the cake to rest in the pan for 10 minutes, then carefully invert onto a wire rack for complete cooling.
- Craft a luscious glaze by whisking melted butter, powdered sugar, milk, and coconut extract until silky smooth.
- Once the cake has fully cooled, drizzle the glaze generously across the surface.
- Garnish with a sprinkle of toasted shredded coconut for a delightful textural finish.
Notes
- Choose room temperature ingredients to ensure smooth, even mixing and optimal cake texture.
- Avoid overmixing the batter to prevent a tough, dense cake; mix just until ingredients are combined.
- Toast coconut beforehand for enhanced nutty flavor and crunchier texture that adds depth to the cake.
- Consider using unsweetened coconut for a less sweet version, perfect for those watching sugar intake.
- Prep Time: 20 minutes
- Cook Time: 10 minutes
- Category: Desserts, Snacks
- Method: Baking
- Cuisine: Caribbean
Nutrition
- Serving Size: 12
- Calories: 430
- Sugar: 36 g
- Sodium: 120 mg
- Fat: 20 g
- Saturated Fat: 12 g
- Unsaturated Fat: 6 g
- Trans Fat: 0 g
- Carbohydrates: 59 g
- Fiber: 1 g
- Protein: 4 g
- Cholesterol: 85 mg
John Nicholson
Lead Writer & Recipe Developer
Expertise
Recipe Testing and Development, Kitchen Hacks and Time-Saving Tips, Flavor Pairing and Ingredient Selection, Engaging Food Writing and Storytelling
Education
Johnson & Wales University
John Nicholson honed his skills at Johnson & Wales University, learning how to use fresh, local ingredients and down-to-earth techniques to make cooking simple and satisfying.
His recipes blend Southern comfort flavors with a modern touch, inviting everyone to cook with ease and confidence.
Living in Charleston, John takes cues from the city’s lively food scene, local markets, and seasonal produce. He’s all about making meals stress-free through easy tips, flavor pairings, and fun experiments in the kitchen