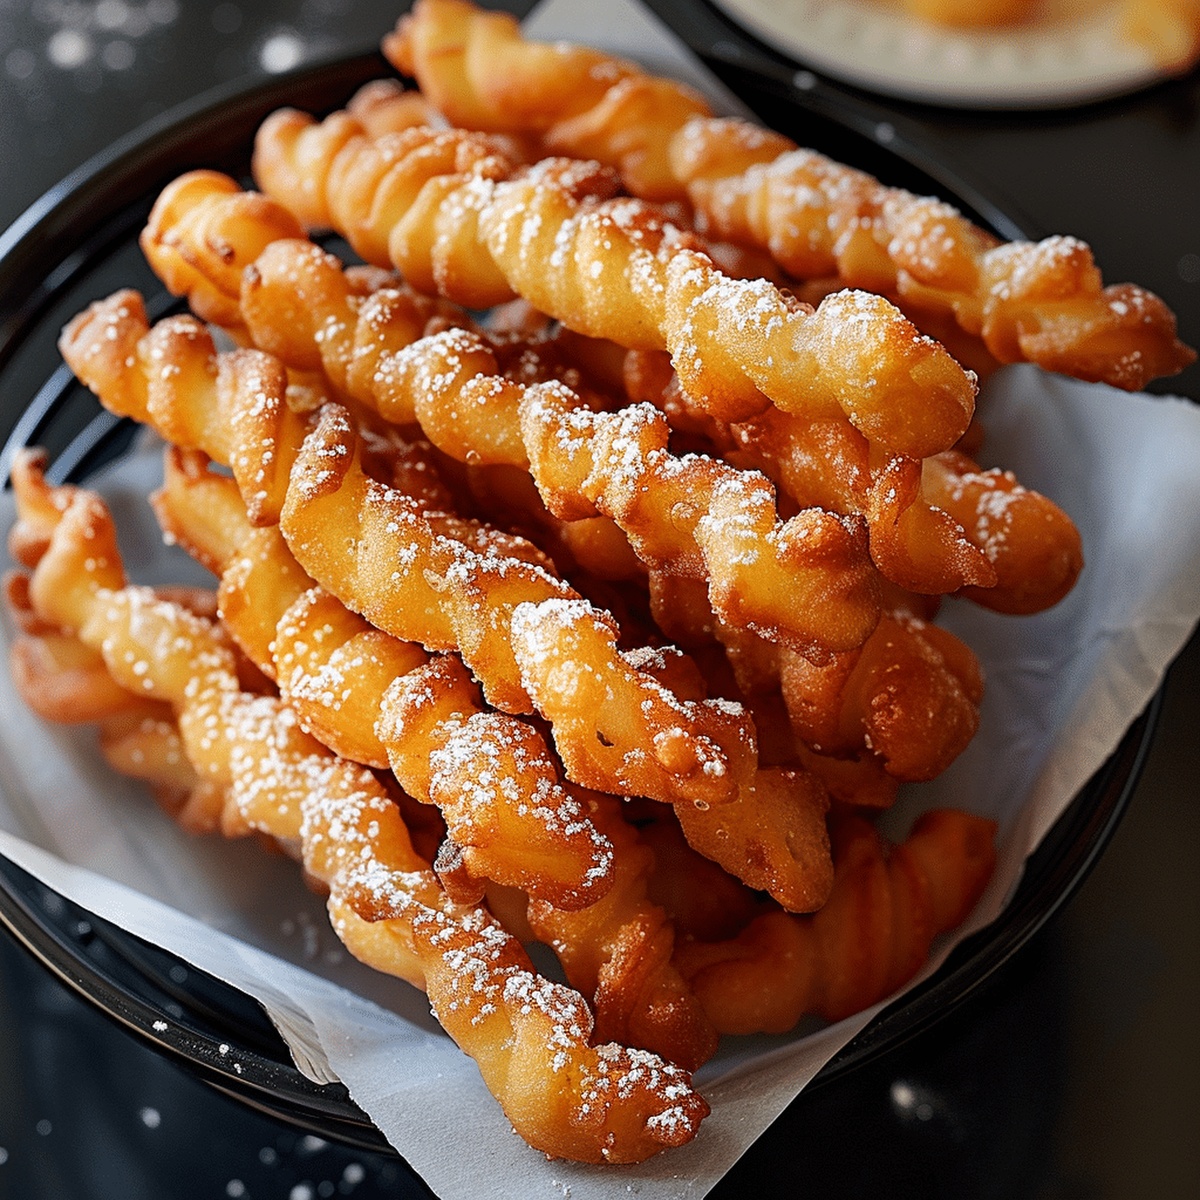
Golden Funnel Cake Sticks Recipe: Crispy Fair-Inspired Sweet Delights
Crunch into these delightful golden funnel cake sticks that bring carnival magic right to your kitchen.
These crispy, sugar-dusted treats capture the essence of fairground nostalgia with every bite.
Sweet memories dance across your taste buds as the funnel cake sticks emerge from the fryer, golden and irresistible.
Powdered sugar cascades over the warm, crispy exterior, creating a delectable contrast of textures.
The recipe transforms simple ingredients into a crowd-pleasing dessert that sparks joy and excitement.
Light, airy, and impossibly crisp, these funnel cake sticks are sure to become your new favorite indulgence.
Prepare to wow everyone at your next gathering with this irresistible sweet sensation.
Step-by-Step to Make Crispy Funnel Cake Fingers
Mix flour, baking powder, salt, and sugar in a bowl. In another bowl, beat egg and blend with milk and vanilla. Stir wet and dry ingredients together until super smooth.
Get a deep pan and pour in vegetable oil. Heat until it’s sizzling hot around 350F. A cooking thermometer helps nail the perfect temperature.
Pour batter into a piping bag or plastic bag with a corner snipped. Squeeze 3-4 inch batter strips directly into bubbling oil. Use kitchen scissors to trim edges if needed. Fry in small batches, flipping once until each side turns golden and crunchy.
Scoop out sticks with a slotted spoon and place on paper towels to drain extra oil. Shower with powdered sugar until they look like delightful snow-covered treats.
Offer these crispy delights while they’re warm. Set out chocolate, caramel, or whipped cream for dipping and watch everyone’s eyes light up with excitement.
Powdered Sugar, Dips, and Sauce Ideas
Serve Funnel Cake Sticks at Fairs or Parties
How to Keep Sticks Crisp After Frying
FAQs
The key is maintaining the right oil temperature around 350F. If the oil is too cool, the batter absorbs more oil and becomes greasy. Use a thermometer to monitor the heat and avoid overcrowding the pan during frying.
Yes, you can prepare the batter up to 2 hours in advance and store it in the refrigerator. Just give it a quick whisk before piping to ensure it’s well-mixed and at the right consistency.
A piping bag with a large round tip or a zip-top bag with a corner snipped off works perfectly. The goal is to create uniform sticks that cook evenly and look consistent.
Look for a golden brown color on both sides and a crispy exterior. They should take about 1-2 minutes per side. If they’re browning too quickly, lower the oil temperature slightly.
Quick Recipe Overview
Prep Time: 10 minutes
Cook Time: 15 minutes
Total Time: 25 minutes
Calories: 290 kcal
Servings: 5
Funnel Cake Stick Ingredient List
For Dry Ingredients:For Wet Ingredients:For Frying and Finishing:Tools to Shape and Fry Funnel Cake Sticks
Print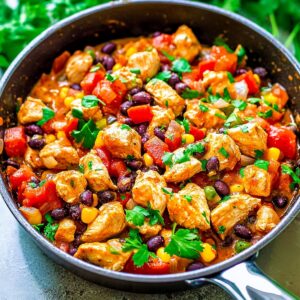
Spicy Southwestern Chicken And Black Bean Skillet Recipe
- Total Time: 30 minutes
- Yield: 5 1x
Description
Sizzling southwestern chicken and black bean skillet brings Mexican-inspired flavors to dinner tables across America. Spicy proteins, hearty beans, and zesty seasonings create a one-pan meal you’ll crave again and again.
Ingredients
- 1 lb (454 g) boneless, skinless chicken breasts, cut into bite-sized pieces
- 1 (15 oz/425 g) can black beans, drained and rinsed
- 1 cup frozen or canned corn (drained if canned)
- 1 tbsp olive oil
- 1 tsp chili powder
- ½ tsp cumin
- ½ tsp paprika
- ½ tsp garlic powder
- Salt and pepper, to taste
- 1 small red bell pepper, chopped
- 1 small green bell pepper, chopped
- ½ small red onion, diced
- 1 (10 oz/283 g) can diced tomatoes with green chilies (like Rotel), undrained
- ½ cup shredded cheddar or Mexican-blend cheese
- Fresh cilantro, chopped (optional, for garnish)
- Lime wedges, for serving (optional)
Instructions
- Sear Chicken: Heat olive oil in a spacious skillet over medium-high temperature. Add seasoned chicken coated with chili powder, cumin, paprika, garlic powder, salt, and pepper. Cook until golden brown and fully done, ensuring deep southwestern flavor infusion.
- Vegetable Integration: Introduce bell peppers and onions into the sizzling skillet, allowing them to soften and release their aromatic essence, creating a vibrant vegetable foundation for the dish.
- Flavor Layering: Incorporate black beans, sweet corn kernels, and diced tomatoes with green chilies. Simmer the mixture, enabling ingredients to harmonize and develop a rich, complex flavor profile while gently reducing liquid content.
- Cheese Melting: Cascade shredded cheese across the skillet’s surface, covering the entire mixture. Allow cheese to melt completely, creating a luxurious, unified coating that binds all components together.
- Final Garnish: Sprinkle fresh cilantro leaves over the dish, adding a bright, herbaceous dimension. Serve piping hot with lime wedges alongside, offering an optional citrusy accent to elevate the meal’s freshness.
Notes
- Boost Protein Precision: Ensure chicken is cooked to 165°F internal temperature for safe, juicy results using a meat thermometer.
- Spice Balance Strategy: Adjust chili powder and cumin quantities based on personal heat tolerance; start conservatively and taste-test midway through cooking.
- Quick Veggie Optimization: Dice bell peppers and onions uniformly to guarantee even cooking and consistent texture throughout the skillet.
- Cheese Melting Technique: Remove skillet from direct heat when adding cheese, allowing residual warmth to create smooth, perfectly melted coverage without burning.
- Prep Time: 10 minutes
- Cook Time: 20 minutes
- Category: Lunch, Dinner
- Method: Sautéing
- Cuisine: Southwestern American
Nutrition
- Serving Size: 5
- Calories: 350
- Sugar: 5 g
- Sodium: 600 mg
- Fat: 10 g
- Saturated Fat: 3 g
- Unsaturated Fat: 7 g
- Trans Fat: 0 g
- Carbohydrates: 36 g
- Fiber: 8 g
- Protein: 30 g
- Cholesterol: 90 mg
John Nicholson
Lead Writer & Recipe Developer
Expertise
Recipe Testing and Development, Kitchen Hacks and Time-Saving Tips, Flavor Pairing and Ingredient Selection, Engaging Food Writing and Storytelling
Education
Johnson & Wales University
John Nicholson honed his skills at Johnson & Wales University, learning how to use fresh, local ingredients and down-to-earth techniques to make cooking simple and satisfying.
His recipes blend Southern comfort flavors with a modern touch, inviting everyone to cook with ease and confidence.
Living in Charleston, John takes cues from the city’s lively food scene, local markets, and seasonal produce. He’s all about making meals stress-free through easy tips, flavor pairings, and fun experiments in the kitchen