Brownie Mix: Provides the rich, chocolatey foundation that creates a decadent dessert base with minimal preparation.
Vegetable Oil: Ensures moisture and helps bind the brownie ingredients for a smooth, tender texture.
Eggs: Adds structure and helps create a soft, chewy brownie consistency.
Water: Helps blend the dry and wet ingredients for a uniform batter.
Mini Chocolate Chips: Adds extra chocolate bursts and texture throughout the brownie layer.
For Peanut Butter Layer:
Creamy Peanut Butter: Delivers a rich, nutty flavor and creamy base for the topping.
Powdered Sugar: Sweetens and helps stabilize the peanut butter mixture for smooth spreading.
Softened Butter: Enhances creaminess and helps blend the peanut butter layer ingredients.
Vanilla Extract: Adds depth and rounds out the sweet flavors in the peanut butter mixture.
For Toppings and Garnish:
Mini Chocolate Chips: Provides extra chocolate crunch and visual appeal.
Chopped Peanuts: Adds nutty crunch and textural contrast to the creamy layers.
Chocolate Syrup: Optional drizzle for extra indulgence and decorative touch.
Sea Salt: Optional sprinkle to enhance the sweet and salty flavor profile.
Tools That Help With This Pizza-Style Dessert
Large mixing bowl: Essential for combining brownie ingredients and creating smooth batter.
12-inch pizza pan: Perfect for creating the brownie base and giving the dessert its pizza shape.
Parchment paper: Helps prevent sticking and makes cleanup easier.
Electric mixer or whisk: Needed to beat peanut butter mixture until smooth and creamy.
Spatula: Great for spreading brownie batter evenly and applying peanut butter layer gently.
Measuring cups and spoons: Crucial for accurate ingredient measurements.
Toothpick: Used to check brownie doneness by testing center.
How to Bake and Top Peanut Butter Brownie Pizza
Set Up Your Baking Station Prep your pizza pan by greasing it or laying down parchment paper, then get your mixing tools ready.
Whip Together Brownie Base Blend brownie mix with wet ingredients until smooth, gently folding in chocolate chips. Pour batter into prepared pan and spread evenly.
Bake Brownie Foundation Place pan in preheated oven and cook until a toothpick comes out clean, about 18-22 minutes.
Create Creamy Peanut Butter Layer Whisk peanut butter with powdered sugar, butter, and vanilla until silky and spreadable.
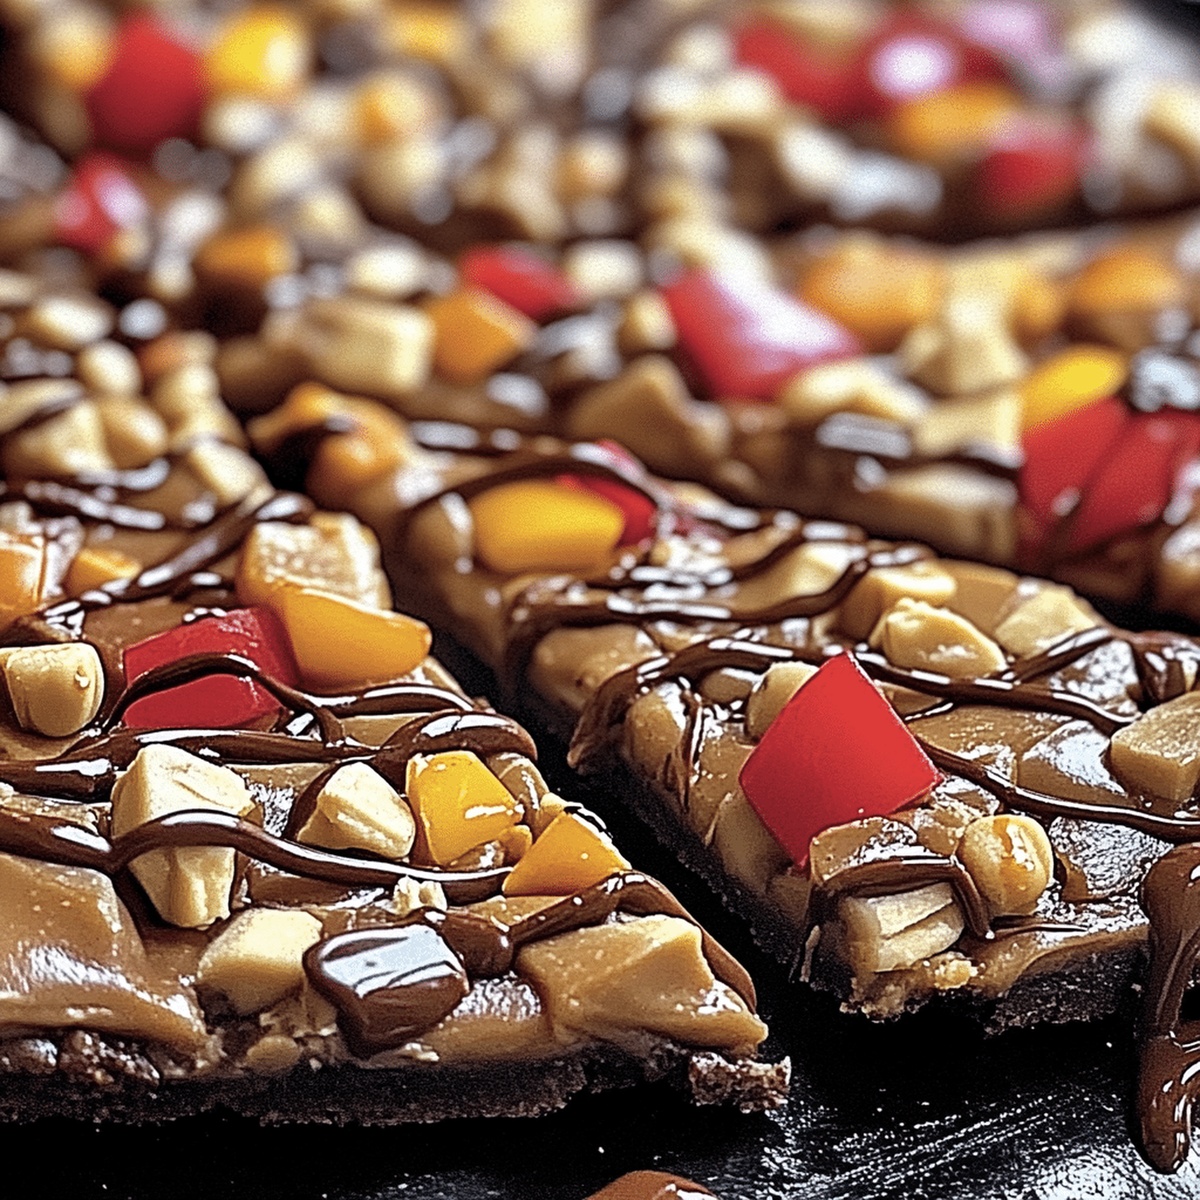
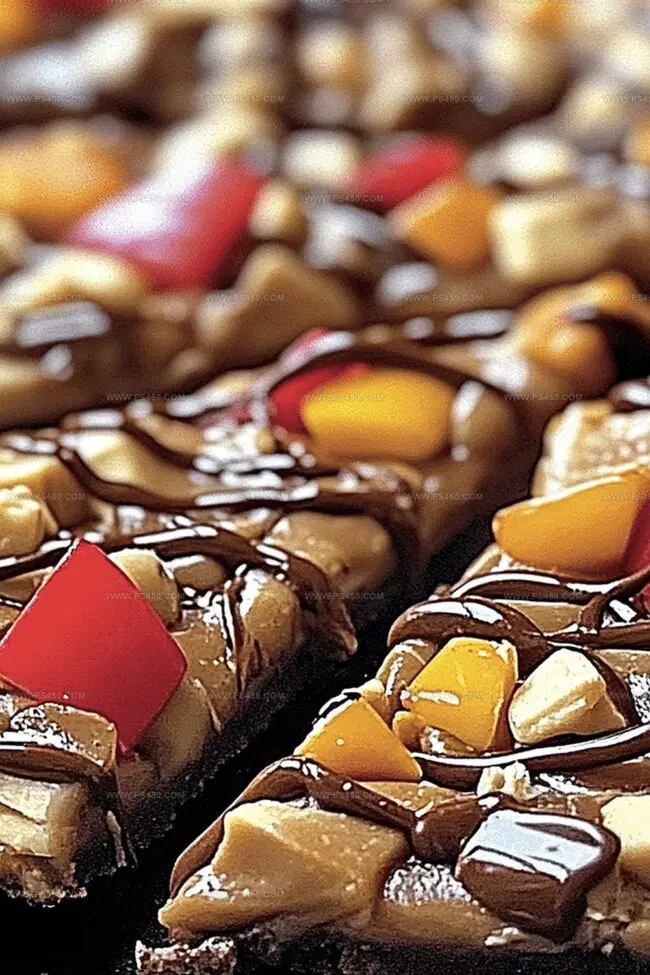
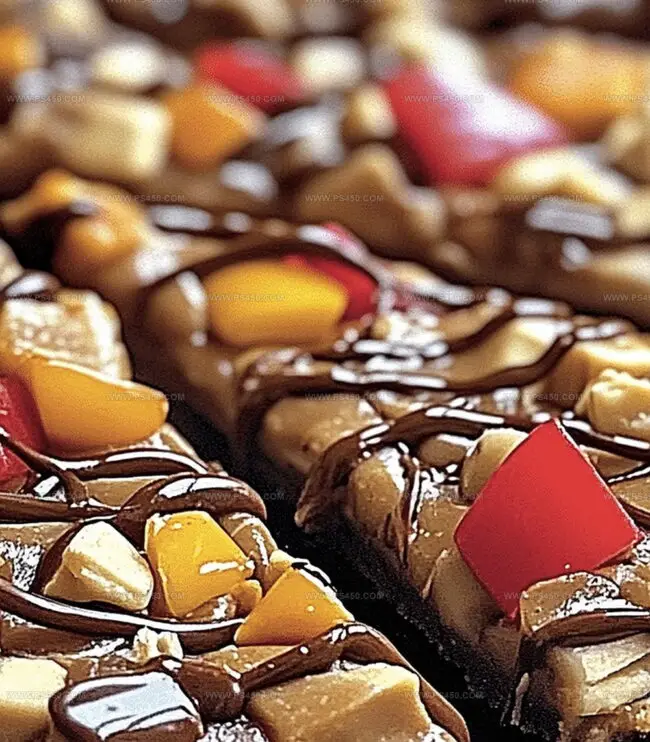
Layer and Decorate Carefully spread peanut butter mixture over cooled brownie base. Sprinkle chocolate chips and chopped peanuts on top. Optional: Drizzle chocolate syrup or add a pinch of sea salt.
Slice and Serve Cut into pizza-style wedges and share this decadent dessert with friends and family. Savor the rich, gooey combination of chocolate and peanut butter.
Change the Toppings on This Dessert Pizza
Warm the peanut butter slightly before mixing to ensure ultra-smooth spreading and easier application across the brownie base.
Prepare the entire dessert pizza up to 2 days in advance and store covered in the refrigerator. Let it sit at room temperature for 15-20 minutes before serving to soften the layers.
Swap standard brownie mix with a gluten-free brownie mix to make this recipe safe for those with gluten sensitivities. Double-check all ingredient labels to ensure complete gluten-free compliance.
Replace butter with coconut oil in the peanut butter layer and use dairy-free chocolate chips. Use a plant-based brownie mix to create a fully dairy-free dessert pizza that everyone can enjoy.
Reduce sugar content by using natural peanut butter, cutting back on powdered sugar, and choosing dark chocolate chips with higher cocoa percentage for a more nutritious treat.
Serve This Pizza at Parties or Special Nights
Sweet Celebration Spread: Perfect for birthday parties, dessert buffets, or movie nights where friends gather to enjoy a decadent treat together.
Playful Portion Presentation: Cut into triangular slices like traditional pizza, creating a fun and interactive dessert experience that surprises and delights guests.
Dessert Pairing Paradise: Serve alongside cold vanilla ice cream, fresh whipped cream, or a cold glass of milk to balance the rich chocolate and peanut butter flavors, enhancing the overall indulgence.
Temperature Temptation: Enjoy warm for maximum gooey goodness or chill in the refrigerator for a firmer, more structured dessert that can be easily transported to potlucks or picnics.
Store Peanut Butter Brownie Pizza in Slices or Whole
Cut the brownie pizza into 8-12 wedges for perfect portion control. Wrap individual slices in plastic wrap or aluminum foil for easy grab-and-go treats.
Store leftovers in an airtight container in the refrigerator for up to 5 days. Cold slices taste delicious, and chilling helps maintain the peanut butter layer’s firm texture.
Wrap the entire pizza or individual slices tightly in plastic wrap, then place in a freezer-safe container. Frozen brownie pizza stays fresh for 2-3 months. Thaw overnight in the refrigerator before serving.
Let refrigerated or frozen slices sit at room temperature for 15-20 minutes before eating to restore the soft, gooey texture and enhance the flavors of chocolate and peanut butter.
FAQs
Is this dessert actually like a pizza?
No, it’s just shaped and served like a pizza but made with brownie base and peanut butter topping. It’s a fun, creative dessert that mimics pizza presentation.
Can I use homemade brownie mix instead of boxed mix?
Absolutely! A homemade brownie batter works perfectly. Just ensure it’s the right consistency to spread evenly in a pizza pan.
How do I know the brownie base is fully baked?
Use the toothpick test. Insert a toothpick into the center of the brownie – if it comes out clean or with just a few moist crumbs, the brownie is done.
Can I make this dessert ahead of time?
Yes, you can prepare it a day in advance. Store it covered in the refrigerator and let it sit at room temperature for 15-20 minutes before serving to soften the peanut butter layer.
Gourmet peanut butter brownie pizza blends dessert indulgence with playful presentation. Chocolate base gets topped with creamy peanut butter, chocolate drizzle, and sweet candy pieces for a crowd-pleasing treat you’ll crave again and again.
Ingredients
Scale
1 box brownie mix
2 eggs
½ cup (120 ml) vegetable oil
¼ cup (60 ml) water
½ cup (120 ml) creamy peanut butter
½ cup (120 ml) chocolate chips
¼ cup (60 ml) chopped peanuts
¼ cup (60 ml) mini Reeses Pieces
¼ cup (60 ml) mini marshmallows or chocolate chips or sprinkles
Instructions
Preparation: Grease a 12-inch pizza pan or line with parchment paper. Preheat the oven to 350F (175C), positioning the rack in the center for even baking.
Brownie Base: Combine brownie mix with vegetable oil, eggs, and water in a large bowl. Fold in mini chocolate chips, ensuring even distribution. Pour the batter into the prepared pan, spreading it smoothly to create a uniform layer that reaches all edges.
Baking Process: Slide the pan into the preheated oven and bake for 18-22 minutes. Test for doneness by inserting a toothpick into the center – it should come out clean. Remove from the oven and allow to cool for 10-15 minutes, creating a stable foundation for the topping.
Peanut Butter Topping: Whip peanut butter, powdered sugar, softened butter, and vanilla extract in a mixing bowl until achieving a creamy, smooth consistency. Gently spread the mixture over the cooled brownie base, using a spatula to create an even layer without disturbing the brownie surface.
Finishing Touches: Generously sprinkle mini chocolate chips and chopped peanuts across the peanut butter layer. For an extra flavor dimension, drizzle chocolate syrup in a zigzag pattern and optionally dust with a pinch of sea salt to enhance the sweet-savory contrast.
Serving: Slice the dessert pizza into triangular wedges, creating an appealing presentation that invites sharing and indulgence.
Notes
Prevent Overbaking: Check brownies at 18 minutes using the toothpick test to ensure a moist, fudgy texture without drying out the base.
Smooth Peanut Butter Layer: Let brownie cool completely before spreading peanut butter mixture to prevent cracking and maintain clean, distinct layers.
Customize Toppings: Swap chopped peanuts with crushed pretzels or almonds for texture variation, or use dairy-free chocolate chips for vegan adaptation.
Room Temperature Ingredients: Ensure eggs, butter, and peanut butter are at room temperature for smoother mixing and more consistent batter texture.
Recipe Testing and Development, Kitchen Hacks and Time-Saving Tips, Flavor Pairing and Ingredient Selection, Engaging Food Writing and Storytelling
Education
Johnson & Wales University
Program: Bachelor of Science in Culinary Arts
Focus: A hands-on curriculum emphasizing farm-to-table cooking, local ingredient sourcing, and creative menu development. Students gained real-world restaurant experience, learning both classic techniques and modern approaches to sustainable cooking.
John Nicholson honed his skills at Johnson & Wales University, learning how to use fresh, local ingredients and down-to-earth techniques to make cooking simple and satisfying.
His recipes blend Southern comfort flavors with a modern touch, inviting everyone to cook with ease and confidence.
Living in Charleston, John takes cues from the city’s lively food scene, local markets, and seasonal produce. He’s all about making meals stress-free through easy tips, flavor pairings, and fun experiments in the kitchen

John Nicholson
Lead Writer & Recipe Developer
Expertise
Recipe Testing and Development, Kitchen Hacks and Time-Saving Tips, Flavor Pairing and Ingredient Selection, Engaging Food Writing and Storytelling
Education
Johnson & Wales University
John Nicholson honed his skills at Johnson & Wales University, learning how to use fresh, local ingredients and down-to-earth techniques to make cooking simple and satisfying.
His recipes blend Southern comfort flavors with a modern touch, inviting everyone to cook with ease and confidence.
Living in Charleston, John takes cues from the city’s lively food scene, local markets, and seasonal produce. He’s all about making meals stress-free through easy tips, flavor pairings, and fun experiments in the kitchen