
Ooey-Gooey S’mores Bombs Recipe: A Fun Fireside Treat!
Campfire memories spark to life with these irresistible chocolate smores bombs that combine the classic campground treat into a decadent dessert delight.
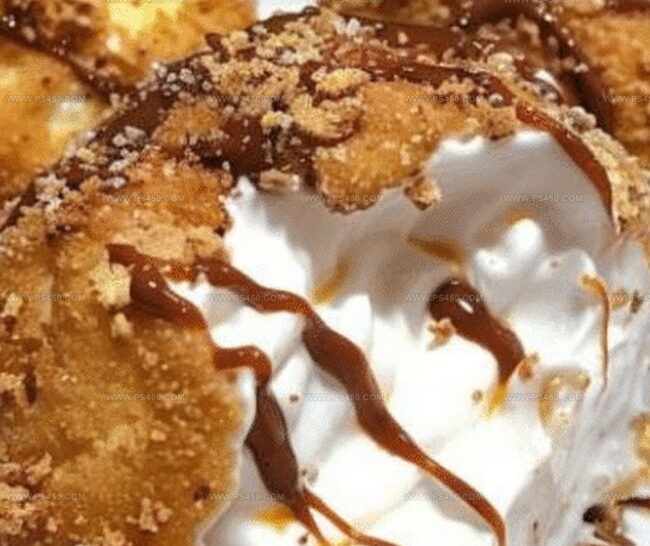
Melted chocolate, marshmallow, and graham cracker crumbs mingle in a sweet explosion of flavor.
Rich ganache envelops each morsel, creating a luxurious coating that crackles with every bite.
Summer gatherings and cozy nights call for these indulgent treats that transport you to nostalgic moments around the flickering flames.
No campfire?
No problem—these bombs bring the outdoor experience right to your kitchen.
Crisp graham cracker shells and gooey marshmallow centers await your first delightful encounter.
Prepare to become the dessert hero at your next gathering.
Quick Recipe Overview

Everything You Need for Fried S’mores Bombs
For Dough Base:For Filling Delights:For Crunchy Coating:For Frying Technique:Tools That Make Frying S’mores Bombs Simple
How to Make Fried S’mores Bombs with Melted Centers
Gently stretch soft biscuit dough into delicate circular shapes. Nestle a fluffy marshmallow and rich chocolate square right in the center of each tender dough circle.
Lovingly embrace the sweet fillings by carefully folding and pinching dough edges, creating perfectly sealed golden pouches packed with gooey goodness.
Transform each dough pocket by generously rolling it through crumbly graham cracker dust, ensuring a completely crispy exterior that promises delightful texture.
Carefully submerge these tempting treats into sizzling hot oil heated to a precise temperature. Watch as they transform into gorgeous golden-brown delicacies in just moments.
Rescue your crispy creations using a slotted spoon, letting excess oil drip away. Optional: Sprinkle with powdered sugar or drizzle with decadent chocolate sauce for an extra touch of pure indulgence.
Flavor Additions for Crunchy, Gooey S’mores Bombs
Serve Fried S’mores Bombs with Dipping Options
Store S’mores Bombs and Reheat
FAQs
The key ingredients are biscuit dough, marshmallows, chocolate squares, graham cracker crumbs, and oil for frying.
Yes, you can assemble the bombs and refrigerate them before frying. Keep them covered and fry just before serving to maintain crispiness.
Milk chocolate or semi-sweet chocolate squares work well. Choose a chocolate that melts easily and complements the marshmallow flavor.
Absolutely! Pinch and seal the edges completely to prevent the filling from leaking during frying, which could cause oil splatters and ruin the bomb’s shape.
Print
Gooey Smores Bombs Recipe
- Total Time: 15 minutes
- Yield: 9 1x
Description
Chocolatey Fried S’mores Bombs blend graham cracker, marshmallow, and chocolate into a crispy, indulgent dessert. Golden-brown spheres promise a delightful explosion of classic campfire flavors you’ll savor with pure joy.
Ingredients
- 1 can (8-count) refrigerated biscuit dough
- 8 large marshmallows
- 8 squares chocolate (milk or dark)
- 1 cup (240 ml) graham cracker crumbs
- 2 cups (480 ml) vegetable or canola oil for frying
- Powdered sugar for dusting (optional)
Instructions
- Preparation: Gently stretch refrigerated biscuit rounds into thin, uniform discs using fingertips, creating a delicate base for the filling.
- Filling: Center a marshmallow and chocolate square on each dough circle, positioning ingredients precisely for optimal flavor distribution.
- Sealing: Meticulously fold dough edges over the filling, pinching and pressing firmly to create a completely sealed parcel that prevents leakage during frying.
- Coating: Thoroughly enrobe each bomb in crushed graham cracker crumbs, ensuring comprehensive and even coverage for a crisp, textured exterior.
- Heating: Warm vegetable oil in a deep skillet to 350F (175C), establishing the ideal temperature for achieving a golden, crispy shell while maintaining a molten interior.
- Frying: Carefully submerge bombs in small batches, rotating gently to promote uniform browning and prevent temperature fluctuations that could compromise cooking quality.
- Draining: Remove fried treats with a slotted spoon, transferring to paper towels to eliminate excess oil and maintain a light, non-greasy texture.
- Finishing: Optionally embellish with a delicate powdered sugar dusting or luxurious chocolate sauce drizzle to elevate visual presentation and flavor complexity.
Notes
- Flatten Carefully: Use gentle, even pressure when stretching biscuit dough to prevent tearing or creating uneven thickness.
- Seal Securely: Pinch dough edges tightly to prevent filling from leaking during frying, which can cause oil splatters and uneven cooking.
- Control Oil Temperature: Maintain consistent 350F heat to ensure crispy exterior without burning or undercooking the bombs.
- Batch Fry Smartly: Avoid overcrowding the skillet to keep oil temperature stable and allow even golden-brown coloration on each bomb.
- Prep Time: 5 minutes
- Cook Time: 10 minutes
- Category: Desserts, Snacks
- Method: Frying
- Cuisine: American
Nutrition
- Serving Size: 9
- Calories: 360
- Sugar: 15 g
- Sodium: 400 mg
- Fat: 20 g
- Saturated Fat: 5 g
- Unsaturated Fat: 15 g
- Trans Fat: 0 g
- Carbohydrates: 40 g
- Fiber: 1 g
- Protein: 4 g
- Cholesterol: 0 mg
John Nicholson
Lead Writer & Recipe Developer
Expertise
Recipe Testing and Development, Kitchen Hacks and Time-Saving Tips, Flavor Pairing and Ingredient Selection, Engaging Food Writing and Storytelling
Education
Johnson & Wales University
John Nicholson honed his skills at Johnson & Wales University, learning how to use fresh, local ingredients and down-to-earth techniques to make cooking simple and satisfying.
His recipes blend Southern comfort flavors with a modern touch, inviting everyone to cook with ease and confidence.
Living in Charleston, John takes cues from the city’s lively food scene, local markets, and seasonal produce. He’s all about making meals stress-free through easy tips, flavor pairings, and fun experiments in the kitchen