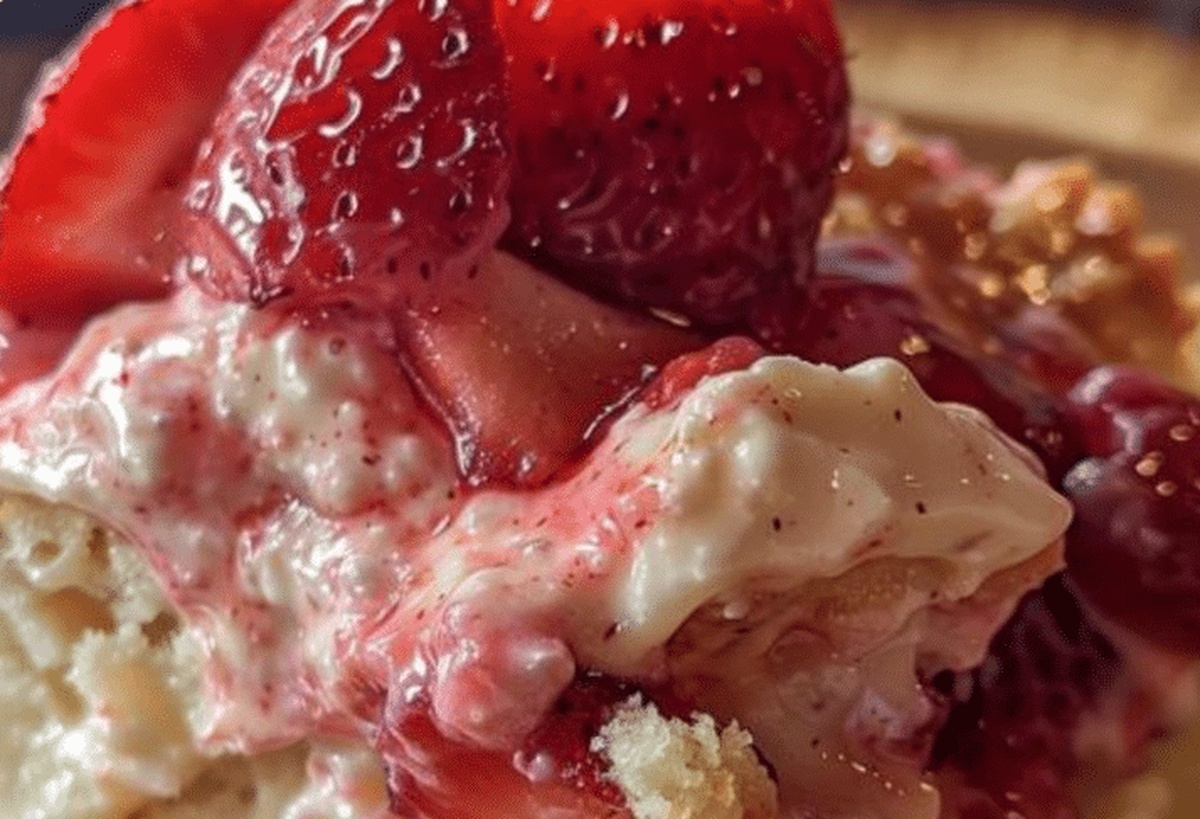
Strawberry Cheesecake Dump Cake Recipe Everyone Loves
Decadent strawberry cheesecake dump cake will make dessert lovers swoon with pure delight.
Sweet berries and creamy cheese create an irresistible combination that melts in your mouth.
Layers of simple ingredients transform into a magical treat that requires minimal effort.
Each bite promises a rich, velvety experience bursting with fruity goodness.
The recipe comes together effortlessly, making it perfect for busy home bakers.
Minimal prep and maximum flavor define this crowd-pleasing dessert.
Prepare to dazzle everyone at the table with this delectable strawberry cheesecake creation.
Quick Recipe Overview
Shopping List for Strawberry Cheesecake Dump Cake
For Strawberry Layer:For Creamy Cheesecake Layer:For Cake and Topping:Tools That Make Dump Cake Dreams Come True
Putting Together Your Cheesecake Dump Cake

Crank your oven to a toasty 350F and get ready for a delicious adventure.
Spray your baking dish with non-stick so nothing sticks behind.
Slather strawberry pie filling across the bottom of your dish, creating a luscious foundation.
Beat cream cheese until silky smooth, then mix in sugar and vanilla for a dreamy blend.
Dollop cream cheese mixture over strawberry filling, gently spreading to create an even blanket.
Sprinkle dry yellow cake mix over the cream cheese layer, covering every delicious inch.
Pour melted butter across the cake mix, ensuring total coverage for a crispy, golden topping.
Pop the dish into the oven and bake 45-50 minutes until the top turns golden and filling bubbles with excitement.
Let the cake rest for 15 minutes, then serve warm with a scoop of vanilla ice cream or dollop of whipped cream.
Tips and Tweaks for a Better Dump Cake
How to Serve Dump Cake Like Dessert Royalty
Make Cheesecake Dump Cake Last a Little Longer
FAQs
Fresh strawberries work, but they’re more watery. Chop and mix them with 2-3 tablespoons of sugar and 1 tablespoon of cornstarch first to help them set properly.
Yes, you can prepare this dump cake a day in advance. Cover and refrigerate before baking, then bake when ready to serve. Just add 5-10 minutes to baking time if going from cold.
White cake mix or vanilla cake mix are perfect substitutes. They’ll create the same crumbly, delicious topping for the dessert.
Look for a golden-brown cake mix top and bubbling edges. When you insert a toothpick near the center, it should come out mostly clean with a few moist crumbs.
Print
Heavenly Strawberry Cheesecake Dump Cake Recipe
- Total Time: 55 minutes
- Yield: 13 1x
Description
Delectable strawberry cheesecake dump cake combines classic dessert flavors in one effortless recipe. Simple ingredients create a luscious treat lovers crave when craving something sweet and indulgent.
Ingredients
- 2 cans (21 oz/595 g) strawberry pie filling
- 1 box (15.25 oz/432 g) yellow cake mix
- 1 cup (2 sticks/227 g) unsalted butter, melted
- 1 package (8 oz/226 g) cream cheese, softened
- ½ cup (100 g) granulated sugar
- 1 tsp vanilla extract
Instructions
- Preparation: Position oven rack centrally and preheat to 350F (175C), ensuring optimal baking conditions for this decadent dessert.
- Foundation Layer: Spray 9×13-inch baking dish with non-stick spray, then evenly spread strawberry pie filling to create a vibrant fruity base.
- Cream Cheese Blend: Whip cream cheese using electric mixer until smooth, gradually integrating sugar and vanilla extract until achieving a luxurious, silky consistency.
- Layering Technique: Gently distribute cream cheese mixture over strawberry filling, ensuring complete and uniform coverage across the entire surface.
- Cake Mix Application: Completely blanket cream cheese layer with dry yellow cake mix, then meticulously drizzle melted butter to saturate the entire cake mix surface, promoting even browning and moisture.
- Baking Process: Slide prepared dish into preheated oven and bake 45-50 minutes until top transforms into a rich golden landscape and filling bubbles enticingly around edges.
- Finishing Touch: Allow dessert to cool and settle for 15 minutes post-baking, then serve warm accompanied by optional whipped cream or vanilla ice cream for ultimate indulgence.
Notes
- Room Temperature Ingredients: Ensure cream cheese and butter are softened to room temperature for smooth, lump-free mixing and easier blending.
- Even Cream Cheese Distribution: Use a spatula or spoon to gently spread cream cheese dollops uniformly across strawberry layer, preventing dense pockets.
- Watch Baking Time Carefully: Check cake around 40-minute mark to prevent over-browning; golden color indicates perfect doneness without burning.
- Gluten-Free Adaptation: Substitute yellow cake mix with gluten-free alternative and verify all ingredients are certified gluten-free for sensitive dietary needs.
- Prep Time: 10 minutes
- Cook Time: 45 minutes
- Category: Desserts
- Method: Baking
- Cuisine: American
Nutrition
- Serving Size: 13
- Calories: 325
- Sugar: 20 g
- Sodium: 350 mg
- Fat: 18 g
- Saturated Fat: 11 g
- Unsaturated Fat: 5 g
- Trans Fat: 0 g
- Carbohydrates: 38 g
- Fiber: 1 g
- Protein: 3 g
- Cholesterol: 45 mg
John Nicholson
Lead Writer & Recipe Developer
Expertise
Recipe Testing and Development, Kitchen Hacks and Time-Saving Tips, Flavor Pairing and Ingredient Selection, Engaging Food Writing and Storytelling
Education
Johnson & Wales University
John Nicholson honed his skills at Johnson & Wales University, learning how to use fresh, local ingredients and down-to-earth techniques to make cooking simple and satisfying.
His recipes blend Southern comfort flavors with a modern touch, inviting everyone to cook with ease and confidence.
Living in Charleston, John takes cues from the city’s lively food scene, local markets, and seasonal produce. He’s all about making meals stress-free through easy tips, flavor pairings, and fun experiments in the kitchen