
Creamy No-Bake Cheesecake Recipe That Always Impresses
Creamy, dreamy cheesecake has a magical way of capturing hearts without ever touching an oven.
My no-bake cheesecake recipe brings delightful simplicity to dessert making for anyone intimidated by traditional baking techniques.
Smooth cream cheese blends effortlessly with sweet ingredients, creating a luxurious texture that melts in your mouth.
Graham cracker crusts provide a crunchy foundation that perfectly complements the silky filling.
Minimal kitchen skills and just a few tools stand between you and this decadent treat.
Chilling allows flavors to meld beautifully, promising a dessert that looks impressive yet requires surprisingly little effort.
Grab a fork and get ready to experience dessert perfection that will make everyone think you trained as a pastry chef.
What Makes The BEST No-Bake Cheesecake Recipe So Loved
What You’ll Need For The BEST No-Bake Cheesecake Recipe
Crust Ingredients:Filling Ingredients:Topping Ingredients:How To Make The BEST No-Bake Cheesecake Recipe Step By Step
Step 1: Prepare Graham Cracker Crust
Crush graham crackers into fine crumbs using a food processor or rolling pin. Mix the crumbs with melted butter until they resemble wet sand. Press the mixture firmly into the bottom of a springform pan, creating an even layer. Refrigerate the crust while preparing the filling.
Step 2: Create Creamy Cheesecake Filling
In a large mixing bowl, beat cream cheese until smooth and creamy. Gradually add powdered sugar, mixing until fully incorporated. Gently fold in whipped cream, creating a light and fluffy texture. Blend in vanilla extract for additional flavor.
Step 3: Combine and Chill Cheesecake
Pour the cream cheese mixture over the chilled graham cracker crust. Smooth the top with a spatula to create an even surface. Cover the pan with plastic wrap and refrigerate for at least 4 hours or overnight.
Step 4: Prepare Fresh Fruit Topping
While the cheesecake is chilling, slice fresh strawberries, blueberries, or your favorite fruits. Arrange the fruits attractively on top of the cheesecake just before serving.
Step 5: Serve and Enjoy
Remove the cheesecake from the refrigerator about 15 minutes before serving. Carefully release the springform pan. Slice with a clean knife and serve chilled. Garnish with additional fresh fruits or a light dusting of powdered sugar if desired.
Helpful Tricks For The BEST No-Bake Cheesecake Recipe
How To Store The BEST No-Bake Cheesecake Recipe Properly
Tasty Pairings For The BEST No-Bake Cheesecake Recipe
Fun Variations On The BEST No-Bake Cheesecake Recipe
Answers To Your Questions About The BEST No-Bake Cheesecake Recipe
While you can substitute low-fat cream cheese and cream, the texture and richness might be slightly different. Full-fat ingredients provide the best flavor and creamy consistency that makes this cheesecake so delightful.
When stored properly in the refrigerator and covered, this no-bake cheesecake can last up to 5 days. Just make sure to keep it chilled and covered to maintain its smooth texture and prevent it from absorbing other refrigerator odors.
Absolutely! This no-bake cheesecake is incredibly simple and foolproof. Even if you’re new to dessert making, you can easily follow the steps and create a professional-looking dessert with minimal cooking skills.
Print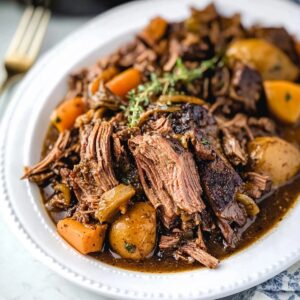
The Best No-Bake Cheesecake Recipe
- Total Time: 10 hours
- Yield: 8 1x
Description
Silky smooth no-bake cheesecake whispers pure dessert elegance with minimal effort and maximum flavor. Creamy philadelphia cream cheese meets graham cracker crust, delivering classic indulgence you can craft in minutes without heating your kitchen.
Ingredients
Main Protein:
- 3.4 lb (1.54 kg) chuck roast
Seasonings and Spices:
- 1 teaspoon salt
- 0.5 teaspoon black pepper
- 1 teaspoon garlic powder
- 1 teaspoon onion powder
- 1 teaspoon dried thyme
- 1 teaspoon dried rosemary
Vegetables and Aromatics:
- 1 yellow onion, sliced
- 4 garlic cloves, minced
- 3 carrots, peeled and cut into chunks
- 3 potatoes, cut into chunks
- 2 tablespoons olive oil
Liquid and Thickening Agents:
- 2 cups beef broth
- 1 tablespoon Worcestershire sauce
- 2 bay leaves
- 2 tablespoons cornstarch
- 0.25 cup cold water
Instructions
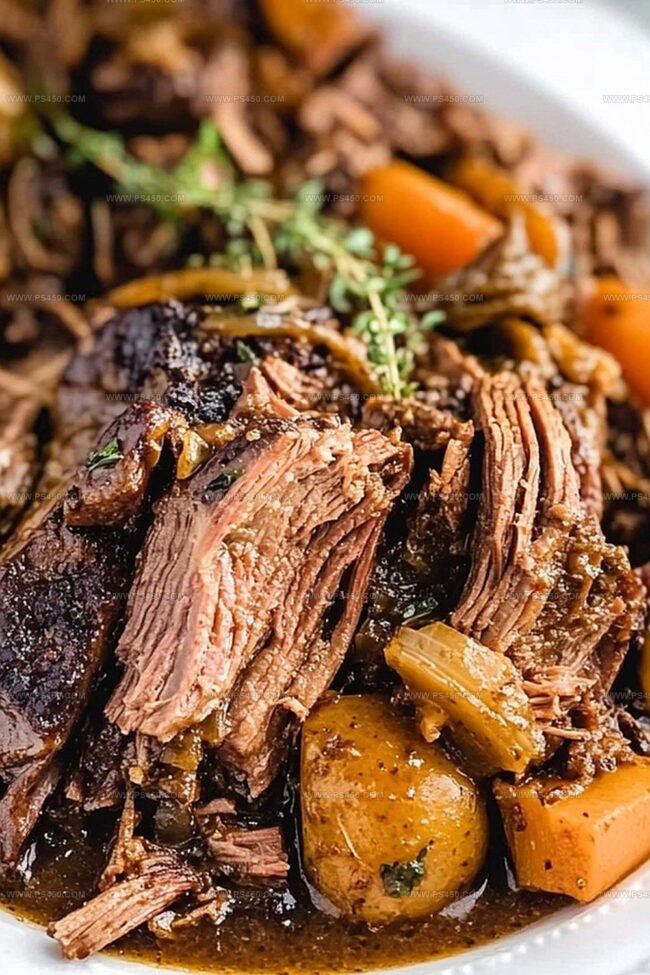
- Prepare the roast by generously coating the chuck with a blend of aromatic seasonings, ensuring an even distribution of salt, pepper, garlic powder, and onion powder.
- Heat olive oil in a heavy-bottomed skillet over medium-high temperature, creating a sizzling surface for optimal caramelization.
- Carefully position the seasoned roast in the hot skillet, searing each side for 3-4 minutes until a rich, golden-brown crust develops, which will lock in the meat’s natural flavors.
- Create a flavorful base in the slow cooker by layering chopped onions, roughly cut carrots, and quartered potatoes to provide a robust foundation for the roast.
- Gently place the perfectly seared roast atop the vegetable bed, allowing it to nestle comfortably.
- Pour a carefully measured combination of beef broth, Worcestershire sauce, and aromatic herbs including thyme, rosemary, and bay leaves around the meat, ensuring complete coverage.
- Secure the slow cooker lid and allow the roast to simmer on LOW for 8-10 hours or HIGH for 5-6 hours, transforming the meat into a tender, melt-in-your-mouth delicacy.
- Once cooking is complete, delicately remove the roast and vegetables, setting them aside while preparing the gravy.
- Create a smooth cornstarch slurry by whisking cold water and cornstarch in a small bowl until completely integrated.
- Stir the slurry into the remaining cooking liquid, allowing it to simmer and thicken for 5-10 minutes, creating a rich, glossy gravy.
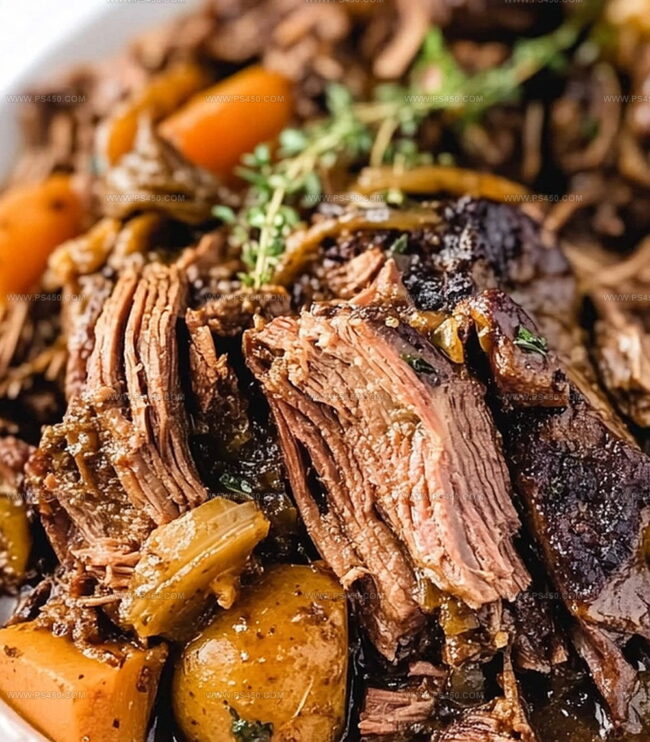
- Shred the roast using two forks, discarding the bay leaves, and gently fold the meat back into the gravy.
- Present the pot roast with a generous drizzle of gravy, optionally garnishing with freshly chopped parsley for a touch of color and freshness.
Notes
- Boost meat tenderness by selecting well-marbled chuck roast with good fat content for maximum flavor and juiciness.
- Searing creates rich caramelization, developing deep brown crust that locks in delicious meaty flavors before slow cooking.
- Avoid lifting crockpot lid during cooking to maintain consistent temperature and prevent moisture loss, ensuring meat remains succulent and perfectly tender.
- Customize vegetable selection by adding celery, parsnips, or sweet potatoes for varied texture and enhanced nutritional profile without compromising traditional pot roast essence.
- Prep Time: 15 minutes
- Cook Time: 8-10 hours (LOW) / 5-6 hours (HIGH)
- Category: Desserts
- Method: Slow Cooking
- Cuisine: American
Nutrition
- Serving Size: 8
- Calories: 591
- Sugar: 5 g
- Sodium: 1446 mg
- Fat: 38.1 g
- Saturated Fat: 17.4 g
- Unsaturated Fat: 20.2 g
- Trans Fat: 0 g
- Carbohydrates: 21.6 g
- Fiber: 3.6 g
- Protein: 47.6 g
- Cholesterol: 161.3 mg
Emily Morgan
Food Critic & Kitchen Tips Specialist
Expertise
Global Food Exploration & Critique, Simple Kitchen Hacks & Time-Saving Tips, Presentation & Plating Techniques, Culinary Research & Storytelling.
Education
New York University
Emily Morgan has journeyed across the globe, collecting culinary secrets that turn everyday ingredients into impressive meals.
Based in Seattle and armed with a Journalism degree from NYU, she blends thorough research with a flair for presentation, ensuring every dish looks just as good as it tastes.
Focusing on fresh flavors, simple methods, and a bit of fun, Emily shows home cooks how to elevate their daily cooking without fancy gadgets or complex steps.