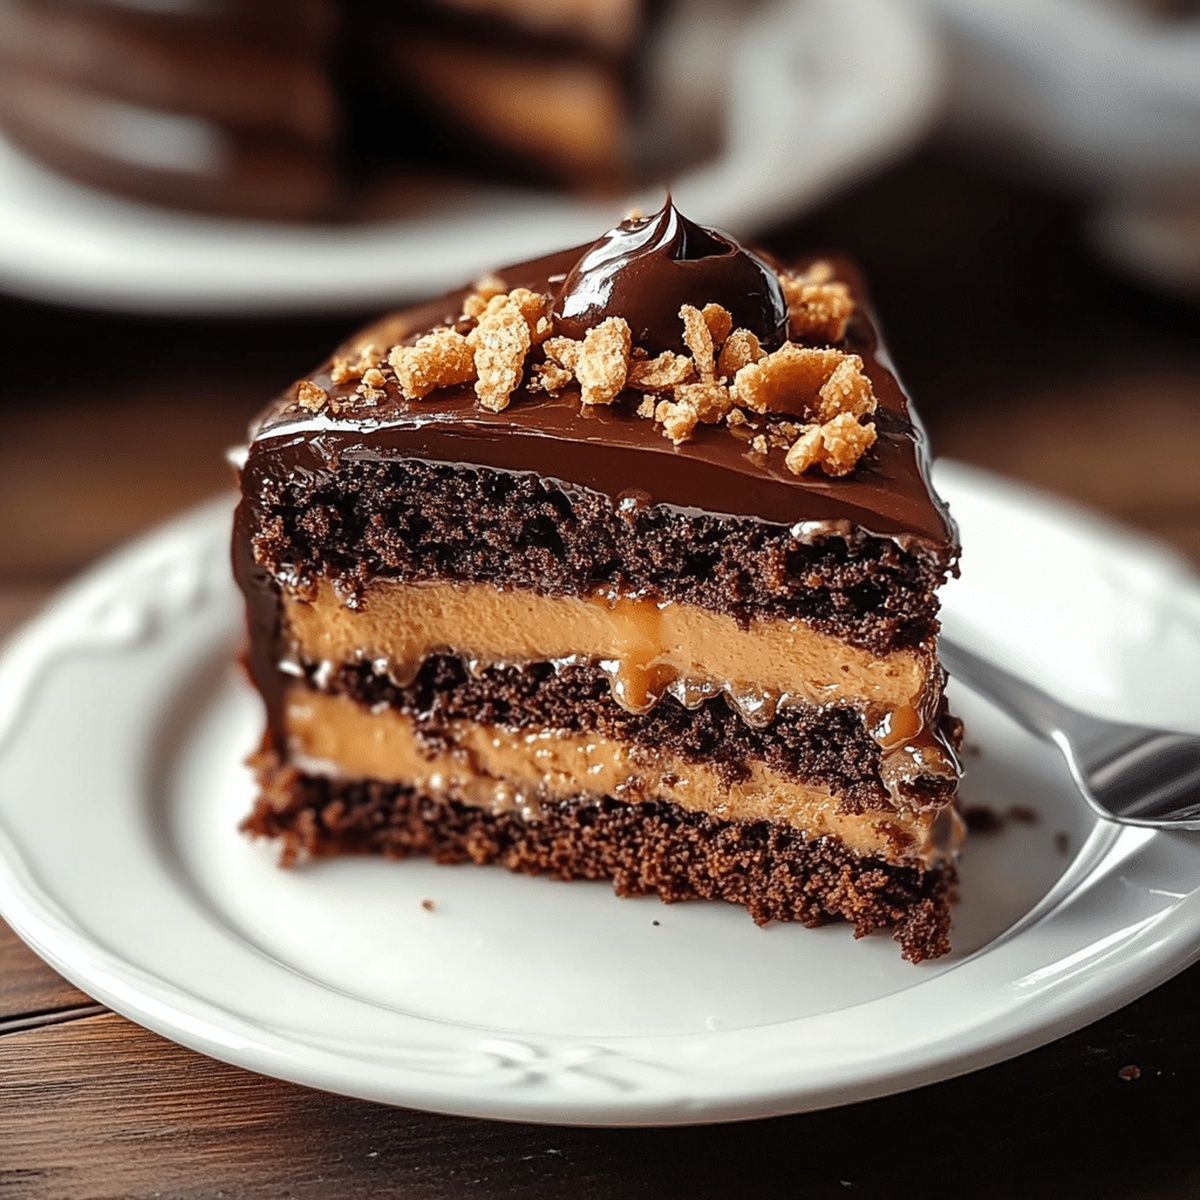
Chocolate Caramel Crunch Cake Recipe for Dessert
Sweet meets decadent in this chocolate caramel toffee crunch cake that promises pure indulgence.
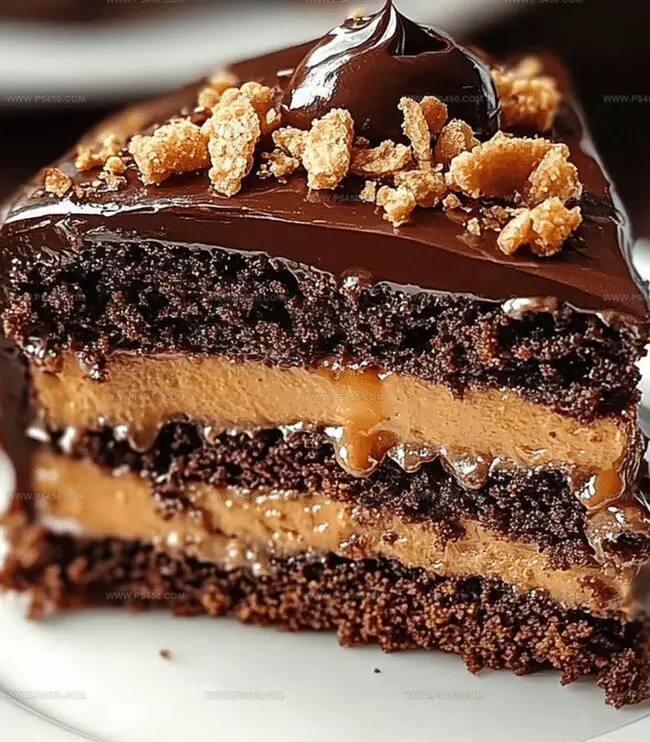
Layer upon layer of rich chocolate melts seamlessly with buttery caramel notes.
Crunchy toffee pieces add a delightful texture that breaks through each velvety bite.
The harmonious blend of flavors creates a dessert that feels both luxurious and comforting.
Every slice tells a story of carefully balanced ingredients dancing together.
Chocolate lovers will swoon over this irresistible masterpiece that elevates the humble cake into a celebrational experience.
Prepare to be seduced by a dessert that turns ordinary moments into extraordinary memories.
Quick Recipe Overview

What Goes Into Chocolate Caramel Toffee Crunch Cake
For Dry Ingredients:For Wet Ingredients:For Topping and Filling Ingredients:Tools That Help This Crunch Cake Turn Heads
How to Bake Chocolate Caramel Toffee Crunch Cake at Home
Crank your oven to a toasty 350F. Prep two cake pans by giving them a light coating of grease or parchment paper.
Toss flour, sugar, cocoa, baking soda, baking powder, and salt into a big bowl. Whisk until everything looks friendly together.
Pour in buttermilk, oil, eggs, and vanilla. Beat the mixture until it looks super smooth and silky. Slowly add hot coffee and mix until the batter looks perfectly blended.
Divide batter between pans and slide into the oven. Bake for about 35 minutes until a toothpick comes out clean. Let cakes rest in pans for 10 minutes, then transfer to a cooling rack.
Heat cream until it’s just bubbling. Pour over chocolate and let sit for 5 minutes. Whisk until glossy and smooth, then stir in butter for extra richness.
Place first cake layer on a serving plate. Drizzle caramel sauce generously. Sprinkle toffee bits and nuts across the layer. Add second cake on top and repeat caramel drizzling.
Pour ganache over the entire cake, letting it cascade down the sides. Scatter remaining toffee bits and nuts on top. Optional: Add extra caramel drizzle for drama.
Refrigerate cake for 30 minutes to set. Bring to room temperature before serving for maximum deliciousness.
Extra Layers or Mix-ins? Here’s How to Elevate It
Serve This Cake When You Want ‘Wow’ on the Table
Keep Your Crunch Cake Just as Perfect Tomorrow
FAQs
The combination of buttermilk, vegetable oil, and hot coffee creates an incredibly tender and moist chocolate cake. The buttermilk adds tanginess and helps break down the flour, while the oil ensures the cake stays soft. Hot coffee deepens the chocolate flavor and makes the batter extra smooth.
For buttermilk, you can mix 1 tablespoon of white vinegar or lemon juice with 1 cup of milk and let it sit for 5 minutes. If you don’t have coffee, use hot water with 1 tablespoon of instant espresso powder. For toffee bits, crushed Heath bars or butterscotch chips work well as alternatives.
Insert a toothpick into the center of the cake. If it comes out clean or with just a few moist crumbs, the cake is done. The cake should also spring back when lightly touched and have a slightly pulled-away edge from the pan. Baking time is typically 30-35 minutes at 350F.
If your ganache isn’t smooth, make sure the cream is just simmering, not boiling, before pouring it over the chocolate. Let it sit undisturbed for a minute to melt the chocolate evenly, then stir gently from the center outward until glossy.
Print
Chocolate-Covered Strawberry Yogurt Clusters Recipe
- Total Time: 1 hour 25 minutes
- Yield: 4 1x
Description
Sweet chocolate-covered strawberry yogurt clusters bring summer’s most romantic dessert into bite-sized bliss. Creamy yogurt, fresh strawberries, and rich chocolate create a delightful treat you can enjoy anytime, anywhere.
Ingredients
Fruits:
- 1 cup fresh strawberries, chopped
Dairy and Sweeteners:
- ½ cup Greek yogurt (vanilla or plain)
- 1 tablespoon honey (optional, for sweetness)
- 1 teaspoon vanilla extract (optional)
Chocolate and Toppings:
- 1 cup dark chocolate chips (or semi-sweet)
- 1 teaspoon coconut oil (for smoother chocolate)
- 1 tablespoon crushed nuts, shredded coconut, or sprinkles (optional)
Instructions
- Prepare a clean workspace and gather all necessary ingredients for crafting delectable chocolate-covered strawberry yogurt clusters.
- Finely dice fresh strawberries into uniform small pieces to ensure even distribution throughout the yogurt mixture.
- Combine chopped strawberries with creamy Greek yogurt, drizzling honey for natural sweetness and adding a splash of vanilla extract to enhance the flavor profile.
- Gently fold the ingredients until thoroughly integrated, creating a harmonious blend of textures and tastes.
- Using a spoon, carefully deposit dollops of the yogurt mixture onto a parchment-lined baking sheet, maintaining consistent size for uniform freezing.
- Transfer the baking sheet to the freezer, allowing the yogurt clusters to solidify completely for approximately one hour.
- Meanwhile, prepare the chocolate coating by selecting high-quality chocolate chips and introducing a small amount of coconut oil to improve melting consistency.
- Utilize microwave techniques, heating the chocolate in short intervals and stirring between each session to prevent burning and achieve a smooth, glossy texture.
- Remove the frozen yogurt clusters from the freezer and prepare for chocolate immersion.
- Delicately dip each cluster into the melted chocolate, ensuring complete and even coverage using a fork or dipping tool.
- Optionally embellish the chocolate-coated clusters with crushed nuts, shredded coconut, or decorative sprinkles for added crunch and visual appeal.
- Return the adorned clusters to the parchment-lined baking sheet and briefly refreeze to set the chocolate coating.
- After approximately 15-20 minutes, the clusters will be ready to consume or can be stored in an airtight container within the freezer for future enjoyment.
Notes
- Opt for fresh, ripe strawberries to maximize the natural sweetness and vibrant flavor of the yogurt clusters.
- Choose full-fat Greek yogurt for a creamier texture and richer taste that holds together better during freezing.
- Use dark chocolate chips for a more intense chocolate flavor and potential antioxidant benefits, which pair wonderfully with the fruity strawberries.
- Experiment with alternative toppings like chia seeds, hemp hearts, or crushed graham crackers for added nutrition and interesting texture contrasts.
- Prep Time: 5 minutes
- Cook Time: 1 hour 20 minutes
- Category: Snacks, Desserts
- Method: Mixing
- Cuisine: American
Nutrition
- Serving Size: 4
- Calories: 300
- Sugar: 22g
- Sodium: 50mg
- Fat: 18g
- Saturated Fat: 10g
- Unsaturated Fat: 8g
- Trans Fat: 0g
- Carbohydrates: 30g
- Fiber: 3g
- Protein: 5g
- Cholesterol: 5mg
John Nicholson
Lead Writer & Recipe Developer
Expertise
Recipe Testing and Development, Kitchen Hacks and Time-Saving Tips, Flavor Pairing and Ingredient Selection, Engaging Food Writing and Storytelling
Education
Johnson & Wales University
John Nicholson honed his skills at Johnson & Wales University, learning how to use fresh, local ingredients and down-to-earth techniques to make cooking simple and satisfying.
His recipes blend Southern comfort flavors with a modern touch, inviting everyone to cook with ease and confidence.
Living in Charleston, John takes cues from the city’s lively food scene, local markets, and seasonal produce. He’s all about making meals stress-free through easy tips, flavor pairings, and fun experiments in the kitchen