3-Ingredient Mounds Bars Recipe with Layers of Flavors
Chocolate and coconut lovers unite over this decadent mounds bars recipe that promises pure indulgence.
Sweet memories of childhood treats flood back with each bite of these homemade coconut delights.
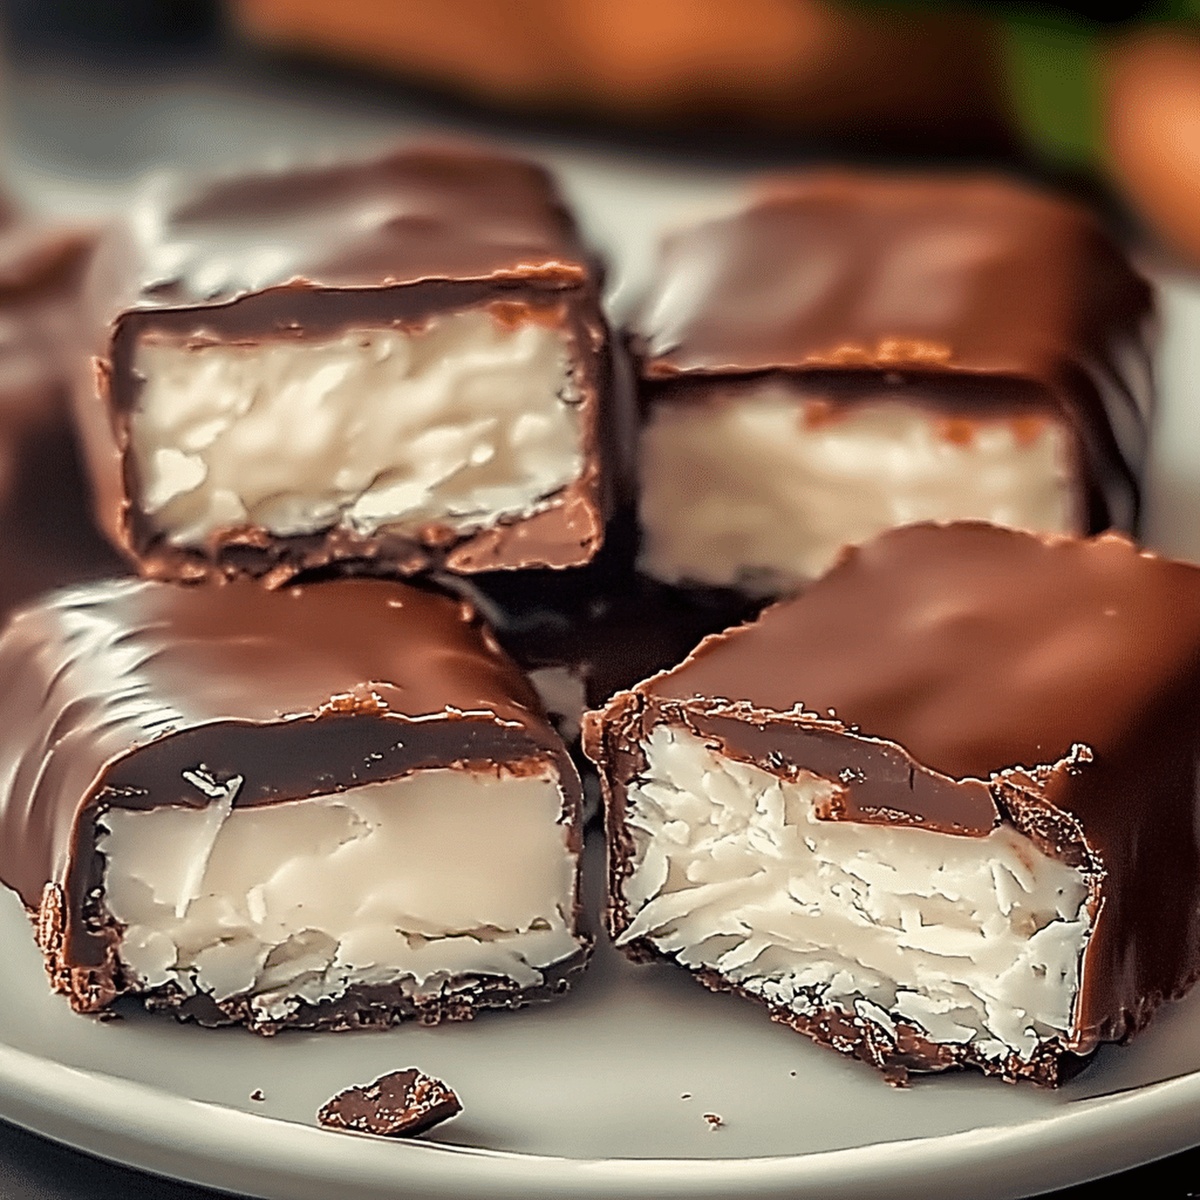
Rich dark chocolate combines perfectly with creamy coconut filling to create a nostalgic dessert.
These bars deliver a simple yet luxurious experience that beats any store-bought candy.
The contrast between smooth chocolate and chewy coconut makes each piece a mini celebration of flavor.
Easy to prepare and even easier to devour, these bars will become your new favorite sweet escape.
One taste will have you falling in love with this classic confection all over again.
Quick Recipe Overview
Inside the 3-Ingredient Mounds Bars
For Coconut Filling:For Chocolate Coating:For Optional Preparation:Tools for Assembling Mounds Bars Easily
How to Build Mounds Bars Without Baking
Mix shredded coconut with sweetened condensed milk until fully blended and sticky.
Use damp hands to craft rectangular bars, then place on parchment-lined tray and freeze briefly to firm up.
Carefully melt chocolate in microwave, stirring between short intervals to achieve smooth consistency.
Gently submerge each coconut bar into melted chocolate, letting excess drip away before setting on parchment.
Allow bars to solidify at room temperature or speed up process by chilling in refrigerator until chocolate hardens completely.
Coconut Bar Flavor Boosts to Try
Presenting Mounds Bars Sweetly
Storage Tips for Mounds Bars That Last
FAQs
Yes, you can use unsweetened coconut, but you’ll need to add some powdered sugar to compensate for the sweetness lost from removing sweetened coconut.
Dark or semi-sweet chocolate works perfectly. Milk chocolate can be used, but it might make the bars overly sweet due to the condensed milk.
When stored in an airtight container in the refrigerator, these bars can last up to 1 week. For best texture, let them sit at room temperature for 5-10 minutes before serving.
While full tempering isn’t required, the method of adding unmelted chocolate to melted chocolate helps create a smoother, shinier chocolate coating that sets more nicely.
Print
Irresistible Mounds Bars Recipe
- Total Time: 40 minutes
- Yield: 13 1x
Description
Coconut-lovers will adore this simple Mounds Bars recipe combining dark chocolate, sweetened condensed milk, and shredded coconut. Quick homemade treats deliver rich tropical flavors for chocolate and coconut enthusiasts craving a delightful dessert.
Ingredients
- 3 cups (720 ml) unsweetened shredded coconut
- 1 can (14 oz / 397 g) sweetened condensed milk
- 15 oz (425 g) dark chocolate (or semi-sweet chocolate)
Instructions
- Coconut Mixture Preparation: Thoroughly blend shredded coconut with sweetened condensed milk in a medium bowl until a cohesive, sticky mixture forms that maintains its shape when compressed.
- Bar Shaping: Moisten hands with water to prevent sticking, then meticulously craft uniform rectangular bars, ensuring each piece is densely packed and symmetrical.
- Initial Chilling: Transfer shaped bars to a parchment-lined tray and freeze for 20 minutes to stabilize structure and optimize chocolate coating adhesion.
- Chocolate Tempering: Melt chocolate in microwave-safe bowl using short intervals, stirring between each to prevent burning, gradually incorporating remaining chocolate to achieve a smooth, glossy consistency.
- Coating Process: Remove frozen bars from freezer and delicately dip each into tempered chocolate using two forks, ensuring complete coverage while allowing excess chocolate to elegantly cascade off.
- Setting and Finishing: Arrange chocolate-coated bars on parchment paper, maintaining spacing to prevent contact, then allow to set at room temperature or expedite chilling in refrigerator until coating hardens with a lustrous finish.
Notes
- Prevent Sticky Hands: Dampen hands with cool water before shaping coconut mixture to avoid messy, clingy preparations.
- Freeze for Perfect Shape: Chill bars for exactly 20 minutes to create a firm base that makes chocolate coating easier and more uniform.
- Master Chocolate Melting: Use short microwave intervals and consistent stirring to prevent chocolate from burning and ensure smooth, glossy texture.
- Strategic Coating Technique: Use two forks when dipping bars into chocolate to achieve clean, even coverage and allow excess chocolate to drip off naturally.
- Prep Time: 20 minutes
- Cook Time: 20 minutes
- Category: Desserts, Snacks
- Method: Freezing
- Cuisine: American
Nutrition
- Serving Size: 13
- Calories: 210
- Sugar: 16 g
- Sodium: 50 mg
- Fat: 12 g
- Saturated Fat: 10 g
- Unsaturated Fat: 2 g
- Trans Fat: 0 g
- Carbohydrates: 27 g
- Fiber: 3 g
- Protein: 2 g
- Cholesterol: 5 mg
John Nicholson
Lead Writer & Recipe Developer
Expertise
Recipe Testing and Development, Kitchen Hacks and Time-Saving Tips, Flavor Pairing and Ingredient Selection, Engaging Food Writing and Storytelling
Education
Johnson & Wales University
John Nicholson honed his skills at Johnson & Wales University, learning how to use fresh, local ingredients and down-to-earth techniques to make cooking simple and satisfying.
His recipes blend Southern comfort flavors with a modern touch, inviting everyone to cook with ease and confidence.
Living in Charleston, John takes cues from the city’s lively food scene, local markets, and seasonal produce. He’s all about making meals stress-free through easy tips, flavor pairings, and fun experiments in the kitchen