
Finger-Licking Peanut Butter Blossoms Recipe For Sweet Smiles
Sweet-toothed bakers adore this classic chocolate peanut butter blossoms that never fail to delight.
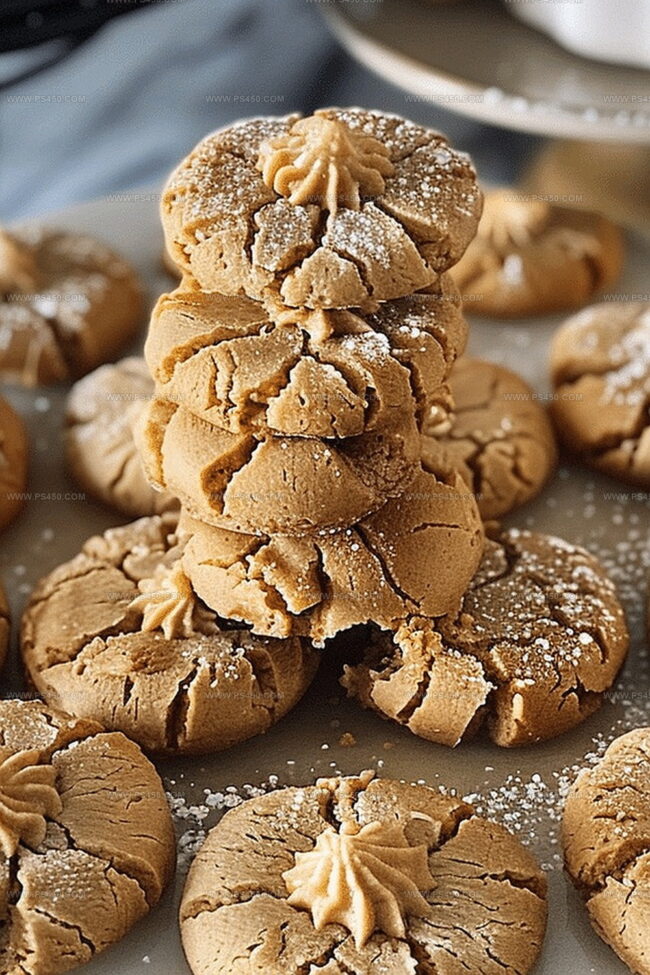
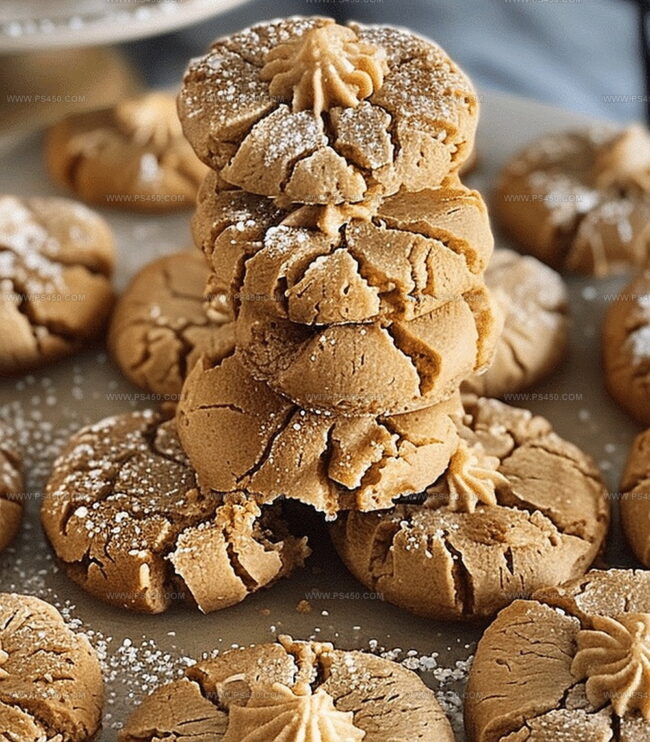
Soft, crumbly cookies with a perfect chocolate kiss nestled in the center create a mouthwatering treat.
These homemade delights bring comfort and nostalgia to every bite.
The simple ingredients come together quickly, making them ideal for last-minute dessert cravings.
Sugar-coated and golden brown, each cookie offers a delightful balance of rich peanut butter and smooth chocolate.
You’ll want to have milk nearby when enjoying these tempting morsels.
Prepare to fall in love with this crowd-pleasing cookie that promises pure deliciousness.
Quick Recipe Overview
Peanut Butter Blossom Ingredient Guide
For Base and Structure:For Richness and Flavor:For Moisture and Binding:For Topping and Decoration:Kitchen Tools for Perfect Cookie Centers
Baking Instructions for Peanut Butter Blossoms
Crank the oven to a toasty 375F and line baking sheets with parchment paper, creating the perfect stage for delicious cookie.
Blend butter, peanut butter, and sugars until they transform into a creamy cloud. Splash in egg, milk, and vanilla, mixing until everything hugs together smoothly.
Gently fold dry ingredients into the wet mixture, creating a soft, irresistible dough that promises sweet adventure.
Roll dough into bite-sized balls, give them a sugar bath, and place them on baking sheets with breathing room between each delightful morsel.
Slide cookies into the oven for 8-10 minutes until edges look perfectly golden. Pull them out and crown each cookie with a chocolate Kiss, watching them crack and welcome their chocolatey companion.
Let cookies rest briefly on the baking sheet, then transfer to a cooling rack. Get ready to enjoy a melt-in-your-mouth sensation that’ll make taste buds dance with joy.
Additions That Complement the Hershey Top
Serve Blossoms with Milk or Coffee
Store Blossoms Without Cracking the Chocolate
FAQs
Natural peanut butter works, but it might make your cookies less stable. Stick to traditional creamy peanut butter for the best texture and consistent results.
The warm cookie helps the chocolate kiss melt slightly and adhere perfectly to the surface. This technique ensures the chocolate stays in place and creates a beautiful presentation.
Chill the dough for 30 minutes before shaping and baking. Cold dough helps cookies maintain their shape and prevents excessive spreading. Also, make sure your butter isn’t too soft when creaming.
Yes, you can! Roll the dough into balls, place them on a baking sheet, and freeze. Once frozen, transfer to a freezer bag. When ready to bake, add an extra 2-3 minutes to the baking time without thawing.
Print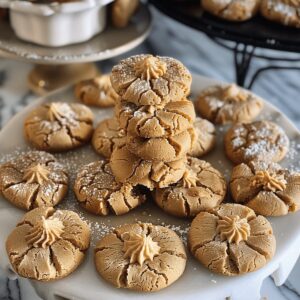
Irresistible Peanut Butter Blossoms Recipe
- Total Time: 25 minutes
- Yield: 25 1x
Description
Irresistible peanut butter blossoms showcase classic cookie charm with rich nutty dough and signature chocolate kiss center. Chocolate and peanut butter lovers will savor this simple, delightful treat that brings nostalgic comfort in each sweet bite.
Ingredients
- ½ cup (4 oz) unsalted butter, softened
- ½ cup (4.2 oz) creamy peanut butter
- ½ cup (100g) granulated sugar (plus extra for rolling)
- ½ cup (110g) brown sugar, packed
- 1 large egg
- 1 ¾ cups (7.8 oz) all-purpose flour
- 2 tablespoons (30 ml) milk
- 1 teaspoon vanilla extract
- 1 teaspoon baking soda
- ½ teaspoon salt
- 24–30 Hershey’s Kisses, unwrapped
Instructions
- Preparation: Align all ingredients and equipment, creating an organized baking workspace for efficient cookie crafting.
- Creaming: Whip butter, peanut butter, and sugars in a large mixing bowl until light, fluffy, and fully integrated, ensuring no lumps remain.
- Liquid Integration: Introduce egg, milk, and vanilla extract, blending thoroughly to create a smooth, homogeneous mixture that glistens with potential.
- Dry Mixture: Combine flour, baking soda, and salt in a separate bowl, whisking to distribute leavening agents evenly throughout the dry ingredients.
- Dough Formation: Gradually merge dry ingredients into wet mixture, folding gently to prevent overworking, resulting in a soft, pliable cookie dough.
- Shaping: Form consistent dough balls, rolling between palms and coating each in granulated sugar to create a sparkling, caramelizable exterior.
- Baking Preparation: Position sugared dough spheres on parchment-lined baking sheets, spacing them to allow proper spreading and heat circulation.
- Oven Transformation: Bake in a preheated oven until cookie edges turn golden and centers remain tender, typically requiring 10-12 minutes at 375°F.
- Chocolate Embellishment: Immediately after removing from oven, gently press a Hershey’s Kiss into the center of each warm cookie, allowing chocolate to slightly melt.
- Cooling and Serving: Transfer cookies to a wire rack, allowing complete cooling and chocolate to set, creating the classic peanut butter blossom texture and appearance.
Notes
- Prevent Overmixing: Stir dry ingredients into wet mixture gently to maintain a tender, soft cookie texture without developing tough gluten strands.
- Sugar Coating Technique: Roll dough balls completely in granulated sugar for a crisp, caramelized exterior that adds delightful crunch and sweet shimmer.
- Chocolate Kiss Placement: Press Hershey’s Kiss immediately after removing cookies from oven while still hot, allowing chocolate to slightly melt and perfectly adhere to cookie surface.
- Temperature Control: Let cookies cool on baking sheet for a few minutes before transferring to wire rack, ensuring structural integrity and preventing potential crumbling.
- Prep Time: 15 minutes
- Cook Time: 10 minutes
- Category: Desserts, Snacks
- Method: Baking
- Cuisine: American
Nutrition
- Serving Size: 25
- Calories: 160
- Sugar: 10g
- Sodium: 90mg
- Fat: 8g
- Saturated Fat: 3.5g
- Unsaturated Fat: 4g
- Trans Fat: 0g
- Carbohydrates: 22g
- Fiber: 1g
- Protein: 3g
- Cholesterol: 15mg
John Nicholson
Lead Writer & Recipe Developer
Expertise
Recipe Testing and Development, Kitchen Hacks and Time-Saving Tips, Flavor Pairing and Ingredient Selection, Engaging Food Writing and Storytelling
Education
Johnson & Wales University
John Nicholson honed his skills at Johnson & Wales University, learning how to use fresh, local ingredients and down-to-earth techniques to make cooking simple and satisfying.
His recipes blend Southern comfort flavors with a modern touch, inviting everyone to cook with ease and confidence.
Living in Charleston, John takes cues from the city’s lively food scene, local markets, and seasonal produce. He’s all about making meals stress-free through easy tips, flavor pairings, and fun experiments in the kitchen