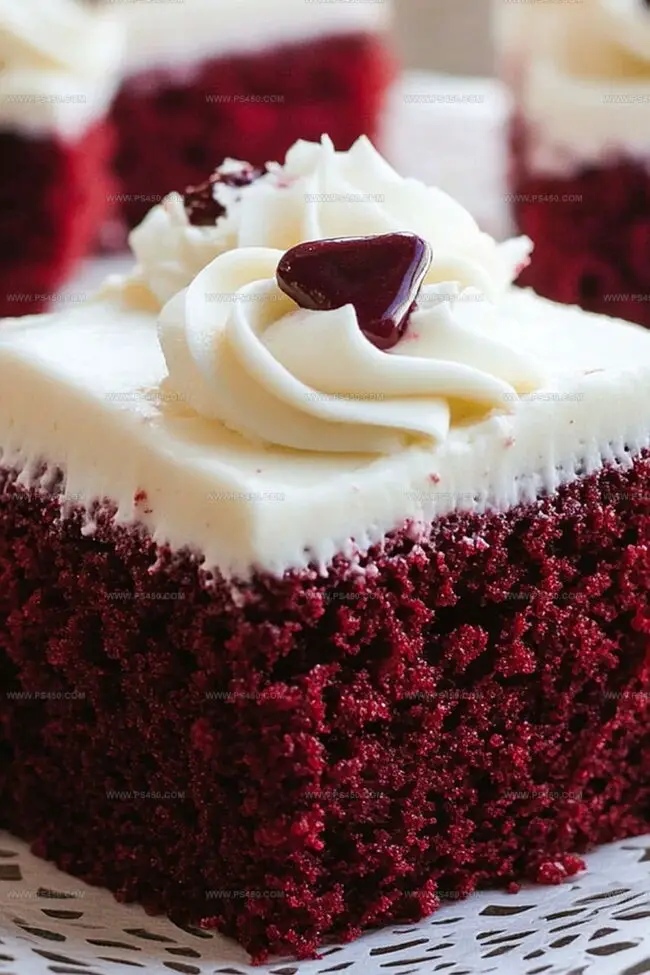
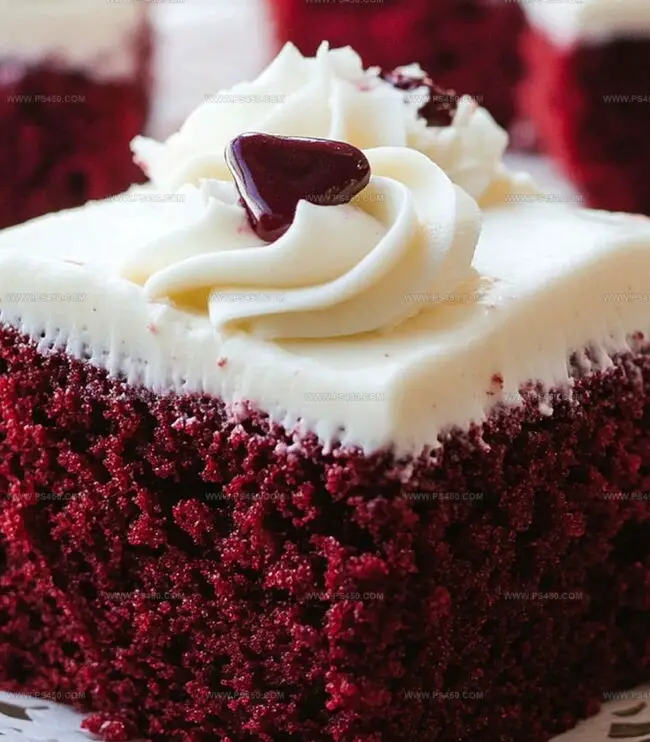
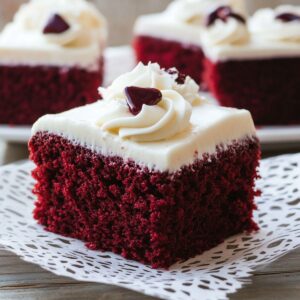
Decadent and rich, this red velvet cake takes dessert to a whole new level of deliciousness.
Layers of deep crimson cake with a velvety red velvet texture promise an indulgent experience.
The subtle cocoa undertones blend perfectly with the smooth cream cheese frosting.
Each slice offers a luxurious balance of flavor and texture that melts in your mouth.
The vibrant color and tender crumb make this cake a showstopper at any gathering.
Topped with creamy frosting, this dessert transforms an ordinary moment into something extraordinary.
You’ll fall in love with every single bite of this classic Southern treat.
Quick Recipe Overview
Prep Time: 25 minutes
Cook Time: 35 minutes
Total Time: 1 hour
Calories: 540 kcal
Servings: 13
Ingredients That Build Red Velvet Cake Bliss
For Dry Ingredients:
All-Purpose Flour: Provides sturdy structure and tender crumb for the cake’s foundation.
Cocoa Powder: Delivers rich chocolate undertones and deep color to the red velvet profile.
Baking Soda: Helps cake rise and creates light, airy texture.
Salt: Enhances overall flavor and balances sweetness.
For Wet Ingredients:
Buttermilk: Creates tangy flavor and ensures incredibly moist cake texture.
Vegetable Oil: Keeps cake incredibly soft and prevents dryness.
Eggs: Bind ingredients together and add richness.
Vanilla Extract: Brings subtle, warm depth to the cake’s flavor.
Red Food Coloring: Provides signature vibrant red hue.
White Vinegar: Activates baking soda and adds subtle tanginess.
For Frosting Ingredients:
Cream Cheese: Creates smooth, luxurious base with signature tangy flavor.
Unsalted Butter: Adds richness and helps stabilize frosting.
Powdered Sugar: Sweetens and thickens frosting to perfect consistency.
Vanilla Extract: Rounds out frosting’s flavor profile.
Salt: Balances sweetness and enhances overall taste.
Gear You’ll Need For Red Velvet Cake Magic
Large mixing bowl: Perfect for combining ingredients smoothly.
Medium bowl: Ideal for whisking dry ingredients together.
Small bowl: Great for mixing buttermilk and liquid ingredients.
9-inch round cake pans: Essential for baking cake layers evenly.
Electric mixer: Helps beat ingredients to right consistency.
Whisk: Useful for blending dry ingredients thoroughly.
Measuring cups and spoons: Necessary for accurate ingredient amounts.
Toothpick: Helps check cake doneness by inserting into center.
Wire cooling rack: Allows cakes to cool completely without getting soggy.
Spatula: Great for spreading batter and frosting smoothly.
Parchment paper: Optional but helpful for easy cake removal.
Steps To Bake Red Velvet Cake Easily
Warm Up the Oven Prepare your baking space by heating the oven and getting pans ready. Grease two round cake pans and set them aside.
Create the Dry Blend Combine flour, cocoa powder, baking soda, and salt in a mixing bowl. Whisk these ingredients until they’re perfectly mixed.
Prepare the Liquid Mix Stir buttermilk, vinegar, and vanilla extract together in a separate container. This magical liquid will help create a smooth texture.
Whip Up the Base Mix sugar and oil until they form a smooth consistency. Add eggs one at a time, blending thoroughly after each addition.
Add Some Color Splash in the red food coloring and mix until the batter looks vibrant and even.
Combine the Mixtures Gently fold dry ingredients into the wet mixture, alternating with the buttermilk blend. Mix carefully to keep the batter light and fluffy.
Fill the Pans Divide the batter evenly between cake pans, smoothing the tops for a perfect finish.
Bake to Perfection Place pans in the oven and bake until a toothpick comes out clean, typically 30-35 minutes.
Cool and Rest Let cakes sit in pans for 10 minutes, then transfer to wire racks to cool completely.
Craft the Frosting Blend cream cheese and butter until smooth. Add vanilla and salt, then gradually mix in powdered sugar until fluffy.
Decorate and Assemble Once cakes are cool, spread frosting between layers and cover the entire cake.
Chill and Serve Refrigerate for 30 minutes to set the frosting before slicing and enjoying.
Tips To Make Red Velvet Cake Stand Out
Color Intensity Tips: Experiment with gel food coloring for a more vibrant red without affecting cake batter consistency.
Texture Perfection Hack: Ensure ingredients are at room temperature to create smoother, more even cake layers with better rise.
Dairy-Free Adaptation: Substitute buttermilk with almond milk mixed with apple cider vinegar and use vegan cream cheese for frosting to make the recipe plant-based friendly.
Make-Ahead Strategy: Wrap unfrosted cake layers in plastic wrap and refrigerate for up to 2 days or freeze for 1 month to streamline cake preparation.
Decoration Options: Sprinkle cake sides with crushed pecans or red velvet cake crumbs for elegant texture and visual appeal.
How To Serve Red Velvet Cake Sweetly
Celebration Centerpiece: Create a stunning dessert table focal point by placing the red velvet cake on an elegant cake stand, surrounded by fresh berries and delicate chocolate shavings.
Romantic Date Night Dessert: Slice individual pieces onto beautiful plates, garnish with a light dusting of cocoa powder, and serve with a scoop of vanilla bean ice cream for an extra touch of indulgence.
Afternoon Tea Companion: Pair each slice with a warm cup of Earl Grey tea or rich hot chocolate, allowing the cake’s velvety texture to complement the smooth beverage and create a delightful sensory experience.
Party Perfect Presentation: Decorate the cake edges with crushed red velvet cake crumbs or add elegant white chocolate curls on top for a sophisticated and visually appealing finishing touch.
Keep Red Velvet Cake Fresh And Soft
Smart Storage Solutions: Keep cake covered in an airtight container at room temperature for 2-3 days.
Refrigeration Magic: Store frosted cake in the refrigerator for up to 5 days, protecting it from drying out by wrapping loosely with plastic wrap.
Freezing Technique: Wrap individual cake layers or whole cake tightly in plastic wrap, then aluminum foil. Freeze for up to 3 months for future enjoyment.
Make-Ahead Strategy: Prepare cake layers in advance, cool completely, and store wrapped at room temperature for 1 day before assembling and frosting.
Red velvet cake emerges as a Southern classic with deep chocolate undertones and cream cheese frosting. Bakers can create this elegant dessert with simple ingredients and careful mixing techniques, promising a rich, memorable experience.
Ingredients
Scale
2 ½ cups (595 ml) all-purpose flour
1 ½ cups (300 g) granulated sugar
1 cup (240 ml) vegetable oil
1 cup (240 ml) buttermilk
2 large eggs
1 oz (28 g) red food coloring
2 tbsps unsweetened cocoa powder
1 tsp baking soda
½ tsp salt
1 tbsp white vinegar
1 tsp vanilla extract
8 oz (226 g) cream cheese
½ cup (113 g) unsalted butter
4 cups (480 g) powdered sugar
1 tsp vanilla extract
1 pinch salt
Instructions
Preheat Oven: Warm the oven to 350F (175C) and prepare cake pans by greasing and lining with parchment paper.
Mix Dry Components: Whisk flour, cocoa powder, baking soda, and salt in a medium bowl to create a uniform dry base.
Prepare Liquid Mixture: Combine buttermilk, vinegar, and vanilla extract in a separate container, ensuring thorough integration.
Create Batter Foundation: Cream sugar and oil in a large bowl until smooth, then add eggs one at a time, blending completely after each incorporation.
Color and Combine: Introduce red food coloring for vibrant crimson hue, then gently fold dry ingredients into wet mixture in three stages, alternating with buttermilk mixture to maintain delicate texture.
Bake Layers: Evenly distribute batter between prepared pans, smoothing surfaces, and bake for 30-35 minutes until a toothpick inserted in the center comes out clean.
Cool and Rest: Allow cakes to sit in pans for 10 minutes, then transfer to wire racks for complete cooling.
Craft Frosting: Whip cream cheese and butter until silky, then blend in vanilla and salt. Gradually add powdered sugar, beating until light and fluffy.
Assemble and Finish: Once cakes are completely cool, apply frosting between layers and along exterior surfaces. Refrigerate for 30 minutes to stabilize frosting and enhance slice precision.
Notes
Control Color Intensity: Use gel food coloring for deeper, more vibrant red without altering batter consistency, avoiding watery texture that might impact cake’s structure.
Prevent Dry Cake: Avoid overmixing batter to maintain moisture; mix just until ingredients combine to keep cake tender and soft, stopping when no flour streaks remain.
Temperature Precision: Ensure buttermilk and eggs are room temperature for smoother blending and more even cake rise, preventing potential lumpy or uneven baking.
Frosting Stability: Chill cream cheese and butter before whipping to create firmer, more stable frosting that spreads cleanly and holds cake layers together without sliding.
Recipe Testing and Development, Kitchen Hacks and Time-Saving Tips, Flavor Pairing and Ingredient Selection, Engaging Food Writing and Storytelling
Education
Johnson & Wales University
Program: Bachelor of Science in Culinary Arts
Focus: A hands-on curriculum emphasizing farm-to-table cooking, local ingredient sourcing, and creative menu development. Students gained real-world restaurant experience, learning both classic techniques and modern approaches to sustainable cooking.
John Nicholson honed his skills at Johnson & Wales University, learning how to use fresh, local ingredients and down-to-earth techniques to make cooking simple and satisfying.
His recipes blend Southern comfort flavors with a modern touch, inviting everyone to cook with ease and confidence.
Living in Charleston, John takes cues from the city’s lively food scene, local markets, and seasonal produce. He’s all about making meals stress-free through easy tips, flavor pairings, and fun experiments in the kitchen

John Nicholson
Lead Writer & Recipe Developer
Expertise
Recipe Testing and Development, Kitchen Hacks and Time-Saving Tips, Flavor Pairing and Ingredient Selection, Engaging Food Writing and Storytelling
Education
Johnson & Wales University
John Nicholson honed his skills at Johnson & Wales University, learning how to use fresh, local ingredients and down-to-earth techniques to make cooking simple and satisfying.
His recipes blend Southern comfort flavors with a modern touch, inviting everyone to cook with ease and confidence.
Living in Charleston, John takes cues from the city’s lively food scene, local markets, and seasonal produce. He’s all about making meals stress-free through easy tips, flavor pairings, and fun experiments in the kitchen