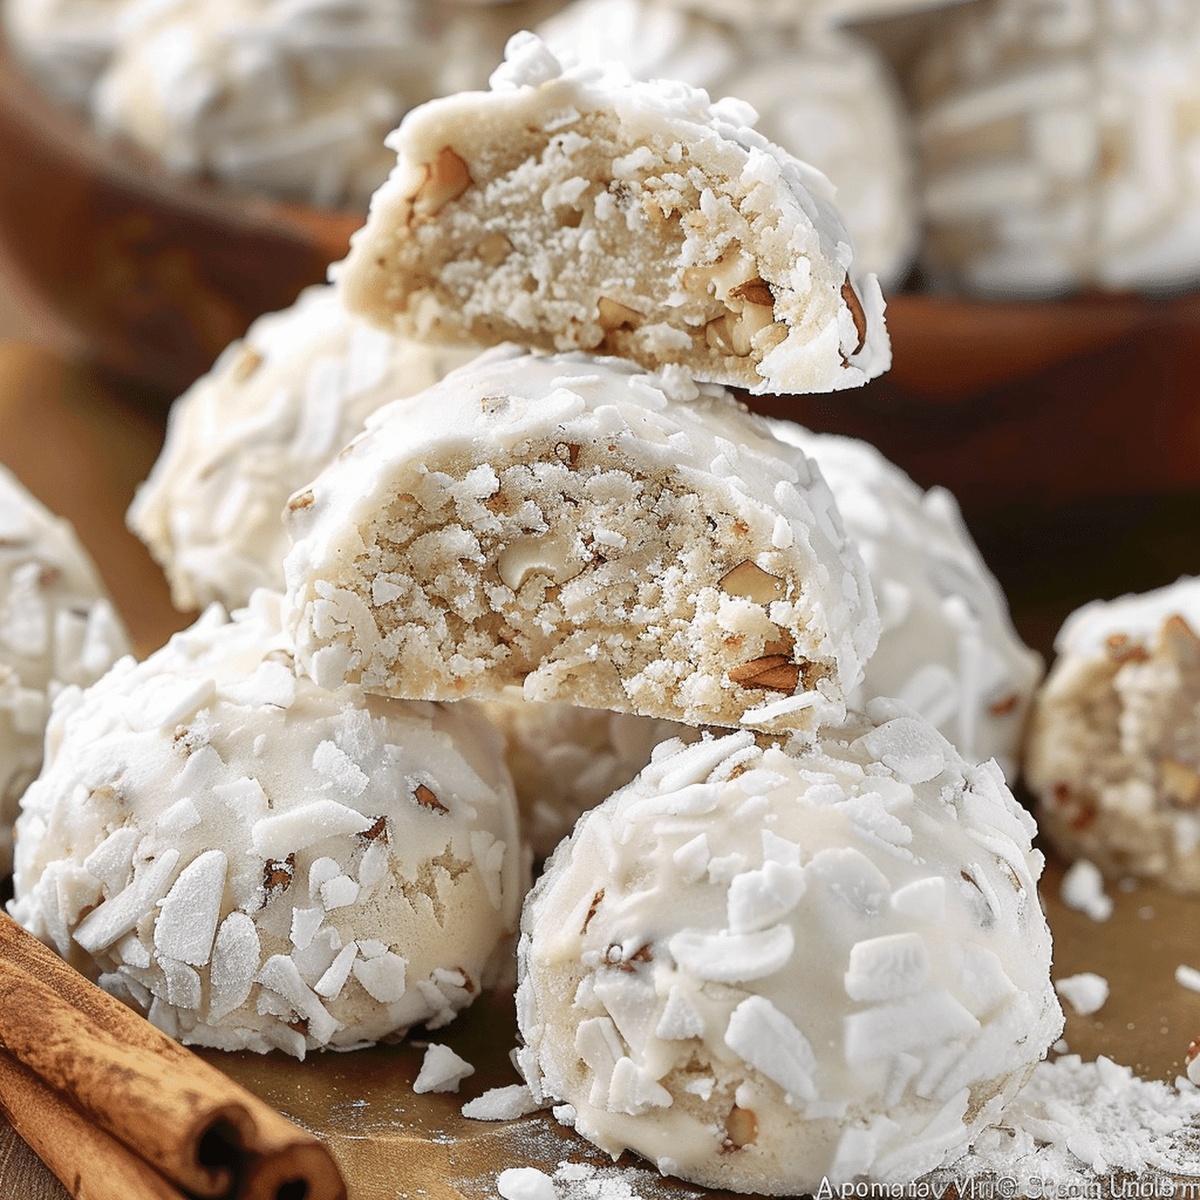
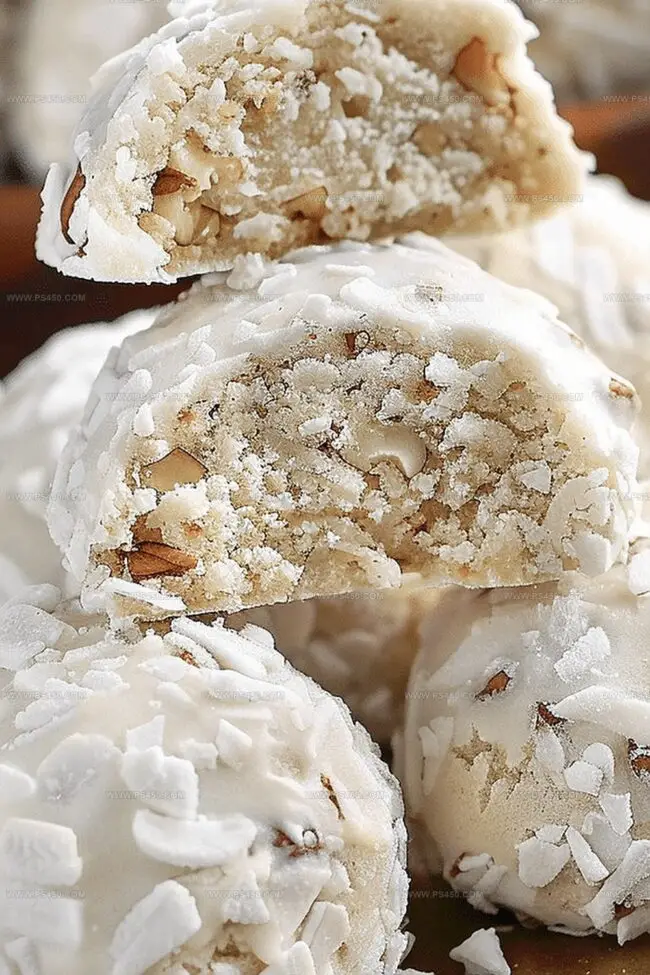
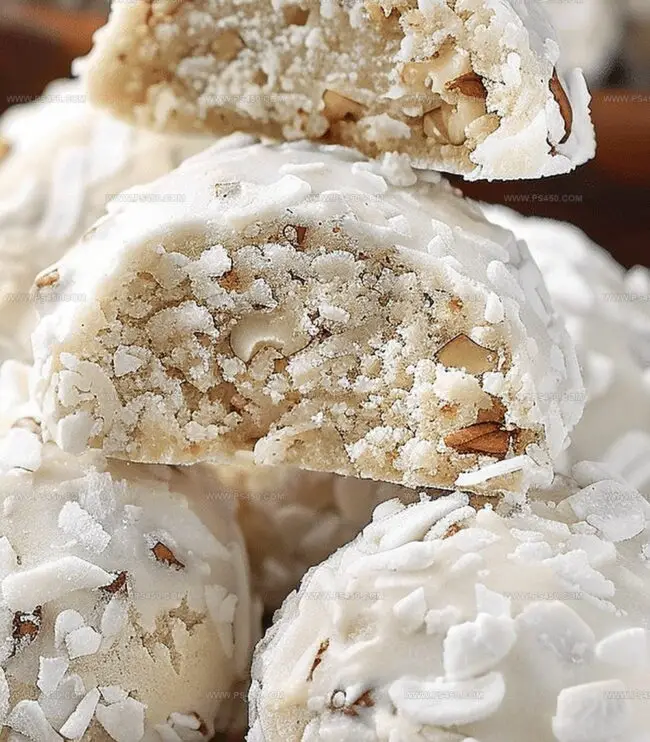
Melt-in-Your-Mouth Pecan Snowball Cookies Recipe

Blissful Pecan Snowball Cookies Recipe: Heavenly Bites

These delightful pecan snowball cookies crumble with a buttery texture that melts in your mouth like winter’s first gentle snowfall.

Rich, nutty pecans add depth and warmth to each delicate bite.

Powdered sugar coats these tender morsels, creating a stunning winter-white appearance that sparkles like freshly fallen snow.

The classic Southern recipe brings comfort and sweetness to any gathering.

Simple ingredients transform into magical treats that dance between crisp and soft textures.

Each cookie promises a moment of pure, sweet bliss.

Bake a batch and watch smiles bloom across eager faces.

Quick Recipe Overview

Prep Time: 15 minutes

Cook Time: 15 minutes

Total Time: 30 minutes

Calories: 132 kcal

Servings: 25

Buttery Pecan Snowball Cookies: Ingredients Breakdown

For Cookie Base:
  • All-Purpose Flour: Provides sturdy structure and delicate texture for classic snowball cookies.
  • Powdered Sugar: Creates a soft, melt-in-your-mouth sweetness with fine, delicate consistency.
  • Salt: Enhances overall flavor and balances the sweetness of the cookie.
For Nutty Richness:
  • Pecans: Adds warm, toasty crunch and deep nutty flavor to complement the sweet base.
  • Unsalted Butter: Delivers rich, creamy foundation with smooth, luxurious mouthfeel.
For Coating and Finishing:
  • Powdered Sugar: Creates signature snowy exterior that gives these cookies their classic snowball appearance.
  • Vanilla Extract: Introduces subtle, aromatic depth and rounds out the cookie's flavor profile.

Essential Tools for Buttery Pecan Snowball Cookies

  • Large mixing bowl: Essential for combining dry and wet ingredients smoothly.
  • Electric mixer or stand mixer: Helps cream butter and sugar quickly and evenly.
  • Measuring cups and spoons: Precise measurements ensure perfect cookie texture.
  • Baking sheet: Provides even heat distribution for golden cookies.
  • Parchment paper or silicone baking mat: Prevents cookies from sticking and ensures easy cleanup.
  • Wire cooling rack: Allows cookies to cool evenly and maintain crisp texture.
  • Small bowl: Useful for powdered sugar coating.
  • Spatula or wooden spoon: Helps mix ingredients thoroughly.

How to Make Buttery Pecan Snowball Cookies

  • Warm Up the Kitchen Prep your oven to a cozy 350 degrees, getting ready for some delightful cookie.
  • Set the Stage Line a baking sheet with parchment paper or a silicone mat, creating the perfect landing spot for your soon-to-be amazing snowball cookies.
  • Blend the Base In a spacious mixing bowl, cream together butter and powdered sugar until they become light and fluffy, creating a dreamy foundation for your cookies.
  • Build Your Dough Gently fold in flour, vanilla, and finely chopped pecans, mixing until a soft and crumbly dough forms that's begging to be shaped.
  • Shape with Love Roll the dough into small, delicate balls about the size of a walnut, placing them carefully on your prepared baking sheet with plenty of breathing room.
  • Bake to Perfection Slide the baking sheet into the preheated oven and let the cookies transform for 12-15 minutes, watching for those delicate golden edges that signal they're almost done.
  • Powder and Pamper Once cooled slightly but still warm, roll each cookie generously in powdered sugar, creating that signature snowy look that makes these treats irresistible.
  • Serve with Joy Transfer your beautiful snowball cookies to a serving plate, ready to melt hearts and delight taste buds with their buttery, nutty goodness.

Pro Tips for Buttery Pecan Snowball Cookies

  • Roll warm cookies twice in powdered sugar for a thicker, more elegant coating that melts in your mouth.
  • Prepare cookie dough up to 3 days in advance and store in the refrigerator, allowing for stress-free holiday baking.
  • Swap all-purpose flour with gluten-free flour blend for those with wheat sensitivities, ensuring everyone can enjoy these delightful treats.
  • Lightly toast pecans before chopping to enhance their rich, nutty flavor and add extra depth to the cookie's overall taste profile.
  • Store cooled snowball cookies in an airtight container between layers of parchment paper for up to a week, maintaining their delicate texture and powdery charm.

Serve Buttery Pecan Snowball Cookies Like a Pro

  • Festive Holiday Platter: Arrange snowball cookies on a decorative ceramic plate with a light dusting of powdered sugar, creating a winter wonderland effect perfect for Christmas gatherings.
  • Sweet Tea Pairing: Serve these delicate cookies alongside a warm cup of Earl Grey or chai tea, allowing the buttery pecan flavor to complement the aromatic beverage.
  • Gift-Worthy Presentation: Package the cookies in clear cellophane bags tied with a rustic ribbon, making them an elegant homemade gift for neighbors, teachers, or holiday hosts.
  • Dessert Companion: Crumble a few cookies over vanilla ice cream or use them as a delightful side to a classic chocolate mousse for an extra textural treat.

Storing & Meal Planning for Buttery Pecan Snowball Cookies

  • Keep cookies in an airtight container at room temperature for up to 5 days, maintaining their delicate texture and rich flavor.
  • Wrap unbaked cookie dough balls in plastic wrap, then store in a freezer-safe bag for up to 3 months. Bake directly from frozen, adding 2-3 extra minutes to cooking time.
  • Before serving, dust cookies with fresh powdered sugar to restore their classic snowball appearance and add a festive visual appeal.
  • Prepare cookie dough 2-3 days in advance and refrigerate, allowing flavors to develop and making party prep easier and stress-free.

FAQs

  • What are snowball cookies made of?

These classic holiday treats are made with simple ingredients like butter, powdered sugar, flour, vanilla extract, and chopped pecans. They’re rolled in powdered sugar to create their signature snowy white appearance.

  • Are snowball cookies hard to make?

Not at all! They’re one of the easiest cookies to prepare. You mix the ingredients, form into balls, bake, and then roll in powdered sugar while still warm. Even beginner bakers can successfully make these delicious cookies.

  • Can I use different nuts in this recipe?

Absolutely! While pecans are traditional, you can substitute with walnuts, almonds, or even leave out nuts entirely if you have allergies. Each nut will give a slightly different flavor and texture to the cookies.

  • Why do these cookies melt in your mouth?

The high butter content and the powdered sugar create a tender, crumbly texture that literally dissolves on your tongue. The delicate, buttery base combined with the coating of powdered sugar makes them incredibly light and soft.

Print
clock clock iconcutlery cutlery iconflag flag iconfolder folder iconinstagram instagram iconpinterest pinterest iconfacebook facebook iconprint print iconsquares squares iconheart heart iconheart solid heart solid icon
Gooey Biscoff Flapjack Recipe

Gooey Biscoff Flapjack Recipe


5 Stars 4 Stars 3 Stars 2 Stars 1 Star

4.7 from 34 reviews

  • Total Time: 35 minutes
  • Yield: 13 1x

Description

Biscoff flapjack magic blends caramelized cookie spread with classic British oat bars. Rich butterscotch notes and crumbled Biscoff cookies create an irresistible sweet treat you cannot resist.


Ingredients

Scale
  • 1 cup (225 grams) unsalted butter
  • ¾ cup (180 grams) Biscoff spread (smooth or crunchy)
  • 3 ½ cups (300 grams) rolled oats
  • ⅓ cup (100 grams) light brown sugar
  • 3 tbsps golden syrup or honey
  • 1 pinch of salt
  • tbsps melted Biscoff (optional topping)

Instructions

  1. Prepare Baking Setup: Preheat oven to 350F (175C) or 160C fan. Line a square baking tin completely with parchment paper, ensuring full base and side coverage.
  2. Create Liquid Base: Melt butter, Biscoff spread, sugar, and golden syrup in a saucepan over low heat. Stir continuously until ingredients merge into a smooth, glossy mixture with uniform consistency.
  3. Combine Flapjack Mixture: Remove saucepan from heat and fold in oats and salt. Ensure thorough coating and even distribution of ingredients throughout the mixture.
  4. Mold and Compress: Transfer mixture into lined baking tin. Use a spatula to press and compact the ingredients, creating an even, dense layer that will transform into a delectable treat.
  5. Bake and Monitor: Slide tin into preheated oven and bake for 20-25 minutes. Watch for golden-brown edges while maintaining a slightly soft center, which indicates perfect texture and doneness.
  6. Cool and Finish: Remove from oven and let flapjack rest in tin for 10 minutes to set. Optional: Drizzle additional melted Biscoff spread across the surface for enhanced flavor. Allow to cool completely at room temperature.
  7. Serve: Once fully cooled, slice into uniform squares or rectangular bars using a sharp knife, revealing the perfectly baked flapjack.

Notes

  • Prevent Burning: Low heat is crucial when melting ingredients to avoid scorching butter or caramelizing sugar too quickly, which could create bitter undertones.
  • Create Consistent Texture: Press mixture firmly and evenly into the baking tin to ensure uniform thickness, guaranteeing balanced baking and a perfect chewy-crisp flapjack texture.
  • Customize Dietary Needs: Substitute dairy butter with coconut oil or vegan butter for a plant-based version, maintaining the recipe’s rich, indulgent flavor profile.
  • Control Sweetness Level: Adjust Biscoff spread quantity based on personal preference – less spread means lighter sweetness, while more creates a more intense caramelized flavor.
  • Prep Time: 10 minutes
  • Cook Time: 25 minutes
  • Category: Breakfast, Snacks, Desserts
  • Method: Baking
  • Cuisine: British

Nutrition

  • Serving Size: 13
  • Calories: 293
  • Sugar: 15 g
  • Sodium: 50 mg
  • Fat: 17 g
  • Saturated Fat: 10 g
  • Unsaturated Fat: 7 g
  • Trans Fat: 0 g
  • Carbohydrates: 31 g
  • Fiber: 3 g
  • Protein: 3 g
  • Cholesterol: 41 mg
John Nicholson

John Nicholson

Lead Writer & Recipe Developer

Expertise

Recipe Testing and Development, Kitchen Hacks and Time-Saving Tips, Flavor Pairing and Ingredient Selection, Engaging Food Writing and Storytelling

Education

Johnson & Wales University

  • Program: Bachelor of Science in Culinary Arts
  • Focus: A hands-on curriculum emphasizing farm-to-table cooking, local ingredient sourcing, and creative menu development. Students gained real-world restaurant experience, learning both classic techniques and modern approaches to sustainable cooking.

John Nicholson honed his skills at Johnson & Wales University, learning how to use fresh, local ingredients and down-to-earth techniques to make cooking simple and satisfying.

His recipes blend Southern comfort flavors with a modern touch, inviting everyone to cook with ease and confidence.

Living in Charleston, John takes cues from the city’s lively food scene, local markets, and seasonal produce. He’s all about making meals stress-free through easy tips, flavor pairings, and fun experiments in the kitchen

Leave a Reply

Your email address will not be published. Required fields are marked *

Recipe rating 5 Stars 4 Stars 3 Stars 2 Stars 1 Star