
Rustic Apple Snickerdoodle Dump Cake Recipe: Cozy Sweetness
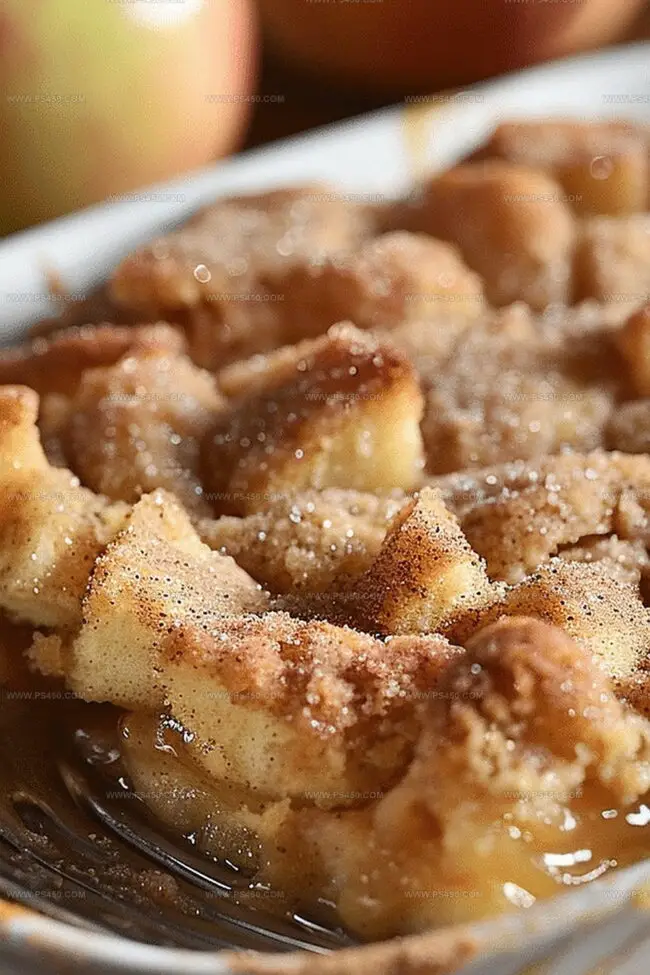
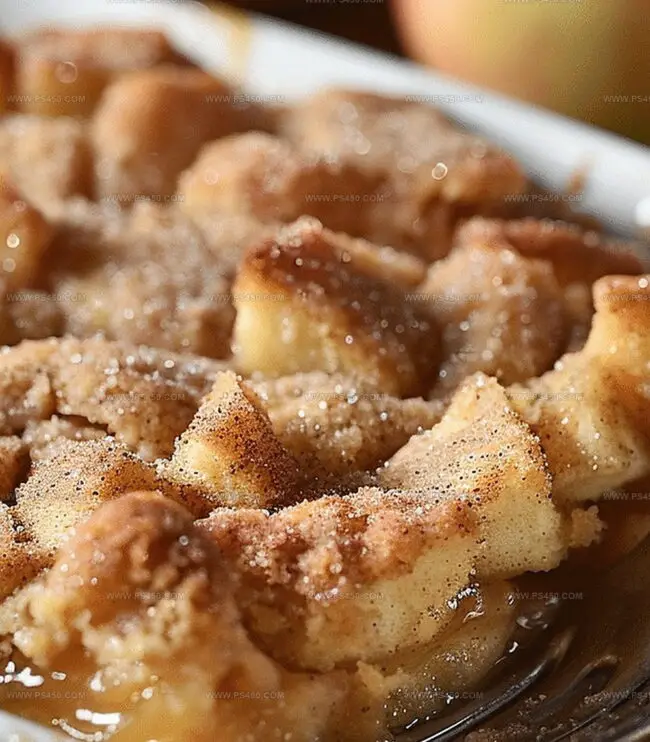
Sweet aromas of cinnamon and warm apple spices fill the kitchen with this delectable apple snickerdoodle dump cake recipe that promises pure comfort.
Layers of tender apples nestle between buttery cake crumbles, creating a dessert that melts in your mouth.
The magic happens when simple ingredients transform into a rustic, irresistible treat.
Crumbly cake meets soft fruit in a dessert that requires minimal effort but delivers maximum flavor.
Cinnamon swirls dance through each bite, promising a delightful experience for anyone with a sweet tooth.
Served warm with a scoop of vanilla ice cream, this dump cake becomes an instant family favorite.
Grab a fork and prepare for a truly memorable dessert experience.
Quick Recipe Overview
Apple Dump Cake Ingredient Set
For Fruity Base:For Crispy Topping:For Moisture and Richness:Tools That Help With This Effortless Dessert
How to Assemble and Bake Apple Snickerdoodle Dump Cake
Fire up your oven to a toasty 350F and give your baking dish a quick spray of non-stick.
Pour those luscious apple pie filling treasures across the bottom of your dish, spreading them out evenly like a cozy blanket.
Grab your snickerdoodle mix and cinnamon-sugar packet, then rain these delightful crumbs all over the apple landscape.
Cascade melted butter across the surface, making sure every crumb gets a luxurious butter bath. For extra crunch, shower some chopped nuts on top if you’re feeling adventurous.
Slide your creation into the oven and let it transform for 40-45 minutes until the top turns a gorgeous golden brown and the edges start bubbling with sweet promise.
Pull out your masterpiece and let it cool just enough. Serve with a scoop of creamy vanilla ice cream or a cloud of whipped cream for the ultimate comfort dessert.
Dessert Additions That Pair Well with Apples
Ways to Serve It Warm with Toppings
Best Ways to Save Cake Without Getting Soggy
FAQs
Yes, you can use homemade apple pie filling. Just ensure it has a similar consistency and sweetness level as the store-bought version.
While snickerdoodle mix provides a unique flavor, you can use sugar cookie or cinnamon cookie mixes as alternatives. The texture and taste might slightly change.
Look for a golden brown top and bubbling edges. When you insert a toothpick near the center, it should come out mostly clean with some moist crumbs.
Yes, use a gluten-free snickerdoodle cookie mix and ensure your apple pie filling is gluten-free. Check all ingredient labels carefully to confirm.
Print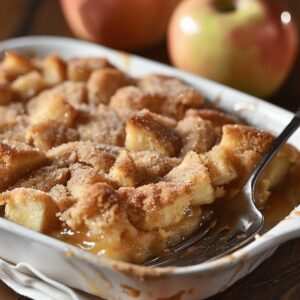
Mouthwatering Apple Snickerdoodle Dump Cake Recipe
- Total Time: 50 minutes
- Yield: 13 1x
Description
Scrumptious Apple Snickerdoodle Dump Cake blends classic cinnamon-sugar cookies with comforting apple dessert. Warm spices and tender fruit create a simple, irresistible treat perfect for family gatherings and sweet cravings.
Ingredients
- 2 cans (20 oz / 567 g) apple pie filling
- 1 package (17.9 oz / 507 g) snickerdoodle cookie mix
- 1 cinnamon-sugar packet (included with cookie mix)
- ½ cup (113 g / 4 oz) melted butter
- ½ cup (57 g / 2 oz) chopped pecans or walnuts
- Whipped cream (for serving)
- Vanilla ice cream (for serving)
Instructions
- Preheat: Set oven to 350F (175C) and lightly coat a 9×13-inch baking dish with cooking spray to prevent sticking.
- Base Layer: Spread apple pie filling evenly across the entire dish bottom, creating a smooth, consistent foundation for the cake.
- Dry Mixture: In a mixing bowl, thoroughly combine snickerdoodle cookie mix with the cinnamon-sugar packet, ensuring complete integration of flavors and textures.
- Layering: Uniformly distribute the seasoned cookie mixture over the apple pie filling, guaranteeing full surface coverage for maximum flavor distribution.
- Moisture Enhancement: Drizzle melted butter across the cookie layer, allowing it to seep through and create a rich, moist texture throughout the cake.
- Optional Crunch: Sprinkle chopped pecans or walnuts across the top for added depth and textural contrast.
- Baking Process: Place the prepared cake in the preheated oven and bake for 40-45 minutes, watching for a golden-brown surface and bubbling edges that indicate complete cooking.
- Finishing Touch: Remove from oven and let the cake cool slightly to set its structure, then serve warm with a scoop of vanilla ice cream or a dollop of whipped cream for an decadent dessert experience.
Notes
- Optimize Butter Distribution: Drizzle melted butter evenly to ensure every part of the cookie layer gets moistened, preventing dry spots and creating consistent texture.
- Temperature Control: Watch the cake closely during baking to prevent over-browning; golden-brown color indicates perfect doneness without burning the cookie topping.
- Customize Nut Selection: Swap pecans or walnuts with almonds or sunflower seeds for different crunch levels and to accommodate nut allergies or preferences.
- Enhance Flavor Depth: Sprinkle extra cinnamon-sugar mixture on top before baking for a more intense sweet-spicy profile and attractive caramelized finish.
- Prep Time: 5 minutes
- Cook Time: 45 minutes
- Category: Desserts
- Method: Baking
- Cuisine: American
Nutrition
- Serving Size: 13
- Calories: 320
- Sugar: 20 g
- Sodium: 350 mg
- Fat: 18 g
- Saturated Fat: 8 g
- Unsaturated Fat: 10 g
- Trans Fat: 0 g
- Carbohydrates: 37 g
- Fiber: 1 g
- Protein: 3 g
- Cholesterol: 30 mg
John Nicholson
Lead Writer & Recipe Developer
Expertise
Recipe Testing and Development, Kitchen Hacks and Time-Saving Tips, Flavor Pairing and Ingredient Selection, Engaging Food Writing and Storytelling
Education
Johnson & Wales University
John Nicholson honed his skills at Johnson & Wales University, learning how to use fresh, local ingredients and down-to-earth techniques to make cooking simple and satisfying.
His recipes blend Southern comfort flavors with a modern touch, inviting everyone to cook with ease and confidence.
Living in Charleston, John takes cues from the city’s lively food scene, local markets, and seasonal produce. He’s all about making meals stress-free through easy tips, flavor pairings, and fun experiments in the kitchen