
Oreo Cookie Balls Recipe for Easy Chocolate Cravings
Sweet childhood memories flood back when I mix these delectable oreo cookie balls with creamy cream cheese.
These decadent bite-sized treats pack a serious punch of nostalgic flavor.
Each round morsel delivers pure chocolate bliss in a single pop.
Crumbling cookies into fine pieces creates the perfect base for these irresistible spheres.
Refrigeration helps these little delights firm up and intensify their rich taste.
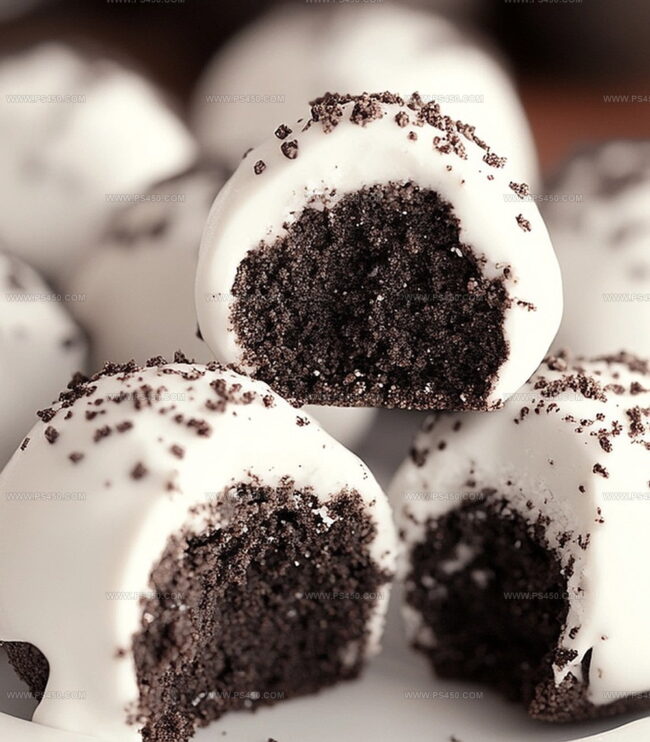
Chocolate coating adds a luxurious finish that makes them look professionally crafted.
You’ll become the dessert hero at any gathering by serving these addictive morsels.
One bite guarantees an instant smile and request for the recipe.
Why Oreo Cookie Balls Are So Fun

What You Need For Oreo Cookie Balls
Main Cookie Base:Coating and Decoration:Optional Garnish:How To Make Oreo Cookie Balls
Step 1: Crush Cookies into Silky Crumbs
Toss whole Oreo cookies into a food processor and pulse until they transform into ultra-fine, sandy crumbs. The key is creating a consistent texture that will blend smoothly with cream cheese.
Step 2: Blend Creamy Mixture
In a mixing bowl, combine the cookie crumbs with softened cream cheese. Use a spatula or hand mixer to blend until the mixture becomes:Step 3: Shape Delightful Bites
Roll the cookie mixture into bite-sized spheres using these techniques:Step 4: Chocolate Coating Magic
Prepare the chocolate coating by:Step 5: Dip and Transform
Carefully dip each chilled truffle into melted chocolate:Step 6: Creative Finishing Touches
Personalize your truffles with fun decorations:Refrigerate truffles until chocolate sets completely. Enjoy your homemade luxurious treats!
Tips To Make Better Oreo Cookie Balls
How To Store Oreo Cookie Balls Right
Tasty Pairings For Oreo Cookie Balls
Oreo Cookie Balls Recipe Ideas
Oreo Cookie Balls FAQ Page
Not at all! They’re super easy and require just three main ingredients: Oreo cookies, cream cheese, and chocolate. Even beginner bakers can create these delicious treats in under 30 minutes.
Absolutely! You can experiment with various Oreo flavors like mint, peanut butter, or birthday cake to create unique cookie balls that match your taste preferences.
When stored in an airtight container in the refrigerator, these cookie balls will remain delicious for up to one week. Just make sure to keep them chilled to maintain their texture and flavor.
No special equipment is necessary. You’ll just need a food processor or rolling pin to crush the Oreos, a mixing bowl, and a baking sheet. A fork helps when dipping in chocolate, but you can use other utensils too.
Print
Oreo Cookie Balls Recipe
- Total Time: 1 hour 20 minutes
- Yield: 24 1x
Description
Indulgent Oreo cookie balls melt hearts with their creamy chocolate-coated goodness, blending classic cookie crunch and silky smoothness. Sweet treats like these bring pure dessert joy you can savor in just one delightful bite.
Ingredients
Main Ingredients:
- 36 Oreo cookies (about 1 package), finely crushed
- 8 ounces (226 grams) cream cheese, softened
- 12 ounces (340 grams) semi-sweet or white chocolate, chopped or melted chips
Oils and Optional Additions:
- 12 teaspoons vegetable oil or coconut oil (for smoother chocolate)
Toppings:
- Extra Oreo crumbs
- Sprinkles
- Drizzle of contrasting melted chocolate
Instructions
- Crush the Oreo cookies into a fine, powdery consistency using a food processor, ensuring no large chunks remain.
- Blend the cookie crumbs with softened cream cheese in a mixing bowl, working the ingredients until they create a uniform, velvety mixture that holds together seamlessly.
- Carefully shape the combined mixture into uniform spheres, approximately one inch in diameter, using gentle rolling motions between your palms.
- Arrange the formed balls on a parchment-lined tray, then transfer to the freezer for a quick 15-minute chill to help them firm up and maintain their shape.
- Prepare the chocolate coating by melting it in short intervals in a microwave-safe bowl, stirring between each heating cycle to ensure smooth, even consistency.
- Remove the chilled balls from the freezer and methodically dip each one into the melted chocolate, using a fork to help drain excess coating and create a clean, even shell.
- Gently place the chocolate-coated balls back onto the parchment paper, allowing them to set at room temperature or in the refrigerator.
- For an elevated presentation, garnish with a light dusting of crushed Oreo crumbs, delicate chocolate drizzles, or festive sprinkles to add visual appeal and texture.
Notes
- Crush Oreos completely to ensure a smooth, uniform texture without large cookie chunks that might disrupt the ball’s shape.
- Cream cheese temperature matters: use room temperature cream cheese for easier mixing and a smoother consistency.
- Chilling the balls before dipping helps them maintain shape and prevents cracking during chocolate coating.
- For gluten-free version, swap regular Oreos with gluten-free sandwich cookies to accommodate dietary restrictions.
- Use high-quality chocolate for better flavor and smoother melting, preferring chocolate meant for coating or baking.
- Keep a consistent ball size by using a small cookie scoop or tablespoon measure for even treats.
- Prevent chocolate from seizing by ensuring no water touches the melting chocolate and stirring gently during microwave intervals.
- Store cookie balls in the refrigerator to maintain firmness and prevent chocolate from melting, especially in warm environments.
- Prep Time: 20 minutes
- Cook Time: 1 hour
- Category: Desserts, Snacks
- Method: Mixing
- Cuisine: American
Nutrition
- Serving Size: 24
- Calories: 150
- Sugar: 10 g
- Sodium: 50 mg
- Fat: 8 g
- Saturated Fat: 4 g
- Unsaturated Fat: 3 g
- Trans Fat: 0 g
- Carbohydrates: 19 g
- Fiber: 1 g
- Protein: 2 g
- Cholesterol: 15 mg
Emily Morgan
Food Critic & Kitchen Tips Specialist
Expertise
Global Food Exploration & Critique, Simple Kitchen Hacks & Time-Saving Tips, Presentation & Plating Techniques, Culinary Research & Storytelling.
Education
New York University
Emily Morgan has journeyed across the globe, collecting culinary secrets that turn everyday ingredients into impressive meals.
Based in Seattle and armed with a Journalism degree from NYU, she blends thorough research with a flair for presentation, ensuring every dish looks just as good as it tastes.
Focusing on fresh flavors, simple methods, and a bit of fun, Emily shows home cooks how to elevate their daily cooking without fancy gadgets or complex steps.