Apple Pie Recipe with Homemade Taste
Crisp autumn winds whisper tales of sweet nostalgia, and a rustic apple pie recipe promises to warm your kitchen with golden memories.
Generations of bakers have perfected this classic dessert, blending tart apples with buttery, flaky crust.
Each slice tells a story of comfort and tradition, inviting you to savor every crumbly bite.
Orchard-fresh apples mingle with warming spices, creating a dessert that feels like a warm embrace.
The rustic charm of this pie transforms simple ingredients into a masterpiece of homemade goodness.
Families gather around, drawn by the irresistible aroma of cinnamon and baked apples.
This recipe will become your new weekend baking adventure, guaranteed to delight everyone at the table.
Quick Recipe Overview
Apple Pie Ingredients That Make It Shine
For Pie Crust:For Apple Filling:For Egg Wash and Finishing:Tools To Bake Apple Pie Right
Steps To Bake Apple Pie The Classic Way
Crank the heat to a toasty 425F and get ready for some serious baking magic.
Spread out one pie crust into a cozy 9-inch pan, gently nudging it to hug the bottom and sides perfectly.
Toss sliced apples with a sweet and spicy dance of sugar, flour, and warm spices. Splash in some zesty lemon juice and vanilla for extra flavor punch.
Pour the apple mixture into the waiting crust and sprinkle butter bits across the top for a rich, creamy surprise.
Drape the second crust over the apple mountain. Trim the edges and pinch them together like you’re giving the pie a tight hug. Slice a few steam escape routes on top.
Whisk egg and milk together, then brush the top crust with this magical golden glaze.
Slide the pie onto a baking sheet and let it transform in the oven for 45-50 minutes. Look for a golden crust and bubbling filling.
If the edges start turning too dark, shield them with foil midway through baking.
Let the pie rest for at least two hours so the filling can settle into delicious harmony before slicing.
Tips To Add Magic To Apple Pie
Serving Ideas For Classic Apple Pie
How To Store Apple Pie Fresh And Neat
Print
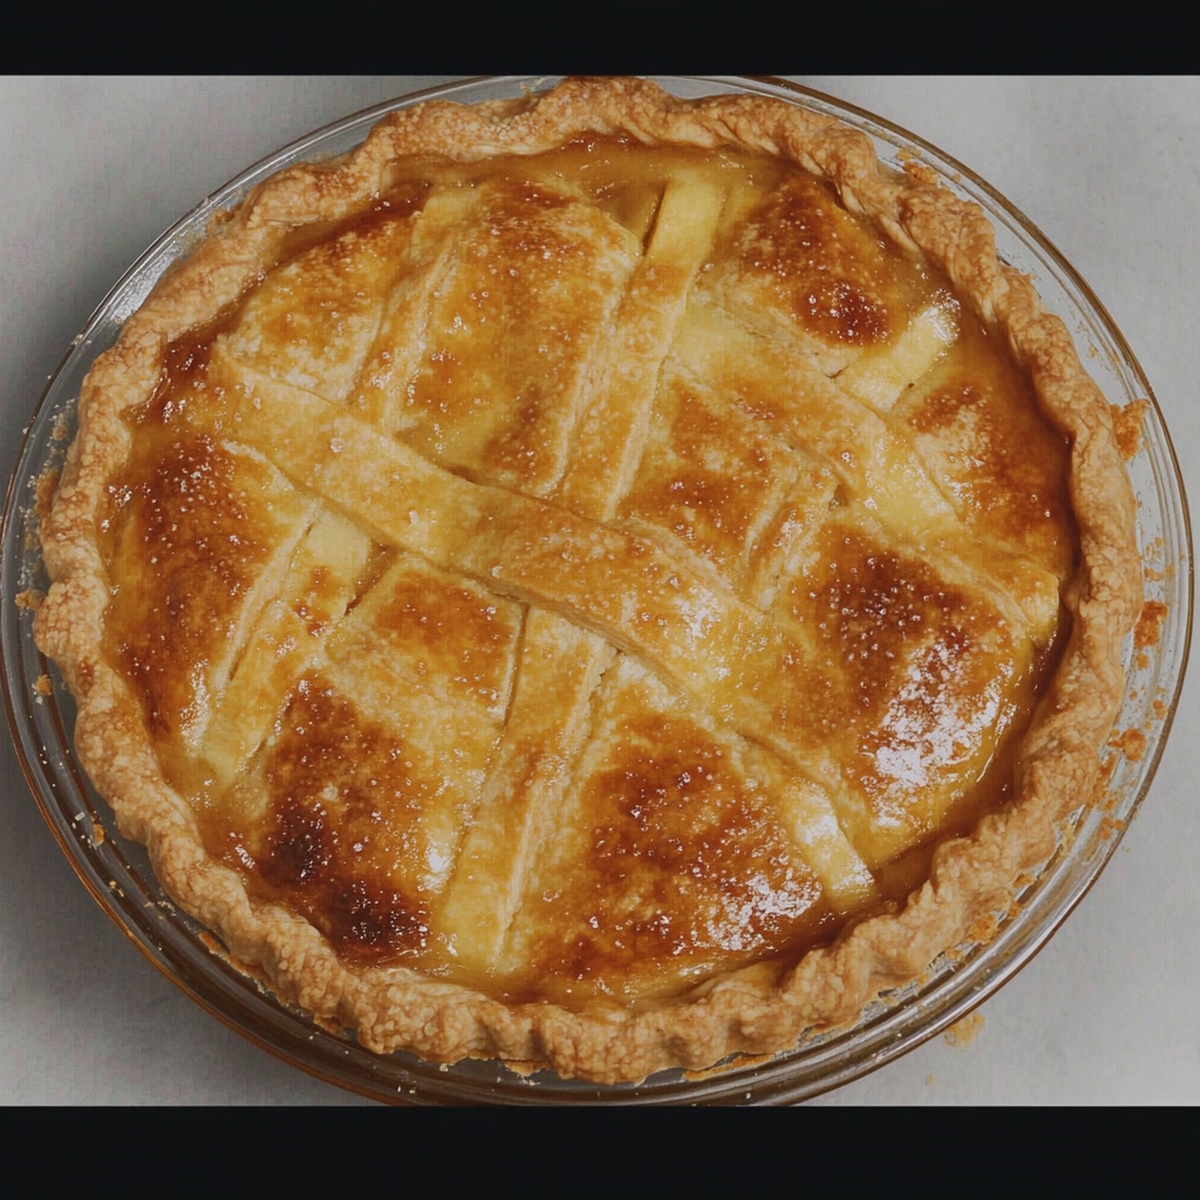
Rustic Apple Pie Recipe
- Total Time: 1 hour 20 minutes
- Yield: 9 1x
Description
Classic apple pie brings together tart Granny Smith apples and sweet cinnamon in a flaky, butter-rich crust. Baked golden brown, this American dessert provides comfort and warmth for family gatherings and holiday celebrations.
Ingredients
- 6 to 7 cups peeled and sliced apples (Granny Smith, Honeycrisp, or a mix)
- 1 package (14 oz / 397 g) refrigerated pie crusts (or homemade crust for 9-inch double-crust pie)
- ¾ cup (150 g) granulated sugar
- ¼ cup (50 g) brown sugar
- 2 tbsps all-purpose flour
- 1 tsp ground cinnamon
- 1 egg (for egg wash)
- 1 tbsp lemon juice
- 1 tsp vanilla extract
- ¼ tsp ground nutmeg
- 1 tbsp butter (cut into small pieces)
- 1 tbsp milk
Instructions
- Pastry Preparation: Carefully unfurl pie dough into a 9-inch pie dish, gently pressing and smoothing the base and sides to create a seamless pastry foundation.
- Apple Transformation: Toss apple slices with cinnamon, sugar, and nutmeg, ensuring each piece is luxuriously coated with the aromatic spice blend, creating a harmonious filling mixture.
- Filling Assembly: Distribute the spiced apple mixture evenly within the prepared crust, strategically placing butter fragments throughout to infuse richness and depth of flavor.
- Crust Artistry: Elegantly layer the top pastry over the apple landscape, trimming excess edges and meticulously crimping the borders to seal the pie’s delectable contents.
- Pre-Baking Finish: Generously brush the pie’s surface with egg wash, creating a golden, glossy exterior that promises a visually stunning and appetizing dessert.
- Baking Precision: Slide the pie onto a rimmed baking sheet and position in a preheated oven, rotating midway to ensure uniform browning and protecting the crust edges with aluminum foil if needed.
- Cooling and Setting: Remove the pie from the oven and allow it to rest, permitting the filling to stabilize and develop a perfect, sliceable consistency before serving.
Notes
- Prepare Workspace Strategically: Organize all ingredients, tools, and equipment before starting to ensure smooth and efficient pie-making process.
- Control Apple Moisture: Pat apple slices dry with paper towels to prevent excess liquid that could make the crust soggy and compromise the pie’s structural integrity.
- Enhance Flavor Depth: Mix different apple varieties like Granny Smith and Honeycrisp to create a more complex, balanced taste profile with varying levels of sweetness and tartness.
- Prevent Crust Sogginess: Sprinkle a thin layer of breadcrumbs or ground nuts on the bottom crust before adding apple filling to absorb excess moisture and maintain a crisp texture.
- Prep Time: 30 minutes
- Cook Time: 50 minutes
- Category: Desserts
- Method: Baking
- Cuisine: American
Nutrition
- Serving Size: 9
- Calories: 320
- Sugar: 20 g
- Sodium: 150 mg
- Fat: 15 g
- Saturated Fat: 7 g
- Unsaturated Fat: 6 g
- Trans Fat: 0 g
- Carbohydrates: 45 g
- Fiber: 2 g
- Protein: 3 g
- Cholesterol: 35 mg
John Nicholson
Lead Writer & Recipe Developer
Expertise
Recipe Testing and Development, Kitchen Hacks and Time-Saving Tips, Flavor Pairing and Ingredient Selection, Engaging Food Writing and Storytelling
Education
Johnson & Wales University
John Nicholson honed his skills at Johnson & Wales University, learning how to use fresh, local ingredients and down-to-earth techniques to make cooking simple and satisfying.
His recipes blend Southern comfort flavors with a modern touch, inviting everyone to cook with ease and confidence.
Living in Charleston, John takes cues from the city’s lively food scene, local markets, and seasonal produce. He’s all about making meals stress-free through easy tips, flavor pairings, and fun experiments in the kitchen