
Silky Peanut Butter Pie Recipe for Dessert Fans
Creamy desserts always spark joy, and this silky peanut butter pie recipe brings pure indulgence to your table.
Rich, velvety textures melt together in a harmonious blend of sweet and nutty flavors.
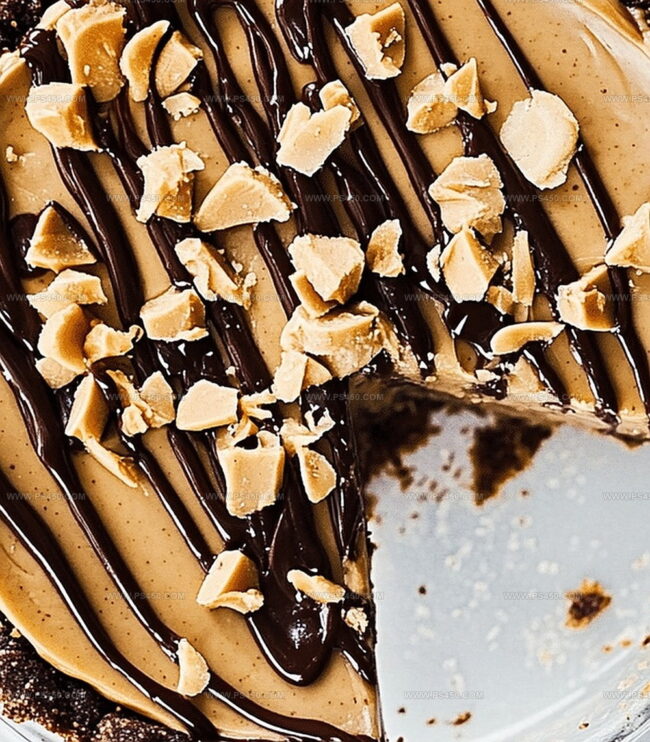
Chocolate cookie crust provides the perfect foundation for this decadent treat.
Whipped cream and smooth peanut butter create a luxurious filling that promises to delight every palate.
Each slice promises a moment of pure culinary bliss that will have everyone asking for seconds.
No gathering is complete without this show-stopping dessert that combines simplicity with extraordinary taste.
Prepare to wow your guests with a pie that turns an ordinary meal into an unforgettable experience.
Quick Recipe Overview

Peanut Butter Pie Ingredient Checklist
For The Crust:For The Filling:For The Topping:Tools for Making a No-Fuss Peanut Butter Pie
From Crust to – Steps for Peanut Butter Pie
Crush graham crackers and blend with sugar and melted butter. Press the mixture firmly into a pie dish, creating a solid foundation. Refrigerate for a quick cool-down to help the base set perfectly.
Blend peanut butter and cream cheese until silky smooth. Mix in powdered sugar and vanilla for extra flavor. Separately, whip cream until it forms gorgeous peaks. Gently fold the whipped cream into the peanut butter mixture, creating a light and airy texture.
Spread the luscious peanut butter filling evenly across the chilled crust. Smooth the top with a spatula for a professional finish. Pop the pie back into the refrigerator and let it rest for several hours until the filling becomes firm and dreamy.
Just before serving, crown the pie with fluffy whipped cream. Add a playful drizzle of chocolate or a sprinkle of extra peanut butter for a show-stopping presentation that’ll make mouths water.
Tricks for a Smooth and Rich Peanut Butter Filling
How to Plate and Present Peanut Butter Pie
Keep Peanut Butter Pie Fresh for Days
FAQs
The creamy texture comes from combining cream cheese, peanut butter, and whipped heavy cream. These ingredients blend together to create a smooth, light, and rich filling that melts in your mouth.
No, this pie contains peanut butter, which is not safe for those with peanut allergies. Always check ingredient labels and be cautious if serving to people with known nut sensitivities.
While you can substitute low-fat cream cheese or use less sugar, keep in mind that this might change the texture and taste of the pie. Full-fat ingredients provide the best flavor and consistency for this dessert.
The pie is ready when the filling is firm and holds its shape when cut. After chilling for at least 4 hours, the pie should be solid and not runny. The top should feel set and not wobble when gently shaken.
Print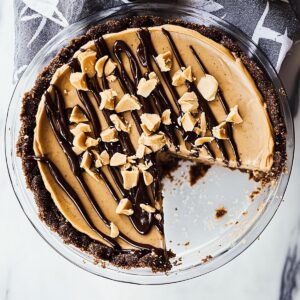
Silky Peanut Butter Pie Recipe
- Total Time: 15 minutes
- Yield: 9 1x
Description
Creamy peanut butter pie delights dessert enthusiasts with its rich, indulgent layers of flavor. Chocolate graham cracker crust and silky filling create a perfect balance for those craving sweet comfort.
Ingredients
- 1 cup (240 ml / 236.6 ml) creamy peanut butter
- 8 oz (226 g) cream cheese, softened
- 1 cup (240 ml / 236.6 ml) heavy whipping cream, chilled
- 1 ½ cups chocolate cookie crumbs (Oreo crumbs)
- 6 tbsps (90 ml / 89.3 ml) melted butter
- ¾ cup powdered sugar
- Whipped cream
- Crushed peanuts or chocolate shavings (optional)
Instructions
- Crust Preparation: Pulverize graham crackers with sugar, then unite with melted butter. Press mixture into pie dish, creating a solid foundation. Chill in refrigerator for 30 minutes to set the base firmly.
- Filling Creation: Whisk cream cheese and peanut butter until silky smooth. Blend in powdered sugar and vanilla. Whip heavy cream to stiff peaks in a separate bowl.
- Mixture Assembly: Gently fold whipped cream into peanut butter mixture, maintaining its airy volume. Ensure a light, creamy consistency without deflating the mixture.
- Pie Construction: Spread the peanut butter filling evenly across the chilled crust, using a spatula to create a seamless layer reaching the dish’s edges.
- Chilling and Setting: Refrigerate the pie for at least 4 hours, allowing the filling to solidify and flavors to intensify. This crucial resting period ensures optimal texture and taste.
- Final Flourish: Before serving, crown the pie with additional whipped cream. Elevate the presentation by drizzling melted chocolate or adding strategic peanut butter accents for visual and flavor depth.
Notes
Prevent Crust Crumbling: Press graham cracker mixture firmly and evenly into the dish, using the back of a measuring cup or spoon to compact the base for a sturdy foundation that won’t fall apart when slicing.
Achieve Silky Smooth Texture: Ensure cream cheese and peanut butter are at room temperature before mixing to avoid lumps and create a perfectly creamy, velvety filling that spreads effortlessly.
Master Whipped Cream Technique: Whip heavy cream in a chilled bowl using cold utensils to reach stiff peaks faster and maintain maximum volume when folding into the peanut butter mixture.
Customize for Dietary Needs: Swap graham crackers with gluten-free alternatives like almond flour crust, use low-fat cream cheese, or substitute traditional peanut butter with natural or sugar-free versions to accommodate various dietary restrictions.
- Prep Time: 15 minutes
- Category: Desserts
- Method: None
- Cuisine: American
Nutrition
- Serving Size: 9
- Calories: 382
- Sugar: 16 g
- Sodium: 150 mg
- Fat: 30 g
- Saturated Fat: 14 g
- Unsaturated Fat: 12 g
- Trans Fat: 0 g
- Carbohydrates: 29 g
- Fiber: 2 g
- Protein: 7 g
- Cholesterol: 42 mg
John Nicholson
Lead Writer & Recipe Developer
Expertise
Recipe Testing and Development, Kitchen Hacks and Time-Saving Tips, Flavor Pairing and Ingredient Selection, Engaging Food Writing and Storytelling
Education
Johnson & Wales University
John Nicholson honed his skills at Johnson & Wales University, learning how to use fresh, local ingredients and down-to-earth techniques to make cooking simple and satisfying.
His recipes blend Southern comfort flavors with a modern touch, inviting everyone to cook with ease and confidence.
Living in Charleston, John takes cues from the city’s lively food scene, local markets, and seasonal produce. He’s all about making meals stress-free through easy tips, flavor pairings, and fun experiments in the kitchen