
7-Layer Dessert Bar Recipe That’s Sweet from Top to Bottom
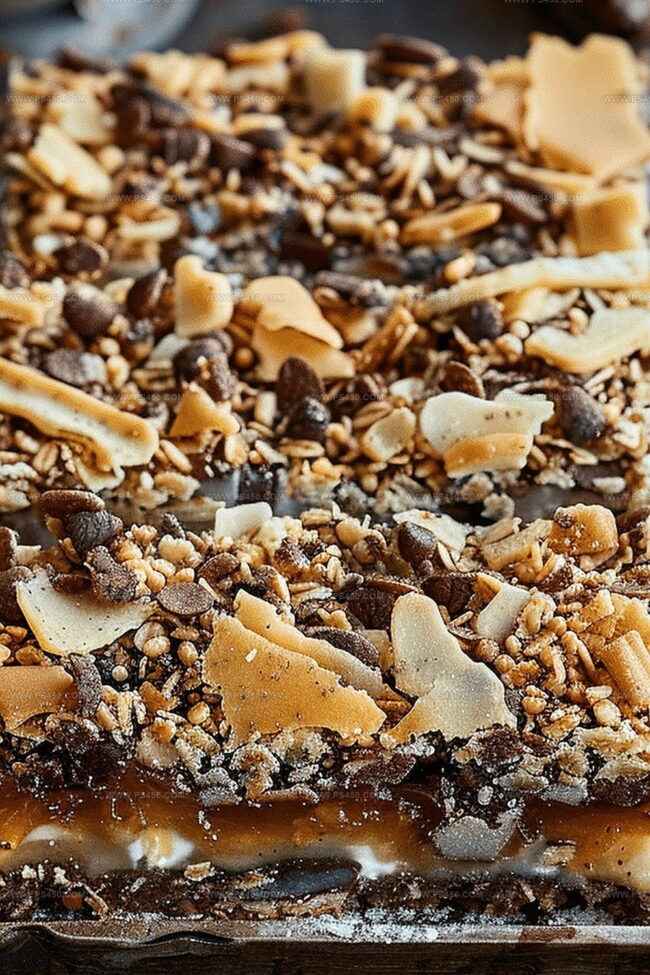
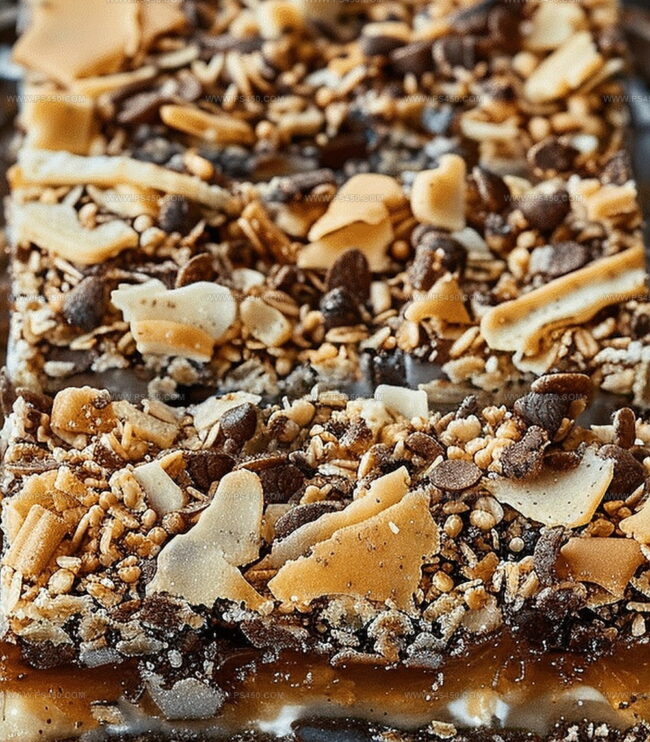
Chocolate chips, coconut, and graham cracker crumbs dance together in this irresistible 7-layer magic bars recipe that promises pure dessert bliss.
These decadent bars burst with layers of deliciousness that melt in your mouth.
Each bite delivers a symphony of textures and flavors that will transport you to dessert heaven.
Condensed milk binds these layers into a rich, gooey masterpiece.
Nuts and chocolate create a perfect balance of crunch and sweetness.
The simplicity of the recipe belies its incredible depth of flavor.
Whip up these magic bars and watch everyone’s eyes light up with pure joy.
Quick Recipe Overview
Everything You Need for Ultimate 7-Layer Magic Bars
For Crust:For Delectable Layers:For Binding and Sweetness:Tools That Help You Build Ultimate 7-Layer Magic Bars
How to Assemble and Bake Ultimate 7-Layer Magic Bars
Crank the oven to 350F. Grab a 9×13 pan and line it with parchment paper, letting some hang over the edges for easy bar removal.
Mix graham cracker crumbs with melted butter. Press this mixture firmly into the pan’s bottom to form a solid foundation.
Sprinkle chocolate chips across the crust. Follow with a cascade of butterscotch chips. Shower shredded coconut over the chips. Scatter chopped nuts for a delightful crunch. Drizzle sweetened condensed milk across everything, making sure every inch gets covered.
Slide the pan into the hot oven. Bake for 25-30 minutes until the edges turn a gorgeous golden brown and the bars look wonderfully set.
Let the bars cool completely in the pan. Use the parchment paper edges to lift them out. Slice into squares and dive into youral creation.
Layering Tips for Creative Ultimate Magic Bar Combos
Serve Ultimate 7-Layer Bars at Any Party or Event
Storage Advice for These Multi-Layered Sweet Treats
FAQs
The comes from the combination of graham cracker crust, chocolate chips, butterscotch chips, coconut, nuts, and sweetened condensed milk, which blend together to create a rich, gooey, and irresistible dessert.
You can swap graham cracker crumbs with cookie crumbs, use different types of chocolate or butterscotch chips, and replace nuts with your favorite varieties like pecans or almonds.
The condensed milk acts as a binding agent that helps all the layers stick together and creates a creamy, sweet caramelized texture when baked, giving the bars their signature gooey consistency.
Press the graham cracker crust firmly, distribute layers evenly, and watch the baking time closely – golden edges indicate the bars are done without overcooking.
Print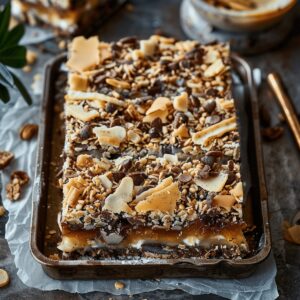
Sweet 7-Layer Magic Bars Recipe
- Total Time: 40 minutes
- Yield: 13 1x
Description
Layers of graham cracker, sweetened condensed milk, and chocolate chips create magic in these 7-layer bars from classic American dessert traditions. Rich combinations of nuts, coconut, and caramel deliver sweet satisfaction for those craving indulgent treats.
Ingredients
- 1 ½ cups (360 ml) graham cracker crumbs
- ½ cup (113 g) unsalted butter, melted
- 1 cup (170 g) semi-sweet chocolate chips
- 1 cup (170 g) butterscotch chips
- 1 cup (100 g) chopped pecans or walnuts
- 1 (14 oz / 397 g) can sweetened condensed milk
- 1 ⅓ cups (110 g) shredded sweetened coconut
Instructions
- Preparation: Line a 9×13-inch baking pan with parchment paper, ensuring complete coverage for easy removal.
- Crust Formation: Blend graham cracker crumbs with melted butter, pressing firmly to create a uniform, compact base that will support the layers of flavors.
- Chip Layering: Distribute chocolate chips and butterscotch chips evenly across the graham cracker foundation, creating a balanced flavor landscape.
- Texture Enhancement: Sprinkle shredded coconut and chopped nuts over the chips, introducing multiple dimensions of crunch and aromatic complexity.
- Binding Process: Drizzle sweetened condensed milk across the entire surface, ensuring complete coverage and acting as a unifying agent for all ingredients.
- Baking Transformation: Position the assembled creation in a preheated 350°F (175°C) oven, allowing the ingredients to meld and caramelize for 25-30 minutes until edges turn golden brown and the surface appears set.
- Finishing Touch: Remove from oven and cool completely in the pan, then lift out using parchment paper overhang and slice into elegant squares, revealing the intricate layered masterpiece.
Notes
- Optimize Moisture Control: Let condensed milk fully saturate ingredients for maximum flavor absorption and prevent dryness.
- Prevent Burning Edges: Cover pan edges with aluminum foil if browning too quickly to maintain even golden color without scorching.
- Customize Nut Selection: Swap pecans or walnuts based on personal preference or dietary restrictions while maintaining similar textural crunch.
- Enhance Storage Technique: Refrigerate bars up to 5 days in airtight container to preserve layered texture and prevent coconut from becoming stale.
- Prep Time: 10 minutes
- Cook Time: 30 minutes
- Category: Desserts, Snacks
- Method: Baking
- Cuisine: American
Nutrition
- Serving Size: 13
- Calories: 380
- Sugar: 32 g
- Sodium: 150 mg
- Fat: 22 g
- Saturated Fat: 13 g
- Unsaturated Fat: 7 g
- Trans Fat: 0 g
- Carbohydrates: 45 g
- Fiber: 1 g
- Protein: 3 g
- Cholesterol: 30 mg
John Nicholson
Lead Writer & Recipe Developer
Expertise
Recipe Testing and Development, Kitchen Hacks and Time-Saving Tips, Flavor Pairing and Ingredient Selection, Engaging Food Writing and Storytelling
Education
Johnson & Wales University
John Nicholson honed his skills at Johnson & Wales University, learning how to use fresh, local ingredients and down-to-earth techniques to make cooking simple and satisfying.
His recipes blend Southern comfort flavors with a modern touch, inviting everyone to cook with ease and confidence.
Living in Charleston, John takes cues from the city’s lively food scene, local markets, and seasonal produce. He’s all about making meals stress-free through easy tips, flavor pairings, and fun experiments in the kitchen