
Cozy Turkey & Stuffing Roll Ups Recipe for Comforting Meals
My kitchen adventure with these delectable turkey & stuffing roll ups began during a cozy autumn afternoon.
Comfort classics sometimes need a playful twist that surprises everyone at the table.
Nostalgic flavors wrap together in these clever little parcels, creating something magical.
Soft tortillas become the perfect canvas for savory ingredients that dance with deliciousness.
Leftovers never looked so tempting or felt so effortless to prepare.
Quick assembly means minimal cleanup and maximum satisfaction for hungry guests.
Let’s transform ordinary ingredients into an extraordinary meal that will have everyone asking for seconds.
Why Turkey & Stuffing Roll Ups Are So Clever
Everything You Need For Turkey & Stuffing Roll Ups
Main Proteins:Stuffing Ingredients:Seasoning Blend:Additional Components:Steps To Make Turkey & Stuffing Roll Ups
Step 1: Warm Up the Oven
Crank the oven to a cozy 375°F (190°C). Grab a baking dish and give it a quick butter massage to prevent any sticky situations.
Step 2: Create Magical Roll Ups
Spread out those tender turkey slices like a delicious canvas. Pile on the stuffing with a generous heart:Tuck each roll snugly into the buttered dish, seam facing down like a well-behaved little package.
Step 3: Sprinkle Some Flavor Magic
Shower your roll ups with a symphony of seasonings:Drizzle gravy over the top, letting it cascade like a savory waterfall.
Step 4: Bake to Perfection
Cover the dish with aluminum foil like a cozy blanket. Slide into the oven and let the magic happen for 20 minutes. Want cheesy goodness? Remove the foil, sprinkle cheese, and bake for an extra 5 minutes until it’s melted and irresistible.
Step 5: Serve with Love
Let the roll ups rest for a moment. Plate up alongside creamy mashed potatoes or roasted vegetables. Watch everyone’s eyes light up with the first delicious bite!
Tips To Keep Turkey & Stuffing Roll Ups Juicy
Storing Turkey & Stuffing Roll Ups The Right Way
Great Sides For Turkey & Stuffing Roll Ups
Fun Variations Of Turkey & Stuffing Roll Ups
Turkey & Stuffing Roll Ups FAQ Guide
Yes, you can prepare the roll-ups in advance and refrigerate them, covered, for up to 24 hours before baking. Just add a few extra minutes to the baking time if they’re cold from the refrigerator.
Classic bread stuffing or cornbread stuffing are ideal. Avoid very wet or soggy stuffing, as it might make rolling difficult. Choose a stuffing that holds its shape well when scooped.
Absolutely! This is a perfect way to transform leftover Thanksgiving ingredients into a delicious new meal. Just ensure your turkey slices are thin and pliable for easy rolling.
Chicken breast slices work great as an alternative. Thinly sliced ham could also work well if you want to change up the protein in this recipe.
Print
Turkey & Stuffing Roll Ups Recipe
- Total Time: 35 minutes
- Yield: 4 1x
Description
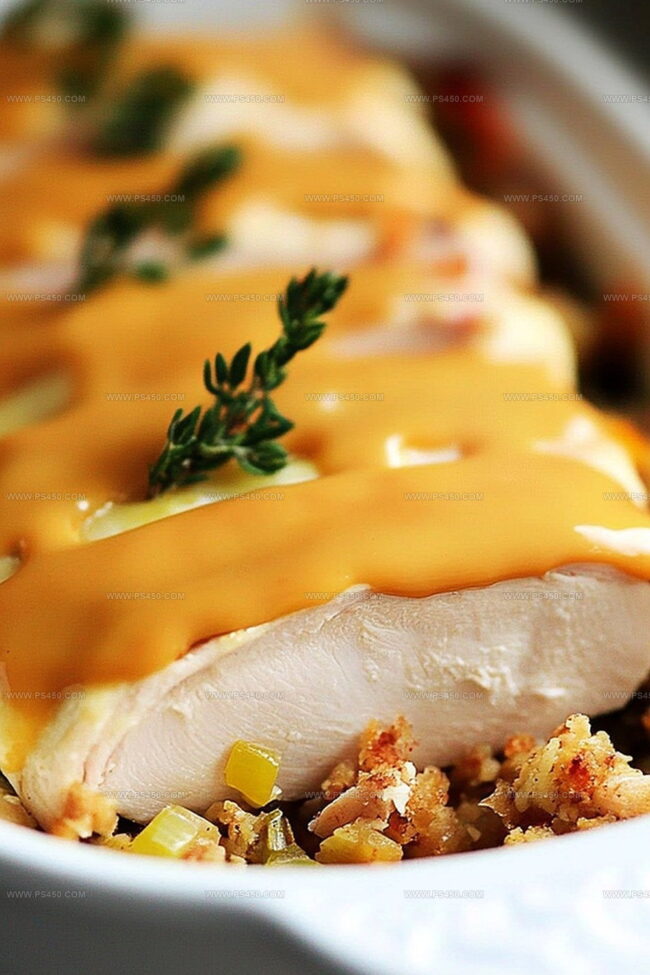
Comfort meets creativity in these turkey & stuffing roll ups, blending traditional holiday flavors into a delightful handheld meal. Crispy edges, savory filling, and nostalgic charm make this dish perfect for family gatherings or quick weeknight dinners you’ll absolutely love.
Ingredients
Main Protein:
- 8 slices deli-style turkey (or leftover roasted turkey slices)
Stuffing and Seasoning:
- 2 cups prepared stuffing (homemade or store-bought)
- ½ teaspoon (2.5 ml) garlic powder
- ½ teaspoon (2.5 ml) onion powder
- ½ teaspoon (2.5 ml) dried thyme
- ½ teaspoon (2.5 ml) black pepper
- ½ cup (120 ml) shredded mozzarella or Swiss cheese (optional)
Additional Components:
- 1 cup (240 ml) turkey or chicken gravy
- 1 tablespoon (15 ml) butter (for greasing the dish)
Instructions
- Prepare the baking vessel by coating it with a thin layer of butter, ensuring complete coverage to prevent sticking. Set the oven temperature to a moderate 375°F (190°C) for optimal cooking.
- Lay out each turkey slice and carefully distribute a measured portion of stuffing along its length. Gently but firmly roll the slice, encasing the filling completely, and position each roll with the seam facing downward in the prepared baking dish.
- Enhance the flavor profile by sprinkling a harmonious blend of garlic powder, onion powder, dried thyme, and freshly ground black pepper across the surface of the rolled turkey parcels.
- Drizzle gravy methodically over the rolls, ensuring an even distribution that will help keep the meat moist during the cooking process.
- Shield the baking dish with aluminum foil, creating a protective cover that will trap moisture and promote even heating. Slide the covered dish into the preheated oven.
- After 20 minutes of covered baking, remove the foil. If desired, scatter a layer of cheese over the rolls to add a creamy, golden finish.
- Return the uncovered dish to the oven for an additional 5 minutes, allowing the cheese to melt and develop a light golden color.
- Remove from the oven and let the rolls rest briefly, allowing the internal temperature to stabilize and the flavors to settle. Serve alongside creamy mashed potatoes or roasted seasonal vegetables for a complete meal.
Notes
- Customize stuffing by using gluten-free breadcrumbs or cornbread for those with wheat sensitivities.
- Swap traditional turkey with rotisserie chicken or thinly sliced deli turkey for a quicker preparation.
- Elevate flavor by adding fresh herbs like rosemary or sage to the stuffing mixture for a more aromatic profile.
- Prep ahead by assembling roll-ups the night before and refrigerating, which allows flavors to meld and saves time during busy weeknight dinners.
- Prep Time: 10 minutes
- Cook Time: 25 minutes
- Category: Lunch, Dinner, Snacks
- Method: Baking
- Cuisine: American
Nutrition
- Serving Size: 4
- Calories: 300
- Sugar: 2 g
- Sodium: 800 mg
- Fat: 10 g
- Saturated Fat: 4 g
- Unsaturated Fat: 5 g
- Trans Fat: 0 g
- Carbohydrates: 30 g
- Fiber: 1 g
- Protein: 25 g
- Cholesterol: 60 mg
Emily Morgan
Food Critic & Kitchen Tips Specialist
Expertise
Global Food Exploration & Critique, Simple Kitchen Hacks & Time-Saving Tips, Presentation & Plating Techniques, Culinary Research & Storytelling.
Education
New York University
Emily Morgan has journeyed across the globe, collecting culinary secrets that turn everyday ingredients into impressive meals.
Based in Seattle and armed with a Journalism degree from NYU, she blends thorough research with a flair for presentation, ensuring every dish looks just as good as it tastes.
Focusing on fresh flavors, simple methods, and a bit of fun, Emily shows home cooks how to elevate their daily cooking without fancy gadgets or complex steps.