
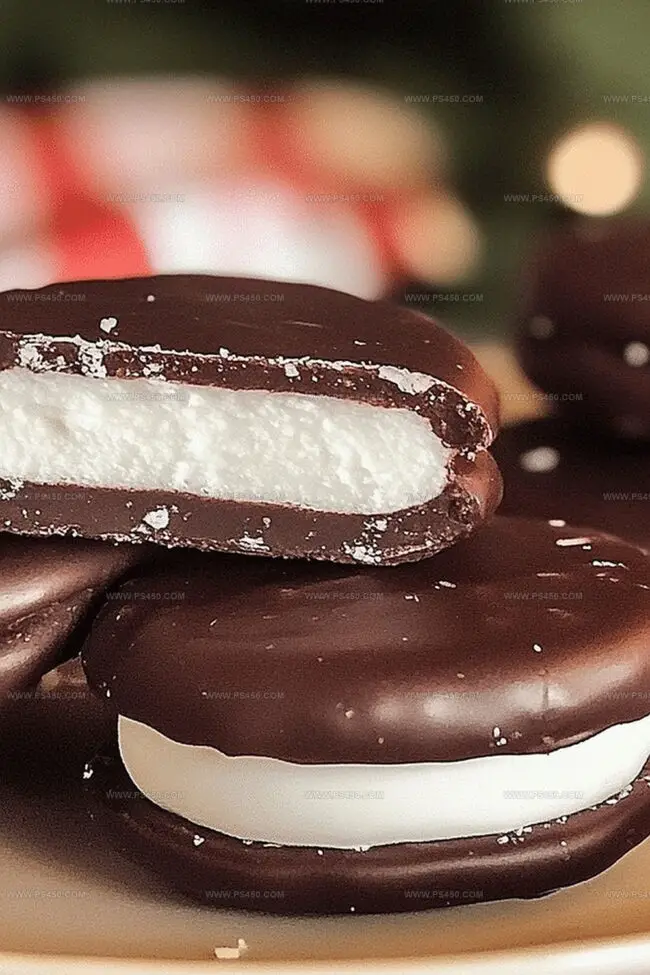
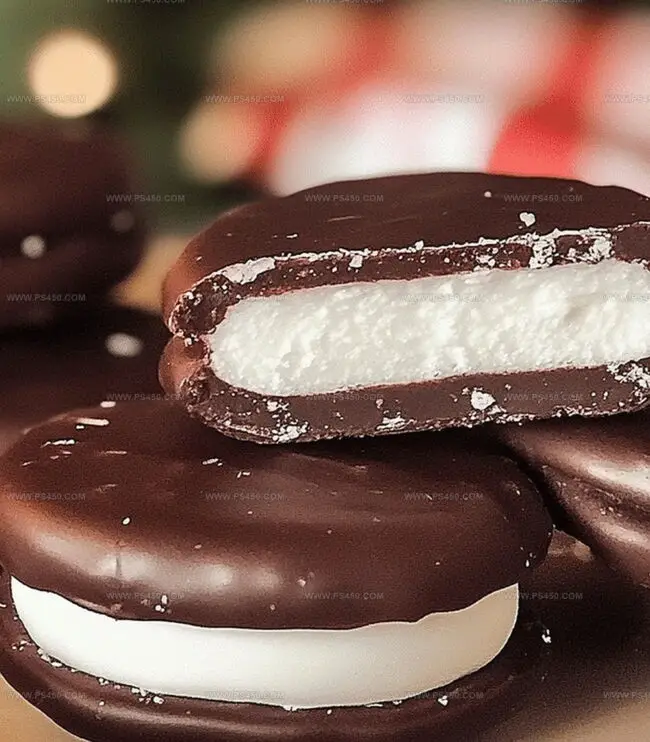
Silky DIY Peppermint Patties: A Refreshing Sweet Recipe
Chocolate lovers swoon over these delectable homemade peppermint patties that blend rich cocoa with cool, refreshing mint.
The classic wintergreen peppermint patties combine smooth chocolate and crisp mint centers in every delightful bite.
These simple treats melt perfectly on your tongue, creating a perfect balance of sweet and cool flavors.
Crafting these delicate confections at home means you control the quality and intensity of each ingredient.
Fresh peppermint extract gives these candies a bright, clean taste that store-bought versions can’t match.
With just a few pantry staples, anyone can create these elegant little desserts.
Each patty promises a moment of pure, minty chocolate bliss that will have everyone asking for seconds.
Quick Recipe Overview
Homemade Peppermint Patties Ingredient Rundown
For Peppermint Filling:For Chocolate Coating:For Optional Garnish:What Tools Help When Making Peppermint Patties
Shape, Chill, and Dip Homemade Peppermint Patties
Whip together powdered sugar, butter, peppermint extract, and milk until smooth. Adjust consistency by adding more sugar if needed.
Roll small dough portions into balls, then flatten into bite-sized circles. Chill in refrigerator for 30 minutes to firm up.
Gently heat chocolate chips with coconut oil using microwave or double boiler. Stir until silky and completely melted.
Carefully dip chilled patties into melted chocolate using a fork. Tap off excess chocolate and place on parchment paper.
Refrigerate chocolate-covered patties for 30-45 minutes until coating hardens with a beautiful glossy finish.
Serve these cool, minty delights straight from the refrigerator and enjoy the perfect chocolate-peppermint combination.
Creative Flavors to Try in Your Peppermint Patties
Serve Homemade Peppermint Patties Anytime, Anywhere
Store Homemade Peppermint Patties Without Losing Texture
FAQs
You can substitute peppermint extract with other flavors like vanilla or almond, but this will change the classic peppermint patty taste. Peppermint extract gives the authentic minty flavor that makes these treats special.
The filling should be playdough-like in consistency – firm enough to hold its shape but soft enough to roll into balls. If it’s too sticky, add more powdered sugar gradually until you can handle it easily without making a mess.
Use a fork or a special chocolate dipping tool to gently lower the chilled patty into melted chocolate. Tap the fork on the bowl’s edge to remove excess chocolate, and slide the coated patty carefully onto parchment paper. Chilling the patties beforehand helps them stay intact during coating.
Yes, you can prepare these peppermint patties up to a week in advance. Store them in an airtight container in the refrigerator. They actually taste better after the flavors have had time to meld together, making them perfect for advance preparation.
Print
Velvety Homemade Peppermint Patties Recipe
- Total Time: 1 hour 20 minutes
- Yield: 13 1x
Description
Delightful homemade peppermint patties blend cool mint with rich chocolate for a classic confection. Crisp peppermint centers dipped in smooth dark chocolate create an irresistible treat guests will savor with pure enjoyment.
Ingredients
- 2 ½ cups (300 grams) powdered sugar
- 1 ½ cups (255 grams) semi-sweet chocolate chips
- 2 tbsps (28 grams) unsalted butter
- 2 tbsps (30 ml) heavy cream
- 1 ½ tsps peppermint extract
- ¼ tsp vanilla extract
- 1/8 tsp salt
- 1 tbsp (15 ml) coconut oil or vegetable shortening
Instructions
- Filling Preparation: Combine powdered sugar, softened butter, peppermint extract, and milk in a mixing bowl. Blend until achieving a smooth, uniform consistency that holds shape without excessive stickiness. Adjust texture with additional powdered sugar if needed.
- Shaping and Chilling: Form the filling into small, uniform rounds approximately one inch wide. Gently flatten each disk and arrange on a parchment-lined baking sheet. Refrigerate for 30 minutes to firm up the peppermint bases and enhance structural stability.
- Chocolate Coating: Melt chocolate chips with coconut oil using either microwave (30-second intervals) or double boiler method. Stir continuously until obtaining a glossy, perfectly smooth chocolate mixture. Maintain a consistent temperature to prevent seizing.
- Dipping and Covering: Remove chilled peppermint disks from refrigerator. Using a fork or specialized dipping tool, completely submerge each patty in melted chocolate. Tap gently to remove excess coating, then carefully place on parchment paper to set.
- Final Setting: Return chocolate-covered patties to refrigerator for 30-45 minutes. Allow chocolate to fully crystallize, creating a professional, glossy finish. The completed confections should display a crisp chocolate shell with a smooth, even coverage.
Notes
- Chill Filling Effectively: Refrigerate peppermint mixture for 15-20 minutes before shaping to prevent sticky hands and ensure clean, uniform patty formation.
- Control Chocolate Coating Temperature: Maintain chocolate between 86-90°F for perfect glossy finish and smooth coverage, preventing streaking or bloom.
- Minimize Moisture Exposure: Use completely dry utensils and work surface to prevent chocolate from seizing or developing unwanted texture.
- Customize Dietary Needs: Swap traditional chocolate with dairy-free dark chocolate and use plant-based butter for vegan-friendly version without compromising taste quality.
- Prep Time: 30 minutes
- Cook Time: 50 minutes
- Category: Desserts, Snacks
- Method: Blending
- Cuisine: American
Nutrition
- Serving Size: 13
- Calories: 170
- Sugar: 24 g
- Sodium: 35 mg
- Fat: 8 g
- Saturated Fat: 5 g
- Unsaturated Fat: 3 g
- Trans Fat: 0 g
- Carbohydrates: 26 g
- Fiber: 0 g
- Protein: 1 g
- Cholesterol: 10 mg
John Nicholson
Lead Writer & Recipe Developer
Expertise
Recipe Testing and Development, Kitchen Hacks and Time-Saving Tips, Flavor Pairing and Ingredient Selection, Engaging Food Writing and Storytelling
Education
Johnson & Wales University
John Nicholson honed his skills at Johnson & Wales University, learning how to use fresh, local ingredients and down-to-earth techniques to make cooking simple and satisfying.
His recipes blend Southern comfort flavors with a modern touch, inviting everyone to cook with ease and confidence.
Living in Charleston, John takes cues from the city’s lively food scene, local markets, and seasonal produce. He’s all about making meals stress-free through easy tips, flavor pairings, and fun experiments in the kitchen