
Homemade Crunch Bars Recipe for Snack Lovers
Chocolate lovers constantly seek that perfect sweet treat with an irresistible crunch bars recipe that delivers pure indulgence.
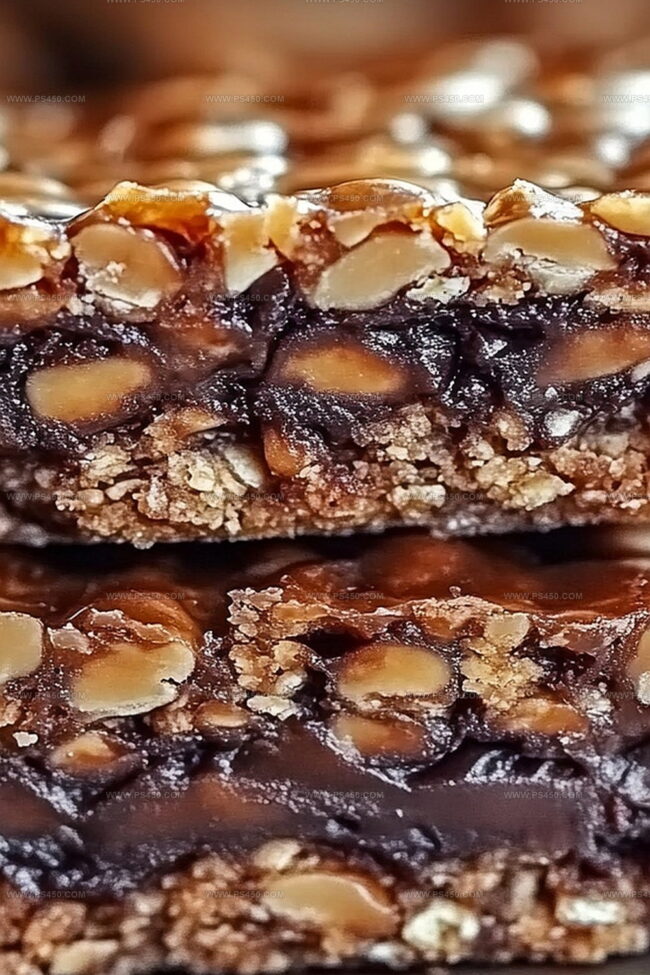
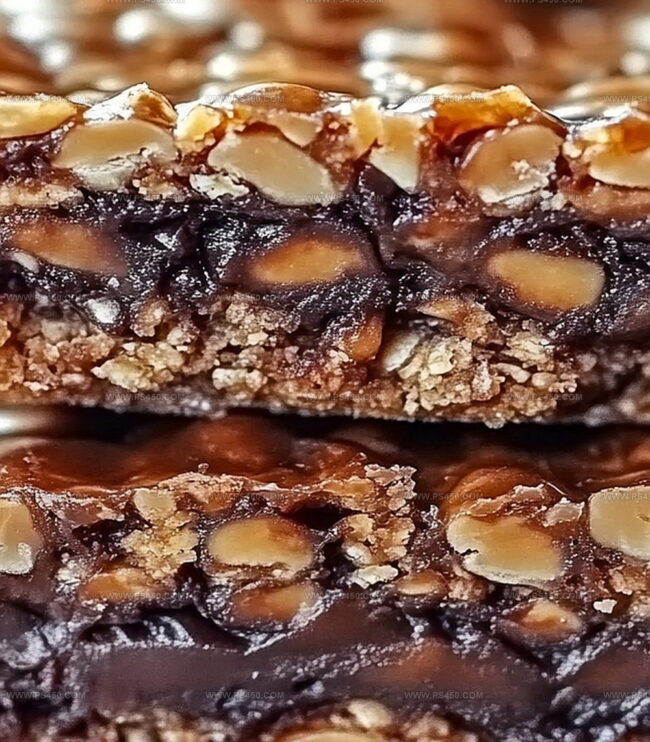
These delectable bars combine smooth chocolate with a satisfying crispy texture that melts in your mouth.
Layers of rich chocolate and crunchy elements create a harmonious blend of flavors and textures.
Every bite promises a delightful experience that will have you reaching for another piece.
The simple ingredients come together effortlessly, making this dessert a go-to option for quick sweet cravings.
Minimal preparation and maximum enjoyment define these addictive bars that are sure to become a favorite in your dessert rotation.
Prepare to be amazed by this crowd-pleasing recipe that transforms ordinary ingredients into an extraordinary treat.
Quick Recipe Overview
What’s In Homemade Crunch Bars Recipe
For Chocolate Base:For Crunch Element:For Optional Garnish:Tools To Make Homemade Crunch Bars
Steps To Make Homemade Crunch Bars
Grab your favorite chocolate chips and gently transform them into a silky pool of deliciousness in the microwave. Zap in short bursts, stirring between each interval until the chocolate becomes perfectly smooth and glossy.
Tenderly fold crispy rice cereal into the molten chocolate, ensuring every single piece gets a luxurious chocolate bath. Make sure each morsel is completely coated for maximum crunch.
Pour the chocolatey mixture into a parchment-lined pan, spreading it evenly with a spatula. Smooth out any bumpy areas to create a perfect chocolate canvas.
Place the pan in the refrigerator and let the magic happen. Give it at least an hour to set completely, transforming from liquid excitement to a firm, delectable treat.
Lift the chocolate creation from the pan using the parchment paper. Slice into bite-sized squares or fun bar shapes. Store in the refrigerator to maintain that irresistible crispy texture.
Tips For Better Homemade Crunch Bars
Serving Up Homemade Crunch Bars
Storage Tips For Homemade Crunch Bars
Print
Addictive Crunch Bars Recipe
- Total Time: 1 hour 10 minutes
- Yield: 13 1x
Description
Chocolate lovers will adore this homemade crunch bars recipe that brings classic candy nostalgia to your kitchen. Crisp Rice Krispies mixed with melted chocolate create a simple, irresistible treat you can enjoy anytime.
Ingredients
- 2 cups (340 g/12 oz) semisweet or milk chocolate chips
- 1 tbsp (15 ml/0.5 fl oz) coconut oil or unsalted butter
- ¼ tsp (1.25 g) salt
- 2 cups (50 g/1.75 oz) crispy rice cereal (like Rice Krispies)
Instructions
- Prep Pan: Line a baking pan completely with parchment paper, ensuring full coverage for effortless chocolate extraction.
- Melt Chocolate: Utilize a double boiler or microwave-safe bowl to gently melt chocolate chips and coconut oil, stirring intermittently until achieving a glossy, smooth texture without burning.
- Cool and Blend: Allow melted chocolate to cool momentarily, then fold crispy rice cereal into the mixture, coating each piece delicately to preserve its crunch without fragmenting.
- Shape and Settle: Pour the chocolate-cereal blend into the prepared pan, spreading evenly and eliminating air bubbles by gently tapping the pan against the countertop.
- Chill and Set: Refrigerate the pan for 60-90 minutes until the chocolate solidifies completely, creating a firm, cohesive texture.
- Cut and Serve: Remove the chocolate slab using parchment paper edges, then slice into consistent squares or bars with a clean, sharp knife, wiping the blade between cuts for pristine edges.
- Store Correctly: Preserve the crunch bars in a sealed container within the refrigerator to maintain their crisp consistency and prevent melting.
Notes
- Prevent Chocolate Burning: Use low, consistent heat when melting chocolate to avoid scorching, which can create bitter flavors and grainy texture.
- Maintain Cereal Crunch: Cool melted chocolate slightly before mixing with crispy rice cereal to preserve the delicate, crisp texture and prevent sogginess.
- Ensure Even Coating: Fold cereal gently into chocolate using a spatula, coating each grain carefully without crushing the cereal’s structural integrity.
- Control Temperature: Refrigerate bars completely (60-90 minutes) to achieve a firm, clean-breaking chocolate that holds its shape at room temperature.
- Prep Time: 10 minutes
- Cook Time: 1 hour
- Category: Snacks, Desserts
- Method: Mixing
- Cuisine: American
Nutrition
- Serving Size: 13
- Calories: 143
- Sugar: 12 g
- Sodium: 0.1 g
- Fat: 8 g
- Saturated Fat: 5 g
- Unsaturated Fat: 3 g
- Trans Fat: 0 g
- Carbohydrates: 17 g
- Fiber: 0.2 g
- Protein: 1 g
- Cholesterol: 0 mg
John Nicholson
Lead Writer & Recipe Developer
Expertise
Recipe Testing and Development, Kitchen Hacks and Time-Saving Tips, Flavor Pairing and Ingredient Selection, Engaging Food Writing and Storytelling
Education
Johnson & Wales University
John Nicholson honed his skills at Johnson & Wales University, learning how to use fresh, local ingredients and down-to-earth techniques to make cooking simple and satisfying.
His recipes blend Southern comfort flavors with a modern touch, inviting everyone to cook with ease and confidence.
Living in Charleston, John takes cues from the city’s lively food scene, local markets, and seasonal produce. He’s all about making meals stress-free through easy tips, flavor pairings, and fun experiments in the kitchen