
White Chocolate Snack Mix Recipe with a Sweet Crunch
Snacking takes on a whole new level with this irresistible white chocolate trash snack mix that combines sweet and salty flavors in every crunchy bite.
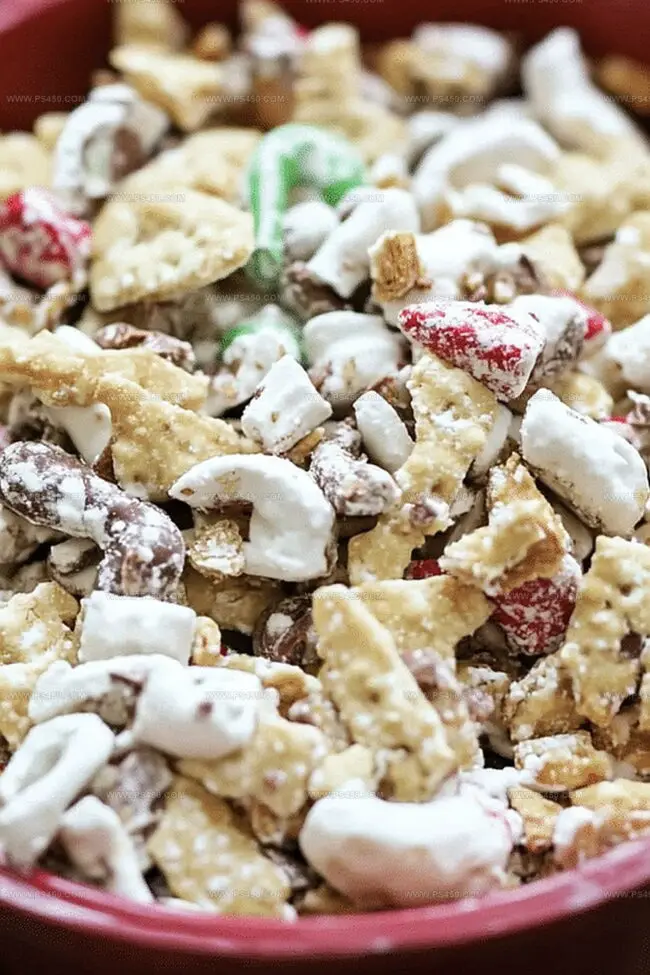
Clusters of pretzels, cereal, and nuts dance together, coated in a creamy white chocolate blanket.
The mix brings pure delight to any gathering or solo snack session.
Crisp textures and rich flavors merge seamlessly, creating an addictive treat you won’t be able to resist.
Each handful promises a perfect balance of indulgence and satisfaction.
The recipe transforms simple ingredients into a spectacular snack that vanishes faster than you can prepare it.
Prepare to be amazed by this crowd-pleasing sensation that will have everyone reaching for more.
Quick Recipe Overview
What Goes Into White Chocolate Trash Snack Mix
For Base Ingredients:For Sweet Additions:For Decorative Toppings:Tools That Keep Mixing This Snack Mess-Free
Melt, Toss, and Chill White Chocolate Trash Snack Mix

Melt white chocolate in microwave, stirring every 30 seconds until completely smooth and creamy.
Toss together pretzels, cereal, candies, marshmallows, and nuts in a spacious mixing bowl, ensuring even distribution.
Carefully pour melted white chocolate over snack mixture, gently folding until every morsel gets a delicious chocolate bath.
Sprinkle colorful candy bits or extra chocolate chips across the mix for a festive and eye-catching finish.
Spread mixture onto parchment-lined baking sheet, allowing chocolate to harden at room temperature for approximately 30 minutes.
Once chocolate firms up, break mix into delectable clusters. Serve immediately or store in sealed container for later snacking.
Flavor Combos and Extras to Make It Your Own
Serve in Bowls, Bags, or Jars With Ribbon
Keep This Mix Sealed and Sweet for Days
FAQs
Yes, you can substitute white chocolate with dark or milk chocolate. The flavor will change, but the overall recipe technique remains the same.
Absolutely! Kids love this sweet and crunchy snack mix. It’s easy to make and has fun textures and colors that children enjoy.
Melt chocolate slowly in 30-second intervals and stir between each interval. If it becomes grainy, add a teaspoon of vegetable oil or coconut oil to help smooth it out.
When stored in an airtight container at room temperature, this snack mix will stay fresh for about 5-7 days. Keep it away from direct sunlight and heat to maintain its crunchiness.
Print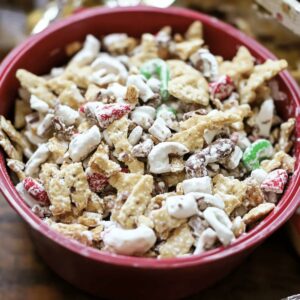
Addictive White Chocolate Trash Snack Mix Recipe
- Total Time: 40 minutes
- Yield: 13 1x
Description
White Chocolate Trash Snack Mix blends salty pretzels, crunchy cereals, and sweet marshmallows in a delightful party treat. Chocolate coating adds luxurious flavor that will make guests crave more snacking moments together.
Ingredients
- 3 cups (720 ml) rice or corn cereal squares
- 2 cups (480 ml) pretzel twists or sticks
- 1.5 cups (360 ml) salted peanuts
- 2 cups (480 ml) mini marshmallows
- 1 cup (240 ml) candy-coated chocolates
- 1 bag (12 oz/340 g) white chocolate chips or white candy melts
- 1 tbsp (15 ml) vegetable oil
Instructions
- Chocolate Preparation: Melt white chocolate chips in a microwave-safe container using 30-second intervals, stirring between each cycle to achieve a smooth, glossy texture without burning.
- Ingredient Combination: In a large mixing bowl, thoroughly blend pretzels, Chex cereal, M&Ms, marshmallows, and nuts, ensuring an even distribution of ingredients and creating a diverse flavor profile.
- Coating Process: Pour warm white chocolate over the dry ingredients, using a spatula to meticulously coat each component, guaranteeing complete coverage and maximum flavor integration.
- Decorative Touch: Sprinkle additional candy confetti or chocolate chips across the mixture for enhanced visual appeal and textural complexity.
- Setting and Cooling: Spread the chocolate-coated mixture on a parchment-lined baking sheet in a single, uniform layer, allowing it to cool and solidify at room temperature for approximately 30 minutes.
- Clustering and Serving: Once completely set, gently break the mixture into bite-sized clusters, creating an irresistible snack perfect for sharing or personal indulgence.
- Storage: Transfer the finished snack mix to an airtight container to preserve its crisp texture and prevent moisture absorption, maintaining optimal freshness.
Notes
- Prevent Chocolate Burning: Microwave white chocolate in short 30-second bursts, stirring between intervals to avoid scorching and maintain smooth texture.
- Achieve Even Coating: Use a spatula to gently fold and coat ingredients, ensuring every piece gets an equal layer of white chocolate for consistent flavor.
- Control Cooling Process: Spread mixture in a single, uniform layer on parchment paper to help chocolate set evenly and create perfect bite-sized clusters.
- Customize Dietary Needs: Swap ingredients for gluten-free pretzels, dairy-free white chocolate, or nut-free alternatives to accommodate various dietary restrictions.
- Prep Time: 10 minutes
- Cook Time: 30 minutes
- Category: Snacks, Desserts
- Method: Blending
- Cuisine: American
Nutrition
- Serving Size: 13
- Calories: 220
- Sugar: 12 g
- Sodium: 160 mg
- Fat: 11 g
- Saturated Fat: 6 g
- Unsaturated Fat: 5 g
- Trans Fat: 0 g
- Carbohydrates: 29 g
- Fiber: 1 g
- Protein: 3 g
- Cholesterol: 0 mg
John Nicholson
Lead Writer & Recipe Developer
Expertise
Recipe Testing and Development, Kitchen Hacks and Time-Saving Tips, Flavor Pairing and Ingredient Selection, Engaging Food Writing and Storytelling
Education
Johnson & Wales University
John Nicholson honed his skills at Johnson & Wales University, learning how to use fresh, local ingredients and down-to-earth techniques to make cooking simple and satisfying.
His recipes blend Southern comfort flavors with a modern touch, inviting everyone to cook with ease and confidence.
Living in Charleston, John takes cues from the city’s lively food scene, local markets, and seasonal produce. He’s all about making meals stress-free through easy tips, flavor pairings, and fun experiments in the kitchen