
Fun Crazy Cookie Monster Cookies Recipe for Sweet Tooths
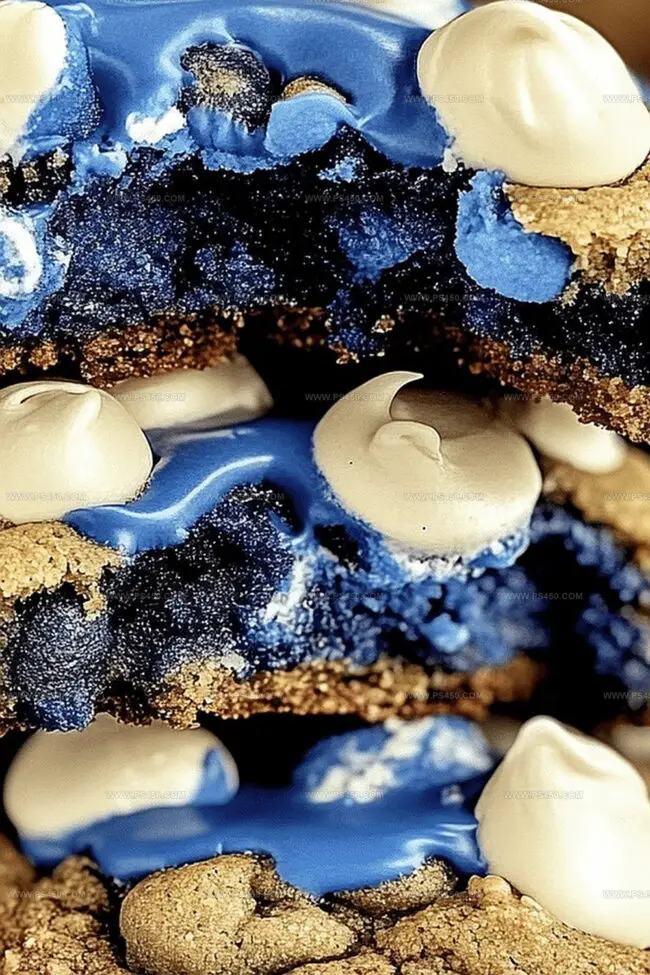
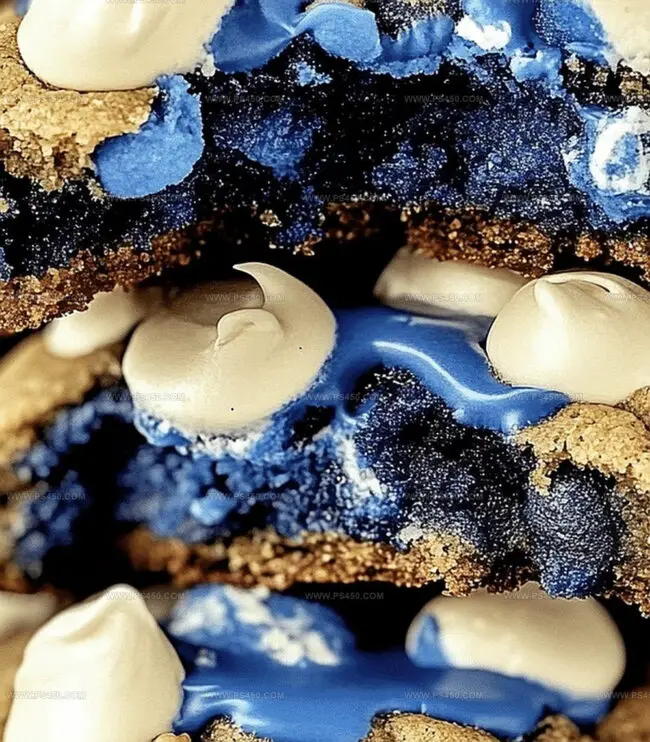
Chocolate chips dance wildly through these crazy cookie monster cookies, creating a playful dessert that drives kids and adults wild with excitement.
Loaded with vibrant blue color and chunks of delightful mix-ins, this recipe promises pure joy in every bite.
The soft, chewy texture melts right on your tongue with unexpected bursts of flavor.
Sprinkles and chocolate add whimsical charm to these delightful treats.
Baking these cookies turns an ordinary afternoon into a celebration of sweet creativity.
You’ll want to share these colorful delights with everyone who loves a little magic on their plate.
Unleash your inner cookie monster and let the baking adventure begin!
Quick Recipe Overview
Cookie Monster Cookies Ingredient Rundown
For Wet Ingredients:For Dry Ingredients:For Mix-Ins:Tools That Make Cookie Monster Cookies Fun to Bake
Bake Cookie Monster Cookies With the Perfect Crunch
Blend softened butter with sugars until creamy and light, creating a smooth foundation for your epic cookie adventure. Crack eggs into the mixture and add a splash of vanilla, stirring until everything looks perfectly combined.
Drop in blue food coloring and swirl until your dough transforms into a vibrant Cookie Monster blue. This isn’t just mixing – it’s creating edible art that’ll make everyone smile.
Gently fold flour, baking soda, and salt into your blue mixture. Stir carefully to keep the texture smooth and avoid over-working the dough, which could make cookies tough.
Toss in chocolate chips, crushed Oreos, and mini cookie pieces. These delightful chunks will create surprise bursts of flavor in every single bite. Fold gently to distribute the goodies evenly.
Roll dough into golf ball-sized rounds and place them on parchment-lined baking sheets. Pop into a preheated 350F oven and bake for 10-12 minutes until edges turn golden and centers remain soft and irresistible.
Let cookies rest on the baking sheet for a few minutes, then transfer to a cooling rack. Get ready to devour these blue, chunky, monster-inspired treats that’ll make cookie lovers go wild!
Flavor Ideas to Mix into Cookie Monster Cookies
Present These Cookies with Fun Extras
Keep Cookie Monster Cookies Soft and Fresh
FAQs
Yes, they get their vibrant blue color from gel food coloring, which gives them the signature Cookie Monster look while maintaining a delicious flavor.
Absolutely! The blue color is optional, and the cookie recipe will taste just as amazing without it. The flavor comes from the delicious mix of chocolate chips and Oreo pieces.
No, most ingredients are standard baking pantry items like flour, sugar, butter, and eggs. The only slightly unique items are the blue gel food coloring and the extra cookie pieces mixed into the dough.
Remove the cookies from the oven when the edges are slightly golden but the center still looks soft. Let them cool on the baking sheet for 5 minutes, which allows them to set without becoming hard or crispy.
Print
Crazy Cookie Monster Cookies Recipe
- Total Time: 27 minutes
- Yield: 25 1x
Description
Beloved Cookie Monster Cookies blend childhood nostalgia with playful blue-tinted chocolate chip magic. Crumbly, sweet morsels celebrate Sesame Street’s iconic character while delivering irresistible homemade comfort.
Ingredients
- 2 ¾ cups (345 g / 12.2 oz) all-purpose flour
- 1 cup (225 g / 8 oz) unsalted butter, softened
- 1 cup (200 g / 7 oz) brown sugar, packed
- ½ cup (100 g / 3.5 oz) granulated sugar
- 2 large eggs
- 1 cup semi-sweet chocolate chips
- 1 cup white chocolate chips
- 1 cup mini candy-coated chocolates (like M&Ms)
- 2 tsps vanilla extract
- 1 tsp baking soda
- ½ tsp salt
- Blue food coloring gel (optional, for a Cookie Monster-themed look)
Instructions
- Preparation Setup: Warm oven to 350F (175C) and line baking sheets with parchment paper for effortless cookie release.
- Creaming Foundation: Whip softened butter with granulated and brown sugars until the mixture transforms into a cloud-like, pale emulsion with exceptional volume.
- Liquid Integration: Blend eggs one at a time, fully incorporating each before introducing vanilla extract and blue gel food coloring, ensuring uniform pigmentation throughout the dough.
- Dry Ingredient Fusion: Gently sift flour, baking soda, and salt together, then delicately fold into the wet mixture, creating a harmonious dough without aggressive stirring.
- Textural Embellishment: Fold chocolate chips, crushed Oreos, and mini cookie pieces into the dough, distributing mix-ins to guarantee a robust flavor profile and varied texture.
- Portioning and Positioning: Scoop uniform dough balls onto prepared sheets, spacing generously to allow proper spreading during baking.
- Baking and Cooling: Bake for 10-12 minutes until edges turn golden yet centers remain tender, then rest cookies for 5 minutes before transferring to a wire rack for complete cooling.
Notes
Color Consistency: Use gel food coloring for vibrant, even blue hue without altering dough texture or moisture.
Prevent Overmixing: Gently fold dry ingredients to maintain tender cookie structure and avoid tough, dense results.
Uniform Sizing: Use portioning scoop for consistent cookie shape, ensuring even baking and professional presentation.
Temperature Control: Let cookies rest on baking sheet post-baking to complete cooking process without over-browning edges.
- Prep Time: 15 minutes
- Cook Time: 12 minutes
- Category: Desserts, Snacks
- Method: Baking
- Cuisine: American
Nutrition
- Serving Size: 25
- Calories: 220
- Sugar: 18 g
- Sodium: 90 mg
- Fat: 10 g
- Saturated Fat: 6 g
- Unsaturated Fat: 4 g
- Trans Fat: 0 g
- Carbohydrates: 30 g
- Fiber: 1 g
- Protein: 2 g
- Cholesterol: 25 mg
John Nicholson
Lead Writer & Recipe Developer
Expertise
Recipe Testing and Development, Kitchen Hacks and Time-Saving Tips, Flavor Pairing and Ingredient Selection, Engaging Food Writing and Storytelling
Education
Johnson & Wales University
John Nicholson honed his skills at Johnson & Wales University, learning how to use fresh, local ingredients and down-to-earth techniques to make cooking simple and satisfying.
His recipes blend Southern comfort flavors with a modern touch, inviting everyone to cook with ease and confidence.
Living in Charleston, John takes cues from the city’s lively food scene, local markets, and seasonal produce. He’s all about making meals stress-free through easy tips, flavor pairings, and fun experiments in the kitchen