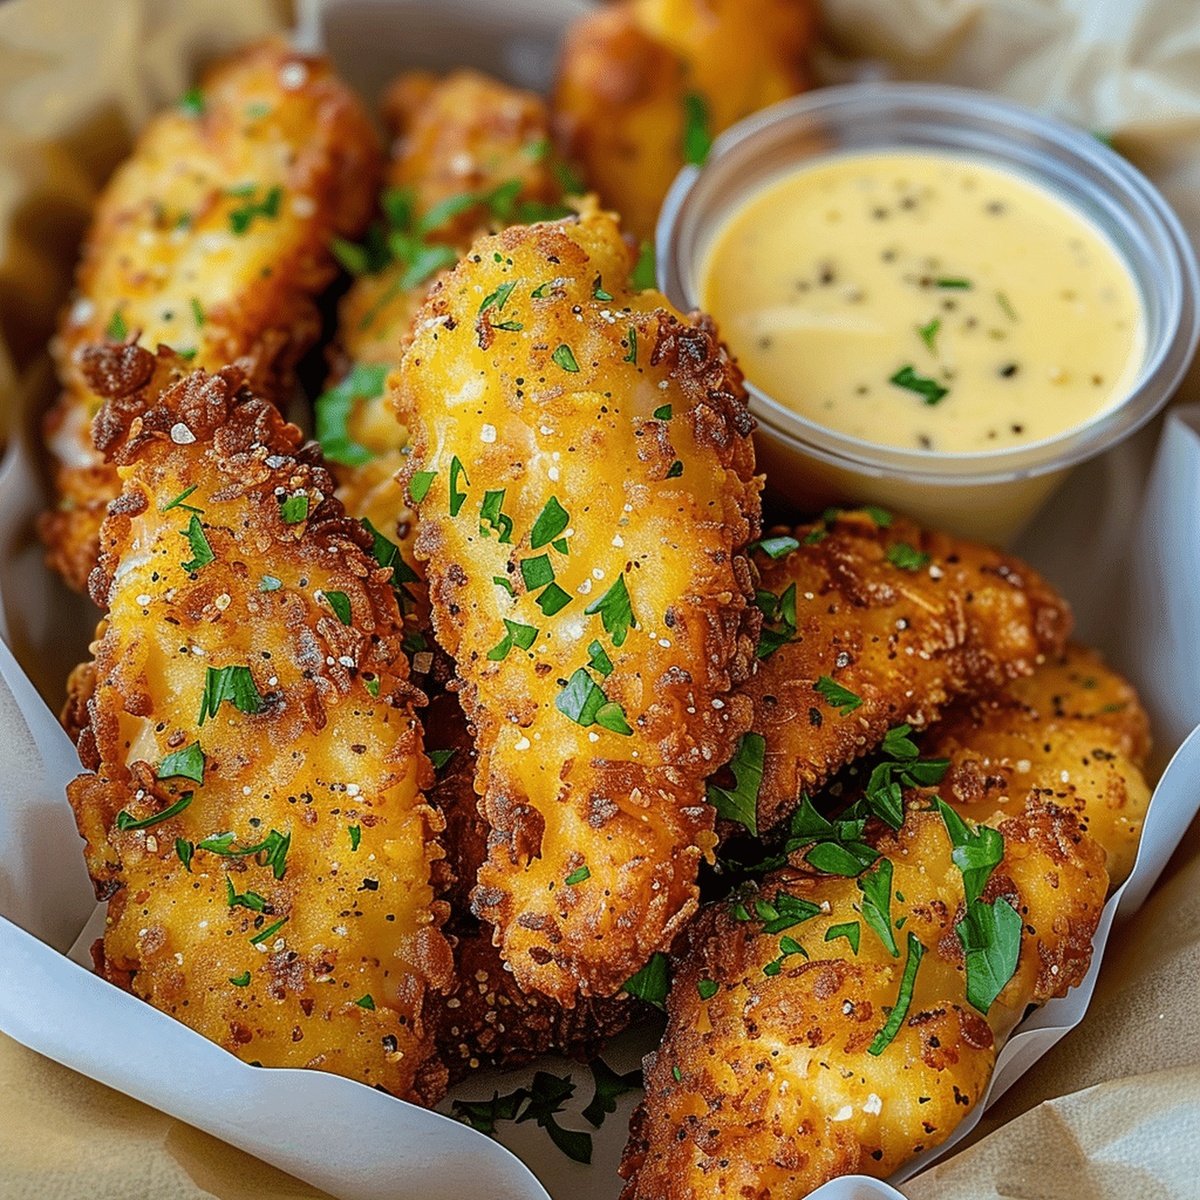
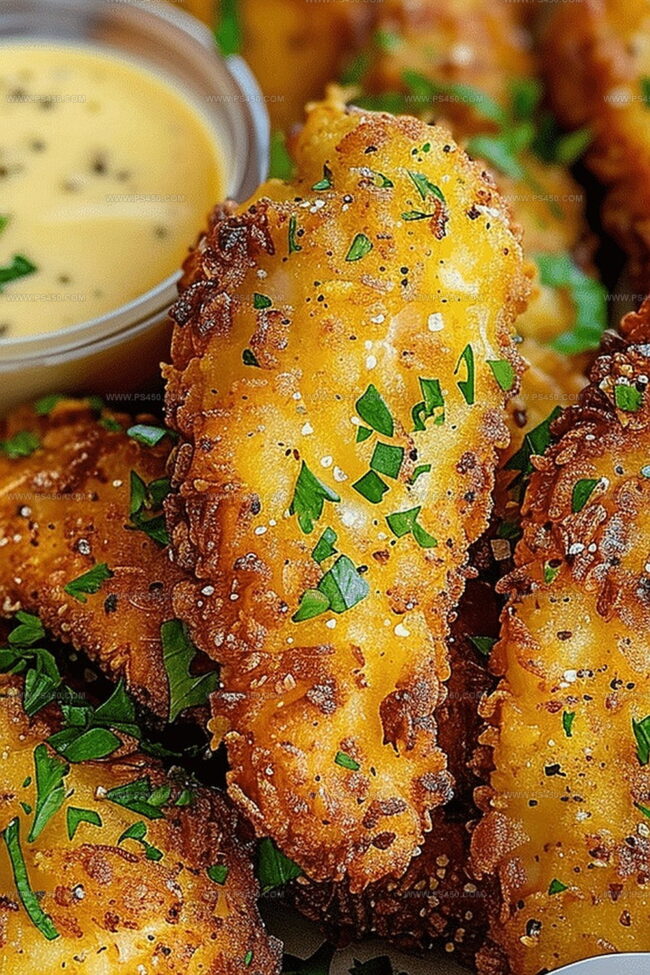
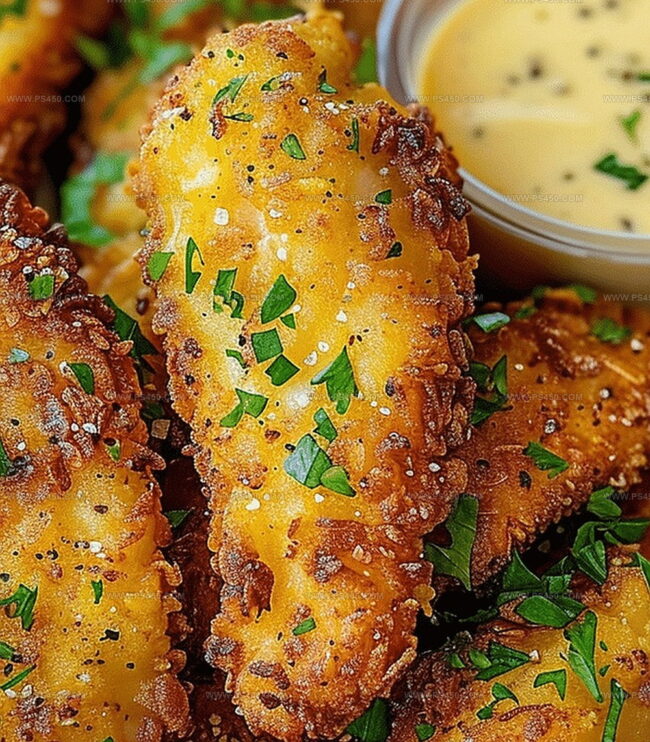
Crunchy Crack Chicken Tenders Recipe to Make Now
Weeknight dinners just got a delicious upgrade with these irresistible crack chicken tenders that promise maximum flavor and minimal effort.
The secret ingredient hidden in crack chicken tenders creates an addictive crunch that keeps everyone coming back for more.
Packed with zesty seasoning and a perfectly crispy exterior, these tenders deliver a mouthwatering experience that turns an ordinary meal into something extraordinary.
Tender chicken meets a golden, crunchy coating that seals in all the juicy goodness.
Each bite bursts with savory notes that dance across your palate, making dinner feel like a celebration.
Who can resist a protein-packed dish that’s both simple to prepare and incredibly satisfying?
You’ll want to add this recipe to your weekly rotation and watch as it becomes an instant family favorite.
Quick Recipe Overview
Crack Chicken Tender Ingredient Lineup
For Chicken Base:For Seasoning and Flavor Boosters:For Fresh Garnish:Tools to Bread and Bake Crack Chicken Tenders
Step-by-Step Guide for Chicken Tenders with Punch
Crank your oven to a sizzling 400F. Grab a baking sheet and give it a quick spray or line with parchment paper for easy cleanup.
Drizzle olive oil over chicken tenders and sprinkle ranch seasoning. Toss everything together until each tender is coated with flavor.
Spread the seasoned tenders on the baking sheet. Generously shower them with shredded cheddar and crispy bacon crumbles.
Slide the sheet into the hot oven. Let the chicken cook for 15-20 minutes until it’s fully cooked and the cheese turns into a golden, bubbly blanket.
Sprinkle some fresh green onions on top for a pop of color and extra zing. Serve immediately while everything is hot and delicious.
Tweaks for More Heat, Crunch, or Seasoning
Chicken Tender Serving Suggestions for Any Crowd
Store and Reheat Tenders Out
FAQs
The key ingredients are chicken tenders, ranch seasoning, olive oil, shredded cheddar cheese, and crumbled bacon. These create the signature flavor and texture that makes the dish irresistible.
Yes, these chicken tenders are great for meal prep. You can prepare them in advance and store them in the refrigerator for 3-4 days. They reheat well in the oven to maintain their crispy texture.
Absolutely! You can slice chicken breasts into tender-sized pieces if you don’t have chicken tenders. Just ensure they’re cut evenly for consistent cooking and adjust cooking time slightly if needed.
Use a meat thermometer to check that the internal temperature reaches 165F (75C). This ensures the chicken is safe to eat and remains juicy and tender.
Print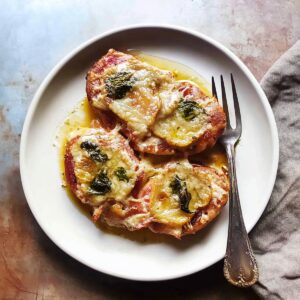
Chicken Saltimbocca Recipe
- Total Time: 35 minutes
- Yield: 4 1x
Description
Succulent chicken saltimbocca brings Italian culinary magic straight from Roman kitchens onto your dinner plate. Prosciutto and sage dance together, creating a symphony of flavors that elevates simple ingredients into an elegant masterpiece you’ll savor with pure delight.
Ingredients
Chicken Saltimbocca
Main Protein:
- 4 boneless, skinless chicken breasts (pounded to ½-inch thickness)
- 4 slices prosciutto
Cheese and Herbs:
- 4 slices fontina cheese (or mozzarella or provolone)
- 8 fresh sage leaves
Cooking and Seasoning Ingredients:
- ¼ cup all-purpose flour (for dusting)
- 2 tablespoons olive oil
- 4 tablespoons (¼ cup) unsalted butter
- ½ cup dry white wine
- ½ cup low-sodium chicken broth
- 1 tablespoon lemon juice
- Salt (to taste)
- Black pepper (to taste)
Instructions
- Prepare the chicken cutlets by gently seasoning with salt and pepper, ensuring even coverage across the surface.
- Layer a delicate slice of prosciutto over each seasoned cutlet, carefully pressing two fresh sage leaves onto the cured meat.
- Crown the prosciutto with a thin slice of your preferred cheese, creating a flavorful topping.
- Lightly dust the bare side of the chicken with a fine coating of flour, avoiding the prosciutto-covered surface.
- Warm a large skillet over medium-high heat, combining olive oil and butter to create a rich cooking medium.
- Carefully place the prepared chicken into the skillet, positioning the prosciutto side facing upward.
- Cook each side for approximately 3-4 minutes, allowing the chicken to develop a golden-brown crust and cook thoroughly.
- Transfer the cooked chicken to a warm plate, preserving its temperature and texture.
- Deglaze the skillet with a splash of white wine, using a wooden spoon to lift the caramelized bits from the pan’s bottom.
- Allow the wine to simmer and reduce, concentrating its flavors.
- Pour in chicken broth and a squeeze of fresh lemon juice, creating a vibrant pan sauce.
- Reduce the liquid by half, concentrating the flavors and achieving a slightly thickened consistency.
- Finish the sauce by whisking in a pat of butter, creating a silky, luxurious texture.
- Taste and adjust the seasoning with additional salt and pepper as needed.
- Generously drizzle the sauce over the chicken, ensuring each piece is beautifully coated.
- Serve immediately alongside your favorite accompaniments like creamy mashed potatoes, sautéed spinach, or a crisp green salad.
Notes
- Choose boneless, skinless chicken breasts of even thickness to ensure uniform cooking and prevent dry or undercooked sections.
- Pat chicken dry before seasoning to help flour adhere better and create a crispy exterior when searing.
- Swap prosciutto with turkey bacon for a lower-fat alternative or use vegetarian cheese for a meat-free version.
- Use fresh sage leaves for maximum flavor, pressing them gently into the prosciutto to help them stick during cooking.
- Avoid overcrowding the skillet to maintain high heat and achieve proper golden-brown caramelization on the chicken.
- Monitor cooking time carefully, as chicken breasts can quickly become tough and dry when overcooked.
- Select a dry white wine like Pinot Grigio or Sauvignon Blanc for deglazing to add subtle complexity to the sauce.
- Quickly whisk cold butter into the sauce off the heat to create a smooth, glossy finish without breaking the emulsion.
- Prep Time: 15 minutes
- Cook Time: 20 minutes
- Category: Dinner
- Method: Sautéing
- Cuisine: Italian
Nutrition
- Serving Size: 4
- Calories: 450
- Sugar: 1 g
- Sodium: 600 mg
- Fat: 26 g
- Saturated Fat: 10 g
- Unsaturated Fat: 14 g
- Trans Fat: 0 g
- Carbohydrates: 12 g
- Fiber: 0 g
- Protein: 36 g
- Cholesterol: 120 mg
John Nicholson
Lead Writer & Recipe Developer
Expertise
Recipe Testing and Development, Kitchen Hacks and Time-Saving Tips, Flavor Pairing and Ingredient Selection, Engaging Food Writing and Storytelling
Education
Johnson & Wales University
John Nicholson honed his skills at Johnson & Wales University, learning how to use fresh, local ingredients and down-to-earth techniques to make cooking simple and satisfying.
His recipes blend Southern comfort flavors with a modern touch, inviting everyone to cook with ease and confidence.
Living in Charleston, John takes cues from the city’s lively food scene, local markets, and seasonal produce. He’s all about making meals stress-free through easy tips, flavor pairings, and fun experiments in the kitchen