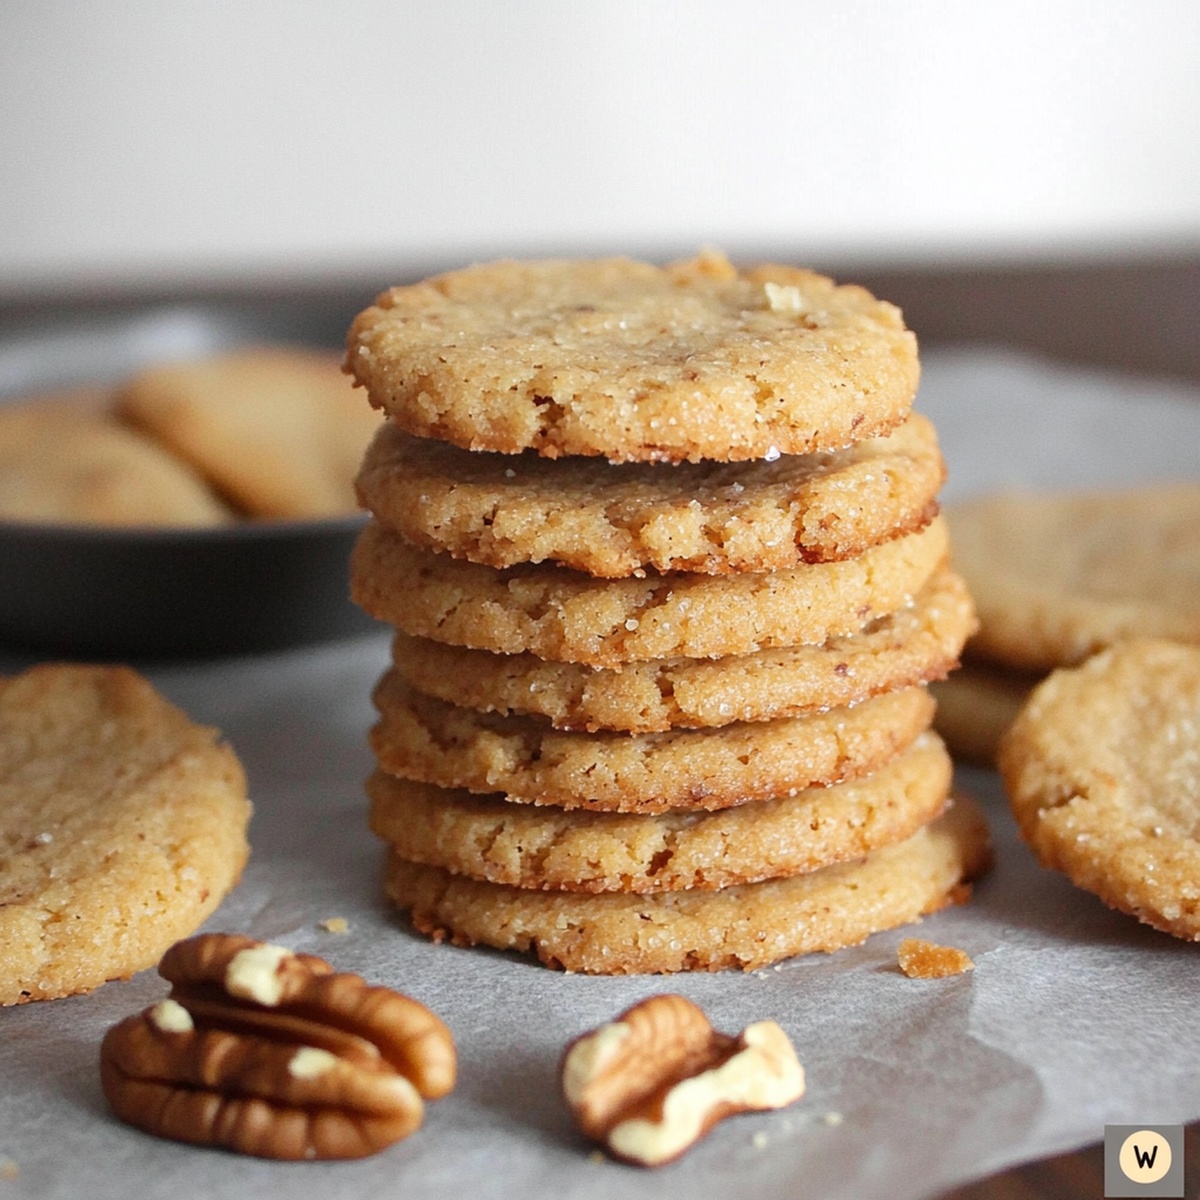
Walnut Butter Cookies Recipe: Crunchy Homemade Joy in Minutes
Sweet and nutty, these crispy walnut butter cookies dance with a delightful crunch that melts in your mouth.
Buttery richness mingles perfectly with toasted walnut pieces throughout each delectable bite.
Crafted with simple ingredients, these cookies promise a delightful treat that comes together effortlessly.
Each golden-brown morsel carries a rich, warm flavor that hints at comforting baking traditions.
The walnut’s earthy notes complement the smooth butter base, creating a harmonious blend of textures and tastes.
Minimal effort yields maximum satisfaction with this straightforward recipe.
Bake a batch and watch these irresistible cookies disappear in moments.
Quick Recipe Overview
What You’ll Need For Walnut Butter Cookies
For Base Ingredients:For Dry Mixture:For Mix-In:Cookie Tools For Walnut Butter Perfection
Baking Steps For Walnut Butter Cookies
Crank the oven to a toasty 350F and line your baking sheets with parchment paper for easy cleanup.
Grab a mixing bowl and beat the butter with both sugars until they transform into a fluffy, creamy dream that looks light as a cloud.
Crack in the egg and splash of vanilla, mixing until everything blends into a smooth, inviting mixture.
In a separate bowl, combine flour, baking powder, and salt, then gently fold these dry ingredients into your buttery base.
Toss in those crunchy chopped walnuts, stirring until they’re evenly scattered throughout the dough.
Roll the dough into bite-sized balls, placing them on the baking sheet with some breathing room. Give each a gentle press to create a classic cookie shape.
Slide the tray into the oven and bake for 10-12 minutes until the edges turn a beautiful golden brown while keeping a soft center.
Let the cookies rest on the baking sheet for a few minutes, then transfer to a cooling rack. Dust with a sprinkle of powdered sugar if you’re feeling extra fancy.
Tips & Variations For Walnut Butter Cookies
How To Serve Walnut Butter Cookies
Keeping Walnut Butter Cookies Fresh Longer
Print
Crispy Walnut Butter Cookies Recipe
- Total Time: 25 minutes
- Yield: 25 1x
Description
Classic walnut butter cookies embody homemade comfort from European baking traditions. Rich nutty notes and delicate crumb invite sweet moments of simple pleasure you’ll savor completely.
Ingredients
- 2 cups (480 ml) all-purpose flour
- 1 cup (230 g) unsalted butter, softened
- 1 cup (100 g) chopped walnuts
- ½ cup (100 g) granulated sugar
- ½ cup (110 g) brown sugar, packed
- 1 large egg
- 1 tsp vanilla extract
- ½ tsp baking powder
- ¼ tsp salt
- Optional: powdered sugar for dusting
Instructions
- Preheat Preparation: Elevate oven temperature to 350F (175C) and strategically line baking sheets with parchment paper to ensure optimal cookie performance and effortless release.
- Creaming Foundation: Whip butter and sugars in a spacious mixing bowl until the mixture transforms into a light, voluminous cream, creating a silky smooth base that promises delectable texture.
- Moisture Integration: Seamlessly blend egg and vanilla extract into the creamed mixture, establishing a rich, harmonious foundation that will infuse depth and moisture throughout the dough.
- Dry Ingredient Fusion: Meticulously combine flour, baking powder, and salt, crafting a delicate dry mixture that will provide structural integrity and balanced flavor to the cookies.
- Dough Consolidation: Delicately merge dry ingredients with the wet mixture, stirring until just incorporated to preserve the dough’s tender consistency and prevent potential toughness.
- Nutty Embellishment: Gently fold chopped walnuts throughout the dough, ensuring an even distribution that promises a delightful crunch in every bite.
- Shaping and Positioning: Craft compact dough spheres approximately one inch in diameter, strategically placing them on prepared baking surfaces with ample spacing to accommodate gentle expansion during baking.
- Baking Transformation: Softly flatten each dough ball to create a uniform profile, then transfer to the preheated oven. Bake for 10-12 minutes, vigilantly monitoring for golden edges while maintaining a soft, yielding center.
- Cooling and Finishing: Allow cookies to rest briefly on the baking sheet, then transfer to a wire rack for complete cooling. Optionally dust with powdered sugar for an elegant, refined presentation.
Notes
- Prevent Dough Overworking: Mix ingredients just until combined to maintain a soft, tender cookie texture without developing tough gluten strands.
- Control Walnut Distribution: Chop walnuts uniformly and fold gently to ensure even nutty crunch throughout each cookie.
- Optimize Baking Performance: Space cookies about 2 inches apart to allow proper spreading and prevent them from merging during baking.
- Temperature Precision: Remove cookies when edges turn golden but centers remain slightly soft for the perfect balance of crisp exterior and chewy interior.
- Prep Time: 10 minutes
- Cook Time: 15 minutes
- Category: Desserts, Snacks
- Method: Baking
- Cuisine: American
Nutrition
- Serving Size: 25
- Calories: 150
- Sugar: 8 g
- Sodium: 50 mg
- Fat: 9 g
- Saturated Fat: 4 g
- Unsaturated Fat: 5 g
- Trans Fat: 0 g
- Carbohydrates: 18 g
- Fiber: 1 g
- Protein: 2 g
- Cholesterol: 20 mg
John Nicholson
Lead Writer & Recipe Developer
Expertise
Recipe Testing and Development, Kitchen Hacks and Time-Saving Tips, Flavor Pairing and Ingredient Selection, Engaging Food Writing and Storytelling
Education
Johnson & Wales University
John Nicholson honed his skills at Johnson & Wales University, learning how to use fresh, local ingredients and down-to-earth techniques to make cooking simple and satisfying.
His recipes blend Southern comfort flavors with a modern touch, inviting everyone to cook with ease and confidence.
Living in Charleston, John takes cues from the city’s lively food scene, local markets, and seasonal produce. He’s all about making meals stress-free through easy tips, flavor pairings, and fun experiments in the kitchen