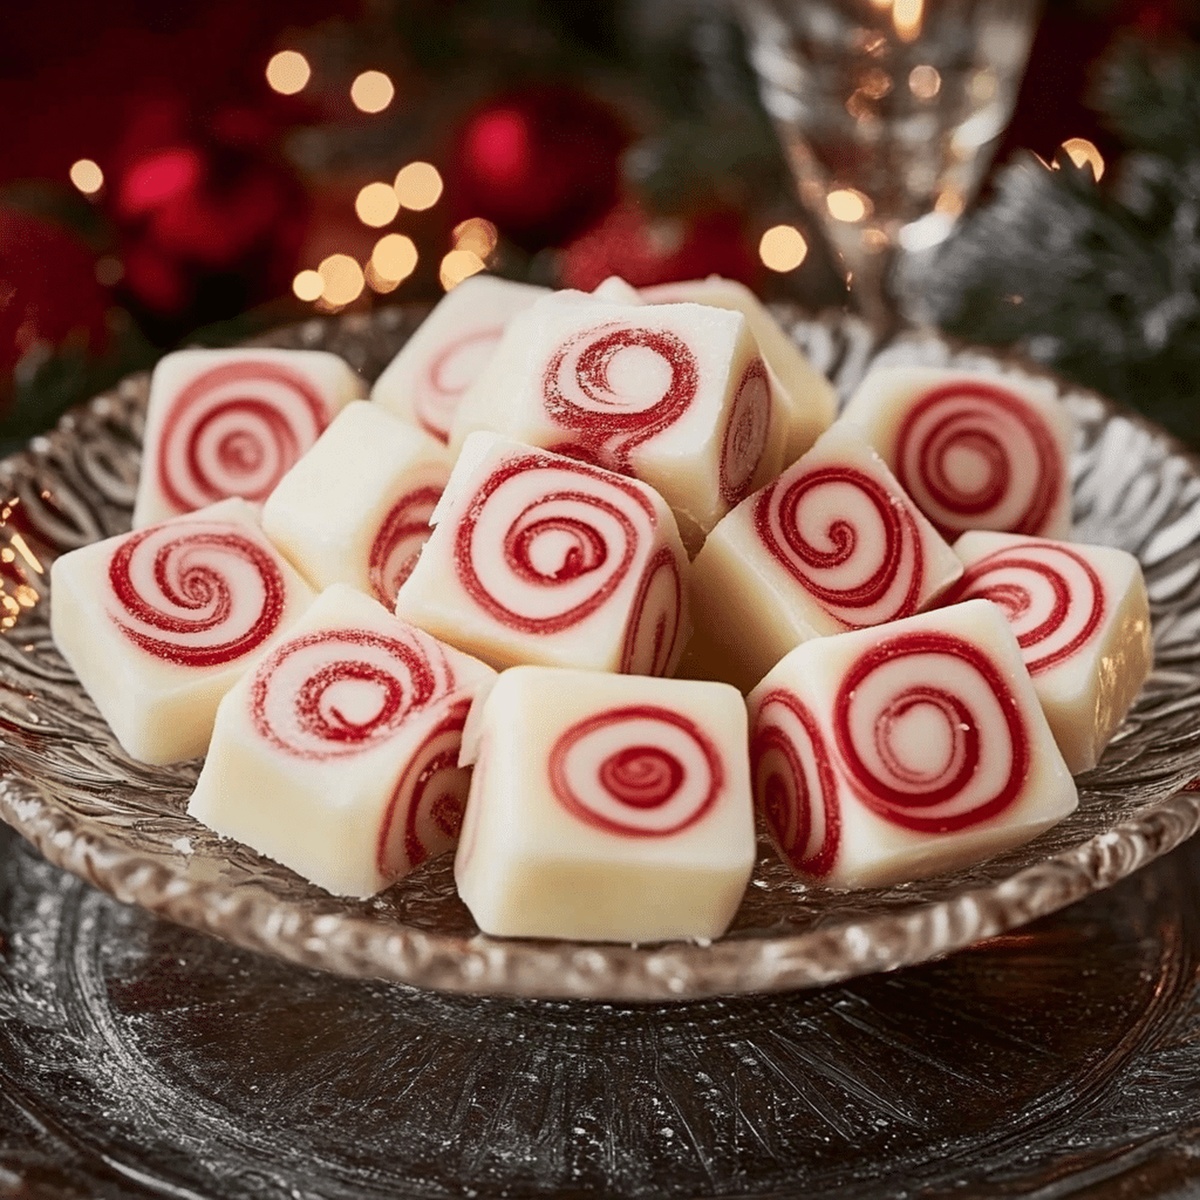
Christmas Peppermint Recipe That’s Cool and Festive
Festive holiday gatherings sparkle with the magic of homemade Christmas peppermints that melt effortlessly on your tongue.
These delicate candies bring nostalgic winter memories dancing through your kitchen.
Sweet peppermint flavors capture the essence of seasonal celebrations with remarkable simplicity.
Crafting these treats connects generations through a cherished culinary tradition.
Delicate sugar crystals and cool mint create an irresistible combination that beckons everyone to the dessert table.
Each carefully prepared peppermint becomes a small work of festive art.
Indulge in this delightful recipe and spread some sweet holiday cheer.
Quick Recipe Overview
What You’ll Need for Soft Christmas Peppermints
For Base Ingredients:For Flavor Enhancers:For Finishing Details:Tools to Shape and Chill Old-Fashioned Butter Mints
How to Make Soft Peppermints from Scratch
Grab your mixer and transform softened butter into a creamy dream, beating until silky smooth.
Gently fold powdered sugar into the butter, creating a crumbly wonderland that’ll make your taste buds dance.
Pour in heavy cream and peppermint extract, then whip until the dough becomes a smooth, delightful canvas ready for color and fun.
Divide your dough and playfully knead in food coloring – think festive red and green or classic white for a traditional touch.
Roll tiny dough balls and gently press with a fork, giving each mint a charming, textured personality.
Allow your mints to air-dry at room temperature for a full night, transforming from soft dough to delicate, melt-in-your-mouth treats.
Tuck your homemade mints into an airtight container, where they’ll stay fresh and delicious for up to two weeks.
Flavor Tweaks & Texture Tips for Butter Mints
Serve Them in Jars, Bags, or Bowls
Keep Peppermints Fresh Through the Holidays
FAQs
Yes, but reduce or omit any additional salt in the recipe. Salted butter might slightly alter the mint’s final taste.
Use standard confectioners’ sugar that’s smooth and finely ground. Sifting helps prevent lumps and ensures a creamy mint texture.
Add small amounts of powdered sugar gradually until the dough becomes easier to handle. Work the sugar in slowly to maintain the right consistency.
No, just a mixing bowl, electric mixer, baking sheet, and parchment paper. A fork works perfectly for creating the decorative pattern on top of each mint.
Print
Dreamy Christmas Peppermints
- Total Time: 8 hours 15 minutes
- Yield: 21 1x
Description
Homemade Soft Christmas Peppermints deliver nostalgic holiday charm with classic butter mint magic. Delicate peppermint squares melt gracefully, offering sweet memories of grandmother’s cherished recipe.
Ingredients
- 4 cups (454 grams) powdered sugar, sifted
- ½ cup (113 grams) unsalted butter, softened
- 2 tbsps (30 ml) heavy cream (plus extra if needed)
- ½ tsp (2.5 ml) peppermint extract (adjust to taste)
- Food coloring (optional, red and green for festive colors)
Instructions
- Butter Preparation: Whip softened butter using an electric mixer until achieving a silky, uniform consistency with no lumps.
- Sugar Integration: Methodically fold powdered sugar into butter, blending thoroughly after each addition until mixture transforms into a crumbly, grainy texture.
- Liquid Enhancement: Pour heavy cream and peppermint extract into the mixture, combining until a smooth, malleable dough forms. Adjust moisture level with minimal additional cream if needed.
- Color Infusion: Divide dough into distinct portions and gently massage food coloring throughout each section, ensuring even pigment distribution. Traditional holiday hues include vibrant red, festive green, and classic white.
- Shaping and Texturing: Roll small, uniform spheres approximately half an inch in diameter, positioning them on parchment-lined surface. Delicately imprint each mint with fork tines to create elegant surface patterns.
- Drying and Setting: Allow mints to air-dry at room temperature for a minimum of eight hours, enabling them to develop a firm, stable structure. Transfer completely set mints into an airtight container to preserve freshness and maintain optimal texture.
- Consumption Guideline: Enjoy these delectable treats within two weeks to ensure peak flavor and quality.
Notes
- Butter Temperature Matters: Ensure butter is softened, not melted, for optimal dough consistency and smooth mixing.
- Precise Sugar Incorporation: Add powdered sugar gradually to prevent lumps and achieve the perfect crumbly texture.
- Color Distribution Technique: Knead food coloring gently to create uniform, vibrant mints without streaking or uneven pigmentation.
- Drying Strategy: Place mints in a cool, dry area away from direct sunlight or humidity to maintain their delicate structure and prevent sticking.
- Prep Time: 15 minutes
- Cook Time: 8 hours
- Category: Desserts, Snacks
- Method: Blending
- Cuisine: American
Nutrition
- Serving Size: 21
- Calories: 106
- Sugar: 10.5 g
- Sodium: 2 mg
- Fat: 4.5 g
- Saturated Fat: 2.8 g
- Unsaturated Fat: 1.7 g
- Trans Fat: 0 g
- Carbohydrates: 16.9 g
- Fiber: 0 g
- Protein: 0.1 g
- Cholesterol: 12 mg
John Nicholson
Lead Writer & Recipe Developer
Expertise
Recipe Testing and Development, Kitchen Hacks and Time-Saving Tips, Flavor Pairing and Ingredient Selection, Engaging Food Writing and Storytelling
Education
Johnson & Wales University
John Nicholson honed his skills at Johnson & Wales University, learning how to use fresh, local ingredients and down-to-earth techniques to make cooking simple and satisfying.
His recipes blend Southern comfort flavors with a modern touch, inviting everyone to cook with ease and confidence.
Living in Charleston, John takes cues from the city’s lively food scene, local markets, and seasonal produce. He’s all about making meals stress-free through easy tips, flavor pairings, and fun experiments in the kitchen