Fluffy Easter Bunny Sugar Cookies Recipe: Adorable Spring Treats
Sweet memories dance around these easter bunny sugar cookies that sparkle with childhood wonder and delicate charm.
Soft vanilla whispers emerge from each carefully crafted shape, inviting playful moments of connection.
Childhood nostalgia blends seamlessly with buttery textures and delicate decorations.
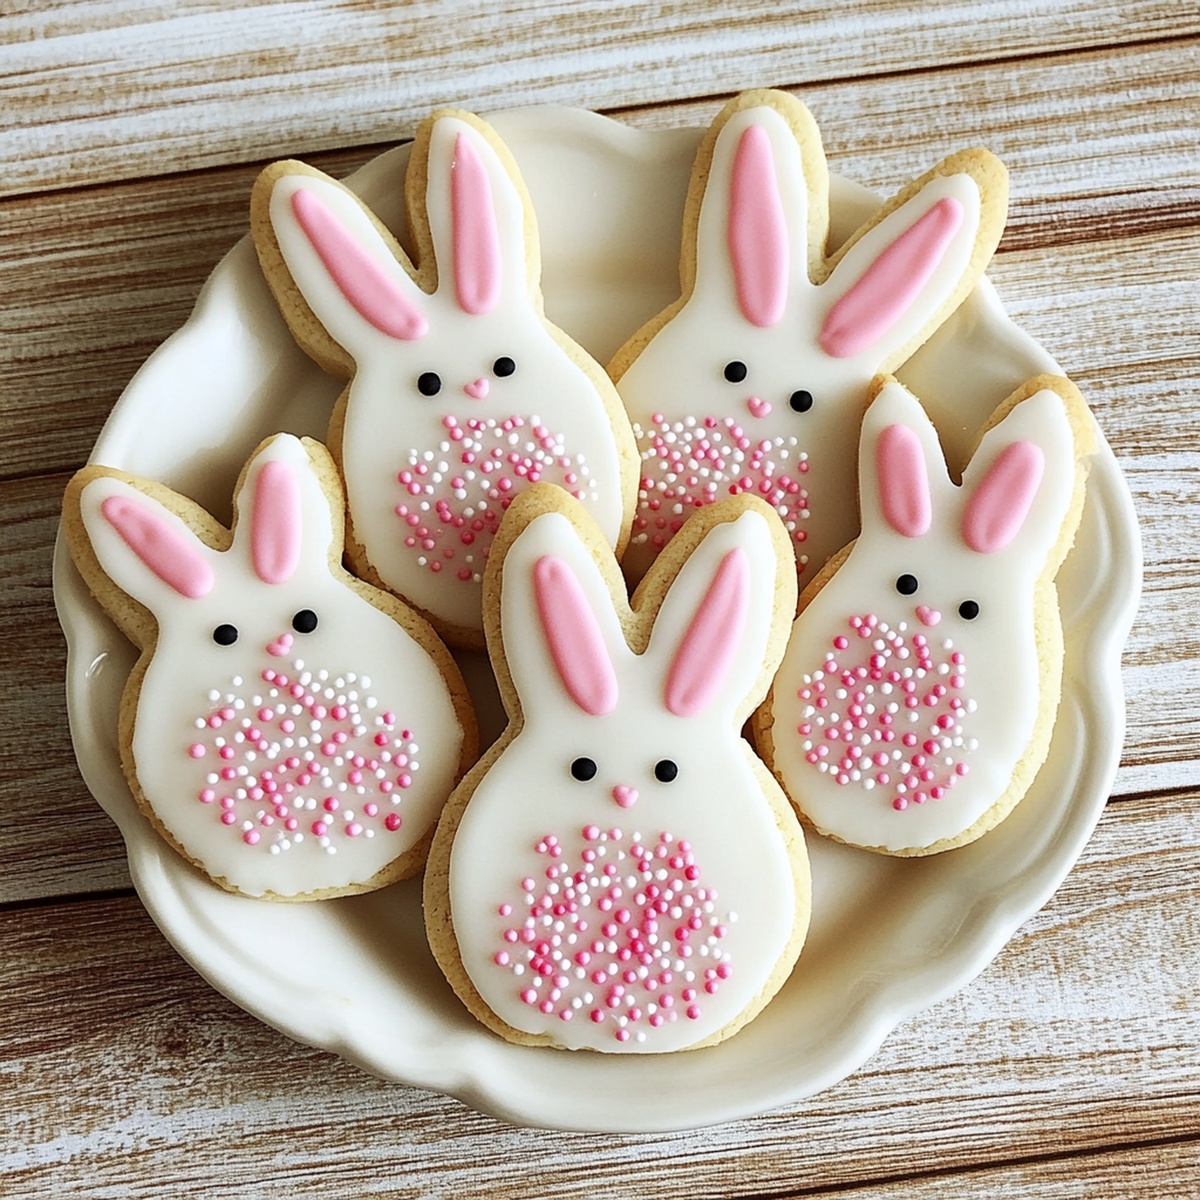
Pastel-hued icing creates whimsical details that transform simple cookies into magical treats.
Delicate ears and sweet expressions capture the essence of springtime celebrations.
Crafting these delightful cookies becomes a joyful ritual that brings smiles to faces young and old.
You’ll find these bunny-shaped delights irresistibly charming and surprisingly easy to create.
Embrace the magic and let your creativity hop into action!
Why Easter Bunny Sugar Cookies Are Adorable And Sweet

Ingredients You’ll Need For Easter Bunny Sugar Cookies
Dry Ingredients:Wet Ingredients:Decorating Ingredients:How To Make Easter Bunny Sugar Cookies Step By Step

Step 1: Whisk Dry Ingredients
Grab a mixing bowl and combine flour, baking powder, and salt. Whisk these ingredients until they’re perfectly blended and set aside.
Step 2: Cream Butter and Sugar
In a large mixing bowl, beat butter and sugar together until the mixture becomes light, fluffy, and creamy. Crack in the egg and pour in vanilla and almond extracts. Mix everything until it’s smooth and well combined.
Step 3: Create Cookie Dough
Slowly fold the dry ingredients into the wet mixture. Keep mixing until a soft, pliable dough forms. Divide the dough into two equal discs, wrap each in plastic wrap, and let them chill in the refrigerator for at least an hour.
Step 4: Prepare Baking Station
Heat the oven to 350 degrees Fahrenheit. Line baking sheets with parchment paper to prevent sticking.
Step 5: Roll and Cut Bunny Shapes
Dust your work surface with flour. Roll out the chilled dough to about 1/4-inch thickness. Use a bunny-shaped cookie cutter to create adorable cookie shapes. Carefully transfer these cute bunnies to the prepared baking sheets, leaving about an inch between each cookie.
Step 6: Bake to Golden Perfection
Slide the baking sheets into the oven. Bake for 8-10 minutes until the cookie edges turn a beautiful light golden color. Transfer cookies to a wire rack and let them cool completely.
Step 7: Whip Up Royal Icing
In a clean bowl, combine:Whisk until the mixture becomes smooth. Adjust the water consistency to create a thick but pipeable icing. Separate the icing into different bowls and add food coloring as desired.
Step 8: Decorate with Bunny Flair
Create the base layer by piping white icing over the entire bunny shape. Let it set for a few minutes. Add playful details:Step 9: Let Icing Set
Allow the decorated cookies to rest at room temperature for 1-2 hours. This helps the icing firm up and creates a perfect, smooth finish.
Enjoy your adorable Easter Bunny Sugar Cookies!
Tips For Icing Easter Bunny Sugar Cookies With Ease
How To Store Easter Bunny Sugar Cookies Safely
Great Snacks To Pair With Easter Bunny Sugar Cookies
Fun Decoration Variations For Easter Bunny Sugar Cookies
FAQs For Easter Bunny Sugar Cookies Enthusiasts
These cookies are adorable and festive, perfect for spring celebrations. The bunny shape, cute decorations like candy eyes and marshmallow tails, and the delicate royal icing make them a delightful treat that kids and adults will love.
You’ll need a bunny-shaped cookie cutter, piping bags or squeeze bottles for decorating, and a wire rack for cooling. A stand mixer or hand mixer helps with mixing the dough and icing, but isn’t absolutely necessary.
While they look intricate, the decorating process is beginner-friendly. The key is to let each icing layer dry before adding the next. Start with a white base, then add details like pink ears and eyes. Take your time and have fun with the decorating!
Absolutely! The cookie dough can be prepared and chilled up to 3 days in advance. The baked and decorated cookies will stay fresh in an airtight container for about 5-7 days, making them perfect for early Easter preparation.
Print
Easter Bunny Sugar Cookies Recipe
- Total Time: 1 hour 30 minutes
- Yield: 24 1x
Description
Delightful easter bunny sugar cookies promise a whimsical hop into springtime sweetness. Crisp edges, smooth vanilla glaze, and playful bunny shapes invite you to savor each delectable bite of childhood nostalgia.
Ingredients
Main Ingredients:
- 2 ½ cups (315 grams) all-purpose flour
- 1 cup (227 grams) unsalted butter, softened
- 1 cup (200 grams) granulated sugar
- 1 large egg
Flavoring Ingredients:
- 1 teaspoon vanilla extract
- ½ teaspoon almond extract (optional)
- 1 teaspoon baking powder
- ½ teaspoon salt
Decoration Ingredients:
- 2 cups (240 grams) powdered sugar
- 2 tablespoons meringue powder
- 46 tablespoons (680 milliliters) water
- Gel food coloring (pink, white, and pastel shades)
- Small candy eyes or chocolate chips
- Mini marshmallows
- Pink sugar crystals or sprinkles
Instructions
- Craft a silky, uniform mixture by whisking flour, baking powder, and salt in a medium bowl, creating a foundational dry ingredient blend.
- In a spacious mixing bowl, cream butter and sugar until the texture becomes airy and pale, incorporating egg, vanilla, and almond extracts to develop a rich, fragrant base.
- Gently fold dry ingredients into the wet mixture, kneading until a cohesive dough emerges. Partition the dough into two compact discs, encase in plastic wrap, and refrigerate for minimum 60 minutes to enhance flavor and texture.
- Heat the oven to 350F (175C) and line baking sheets with parchment paper, preparing a pristine surface for cookie transformation.
- Dust the work surface with flour and roll the chilled dough to a uniform 1/4-inch thickness. Utilize a bunny-shaped cookie cutter to sculpt adorable cookie silhouettes, positioning them strategically on prepared baking sheets.
- Slide the trays into the preheated oven, baking for 8-10 minutes until edges acquire a delicate golden hue. Transfer cookies to a wire rack, allowing complete cooling.
- Construct royal icing by whisking powdered sugar and meringue powder, gradually introducing water until achieving a smooth, pipeable consistency. Divide icing and infuse with vibrant food coloring.
- Commence decorating by coating each bunny with a pristine white icing base. Once set, embellish with pink-tinted ear and nose details. Affix candy eyes or pipe chocolate accents. Crown each cookie with a miniature marshmallow “tail” secured by a dollop of icing.
- Allow decorated cookies to rest at room temperature, permitting the intricate icing design to solidify completely over 1-2 hours.
Notes
- Ensure butter is at room temperature for easier mixing and a smoother dough consistency.
- Chill the dough thoroughly to prevent spreading and maintain the bunny shape during baking.
- Use a sharp, clean cookie cutter for crisp bunny silhouettes and minimal dough waste.
- Rotate baking sheets halfway through cooking to guarantee even golden edges on all cookies.
- Work quickly when rolling out dough to keep it cold and prevent sticking.
- For gluten-free options, substitute all-purpose flour with a 1:1 gluten-free baking blend.
- Create uniform cookie sizes by using a digital kitchen scale when portioning dough.
- Store decorated cookies in a single layer between parchment paper to preserve delicate icing details.
- Experiment with natural food colorings like beet powder or matcha for pastel Easter hues.
- Allow royal icing to dry completely to achieve a smooth, professional-looking finish.
- Prep Time: 30 minutes
- Cook Time: 30 minutes
- Category: Desserts, Snacks
- Method: Baking
- Cuisine: American
Nutrition
- Serving Size: 24
- Calories: 150
- Sugar: 10 g
- Sodium: 50 mg
- Fat: 7 g
- Saturated Fat: 4 g
- Unsaturated Fat: 2 g
- Trans Fat: 0 g
- Carbohydrates: 20 g
- Fiber: 0 g
- Protein: 1 g
- Cholesterol: 15 mg
Emily Morgan
Food Critic & Kitchen Tips Specialist
Expertise
Global Food Exploration & Critique, Simple Kitchen Hacks & Time-Saving Tips, Presentation & Plating Techniques, Culinary Research & Storytelling.
Education
New York University
Emily Morgan has journeyed across the globe, collecting culinary secrets that turn everyday ingredients into impressive meals.
Based in Seattle and armed with a Journalism degree from NYU, she blends thorough research with a flair for presentation, ensuring every dish looks just as good as it tastes.
Focusing on fresh flavors, simple methods, and a bit of fun, Emily shows home cooks how to elevate their daily cooking without fancy gadgets or complex steps.