Quick Explosive Pepperoni Pizza Bombs Recipe: Fun Handheld Treats!
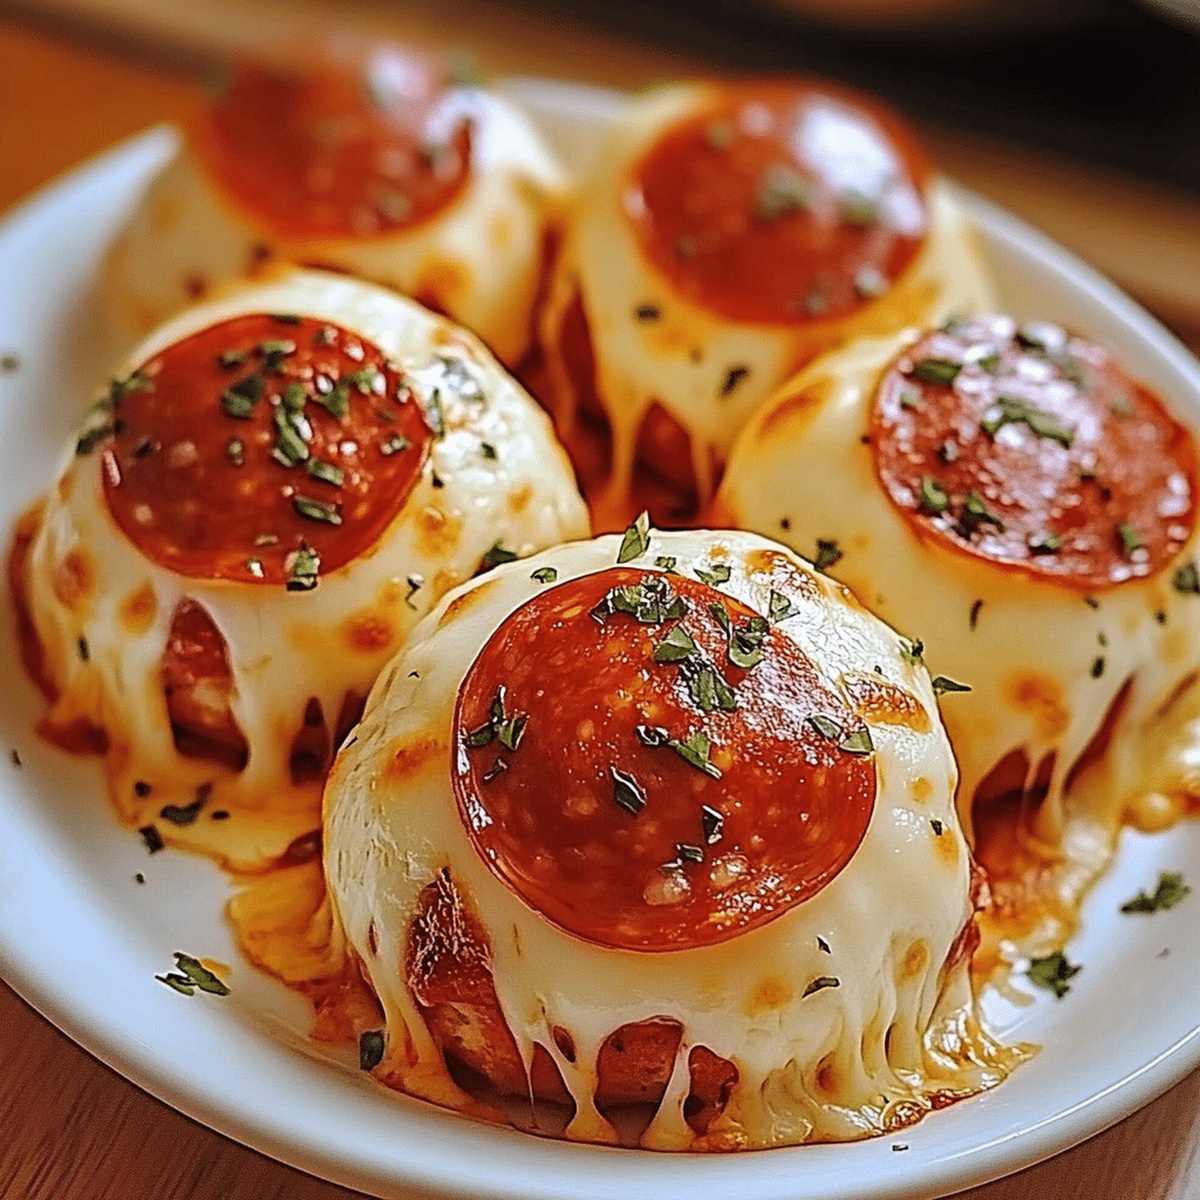
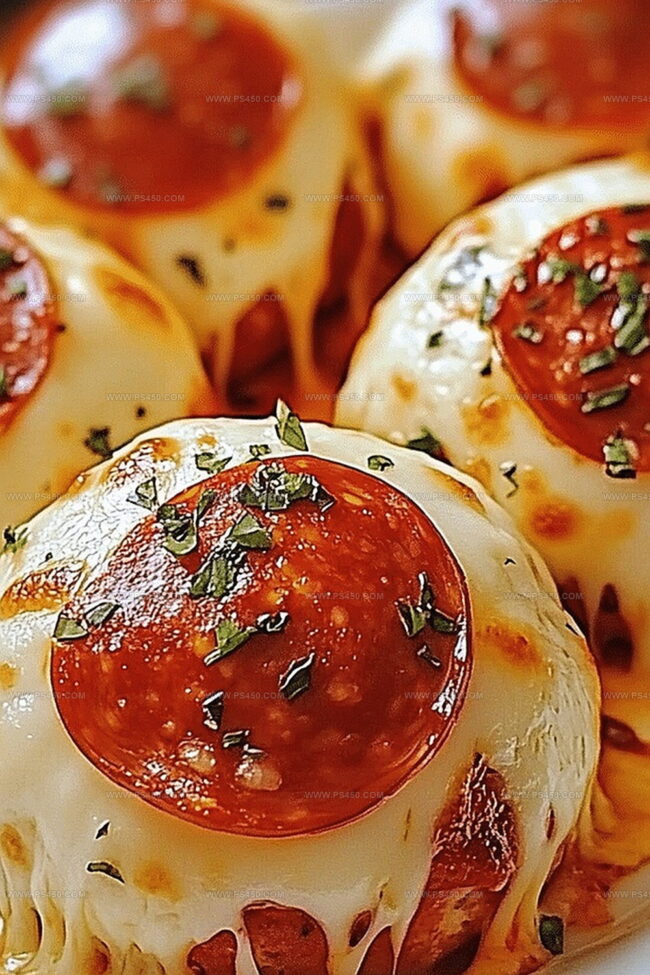
Dinner nights just got a delicious upgrade with these mouthwatering pepperoni pizza bombs that pack an irresistible cheesy punch.
Melted mozzarella and savory pepperoni hide inside golden, crispy dough waiting to surprise your taste buds.
These handheld treats combine all the classic pizza flavors into one perfectly portable snack.
Crisp on the outside and gooey on the inside, they deliver maximum flavor with minimal effort.
Each bite promises a burst of tangy marinara and melted cheese that will make you forget traditional pizza slices.
Quick to prepare and even faster to disappear, these pizza bombs transform ordinary meal times into something extraordinary.
Serve them hot and watch everyone dive in with pure culinary excitement.
Quick Recipe Overview
What Makes Cheesy Pepperoni Pizza Bombs Tick
For Dough and Base:For Filling and Cheese:For Seasoning and Topping:Kitchen Prep for Pizza Bomb
How to Bake Cheesy Pepperoni Bombs That Ooze Just Right

Get your oven cranked up to 375F and line a baking sheet with parchment paper for easy cleanup.
Break apart your biscuits and slice each one in half, creating tiny dough canvases ready for delicious fillings.
Gently flatten each dough piece and tuck in a dollop of marinara, sprinkle of pepperoni, and a cheesy surprise in the center.
Wrap each dough pocket carefully, pinching edges to lock in all the mouthwatering ingredients. No cheese leaks allowed!
Whisk melted butter with garlic powder and Italian herbs. Brush thisal mixture over each pizza bomb and dust with Parmesan for an extra flavor punch.
Pop these beauties into the oven for 12-15 minutes until they turn a gorgeous golden brown and cheese melts inside.
Pull from the oven, let cool briefly, and serve with extra marinara for dipping. Sprinkle fresh herbs on top for a gorgeous finish.
Tricks to Keep Pizza Bombs Crispy Outside, Gooey Inside
Serving Hot, Dippable Pepperoni Pizza Bombs
Stash and Reheat Pizza Bombs Like a Pro
FAQs
Yes, you can swap mozzarella with cheddar, provolone, or any melting cheese that you enjoy. Just ensure it melts well and complements the pepperoni flavor.
Make sure to pinch the dough edges tightly and seal completely. Double-check that there are no gaps or openings when forming the bombs. If cheese starts to peek through, pinch those spots closed.
Absolutely! You can prepare the bombs and store them unbaked in the refrigerator for up to 24 hours. When ready to serve, brush with seasoned butter and bake as directed. They can also be frozen before baking for up to 1 month.
Definitely! You can use cooked bacon bits, ham, or skip the meat entirely for a vegetarian version. Just replace the pepperoni with your preferred filling while keeping the cheese and marinara sauce.
Print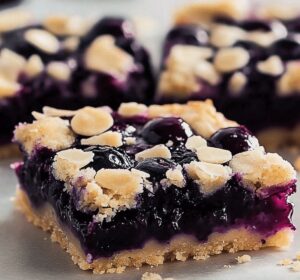
Blueberry Pie Cookie Bars Recipe
- Total Time: 50 minutes
- Yield: 12 1x
Description
Homemade blueberry pie cookie bars blend classic pie flavors with convenient bar form, creating a delightful dessert that merges comfort and innovation. Sweet blueberry filling nestled between buttery cookie layers invites you to savor each delectable bite of this irresistible treat.
Ingredients
Primary Ingredients:
- 3 cups fresh or frozen blueberries
- 2 ½ cups all-purpose flour
- 1 cup (2 sticks/226 grams) unsalted butter, softened
Sugar and Sweeteners:
- ¾ cup granulated sugar
- ½ cup light brown sugar, packed
- ½ cup granulated sugar
Binding and Flavoring Ingredients:
- 1 large egg
- 1 tablespoon cornstarch
- 1 tablespoon lemon juice
- 1 teaspoon lemon zest
- 1 teaspoon vanilla extract
- ½ teaspoon baking powder
- ½ teaspoon salt
Instructions
- Preheat the oven to a warm 350°F (175°C), ensuring the rack is positioned in the center. Carefully line a 9×13-inch baking dish with parchment paper, allowing slight overhang for easy removal.
- In a spacious mixing bowl, vigorously cream the butter with granulated and brown sugars until the mixture transforms into a light, airy consistency with a pale, silky texture.
- Incorporate the egg and vanilla extract, blending thoroughly until the mixture becomes smooth and uniform.
- Separately, sift together the flour, baking powder, and salt, ensuring no lumps remain in the dry ingredients.
- Gently fold the dry ingredient mixture into the wet ingredients, stirring until a soft, pliable dough emerges that holds together easily.
- Carefully separate and set aside one cup of the prepared dough for creating a crumbly topping later in the process.
- Spread the remaining dough evenly across the prepared baking dish, pressing firmly to create a uniform crust that reaches all corners and edges.
- Place the crust in the preheated oven and bake for approximately 10 minutes, allowing it to develop a light golden color and slightly firm texture.
- Remove the partially baked crust and let it cool momentarily while preparing the blueberry filling.
- Spread the blueberry mixture evenly over the warm crust, ensuring complete and consistent coverage.
- Crumble the reserved dough over the blueberry layer, creating a rustic, textured topping.
- Return the assembled bars to the oven and bake until the topping turns golden brown and the blueberry filling bubbles softly around the edges.
- Once baked, remove from the oven and allow the bars to cool completely in the baking dish.
- Using the parchment paper overhang, carefully lift the entire batch from the pan and transfer to a cutting surface.
- Slice into neat, uniform squares, ensuring clean edges for a professional presentation.
Notes
- Customize your blueberry bars by swapping fresh blueberries with frozen ones, ensuring they’re thawed and gently patted dry to prevent excess moisture.
- Experiment with mixed berries like raspberries or blackberries for a vibrant twist on the classic blueberry flavor profile.
- Enhance the texture by sprinkling sliced almonds or chopped pecans into the crumble topping for an added crunch and nutty dimension.
- For a gluten-free version, substitute all-purpose flour with a 1:1 gluten-free baking blend, maintaining the same measurements and baking technique.
- Prep Time: 15 minutes
- Cook Time: 35 minutes
- Category: Desserts, Snacks
- Method: Baking
- Cuisine: American
Nutrition
- Serving Size: 12
- Calories: 210
- Sugar: 14 g
- Sodium: 120 mg
- Fat: 9 g
- Saturated Fat: 5 g
- Unsaturated Fat: 4 g
- Trans Fat: 0 g
- Carbohydrates: 30 g
- Fiber: 1 g
- Protein: 2 g
- Cholesterol: 30 mg
John Nicholson
Lead Writer & Recipe Developer
Expertise
Recipe Testing and Development, Kitchen Hacks and Time-Saving Tips, Flavor Pairing and Ingredient Selection, Engaging Food Writing and Storytelling
Education
Johnson & Wales University
John Nicholson honed his skills at Johnson & Wales University, learning how to use fresh, local ingredients and down-to-earth techniques to make cooking simple and satisfying.
His recipes blend Southern comfort flavors with a modern touch, inviting everyone to cook with ease and confidence.
Living in Charleston, John takes cues from the city’s lively food scene, local markets, and seasonal produce. He’s all about making meals stress-free through easy tips, flavor pairings, and fun experiments in the kitchen