
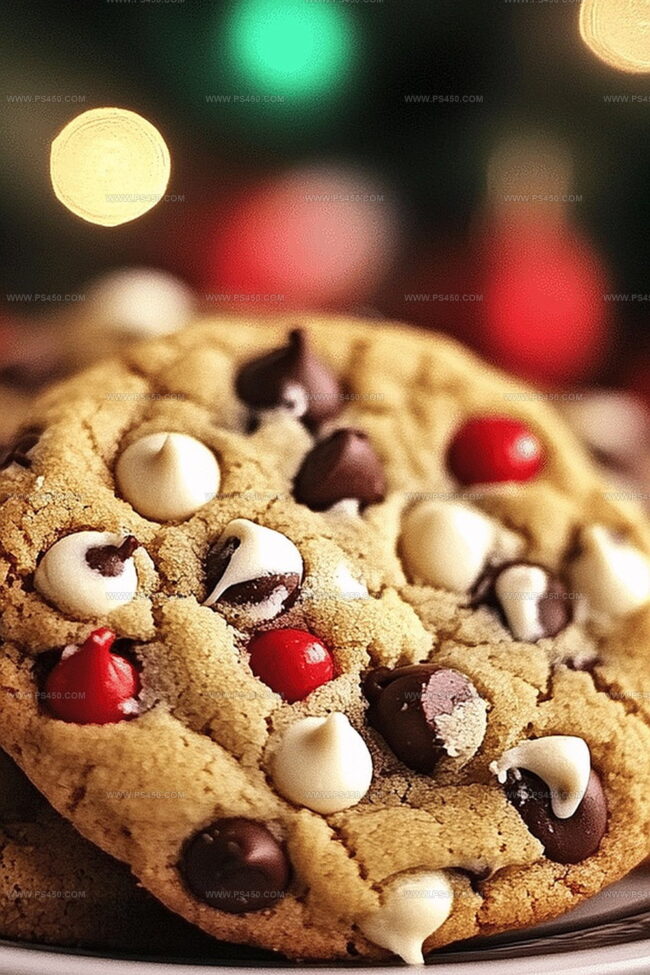
Jolly Festive Christmas Chocolate Chip Cookies Recipe
These melt-in-your-mouth festive Christmas chocolate chip cookies blend traditional warmth with delightful seasonal cheer.
Sweet memories of holiday gatherings dance through each carefully crafted bite.
The classic chocolate chip recipe whispers comfort and joy with every crumb.
Generations of bakers have shared similar recipes, passing down delectable traditions from kitchen to kitchen.
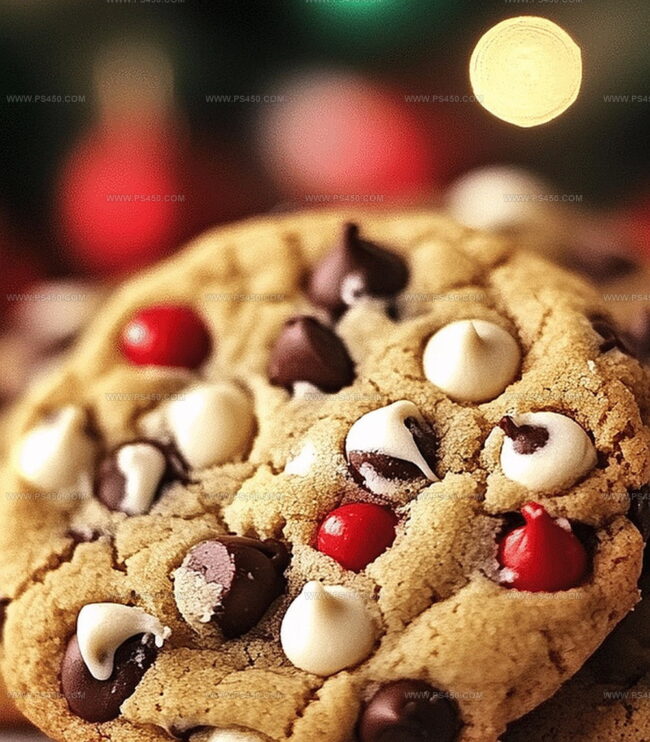
Rich chocolate chunks nestled in soft, buttery dough create an irresistible treat that sparks pure happiness.
Each cookie promises a moment of pure bliss during the most wonderful time of the year.
Bake a batch and watch smiles spread faster than melted chocolate.
Quick Recipe Overview
Ingredients for Christmas Chocolate Chip Cookies
For Dry Base:For Sweet and Creamy Foundation:For Festive Mix-Ins:Gear Up to Prepare Christmas Chocolate Chip Cookies
How to Make Christmas Chocolate Chip Cookies
Fire up your oven to 350 degrees and grab a baking sheet. Line it with parchment paper to create a non-stick surface for your festive treats.
Grab your mixing bowl and cream together butter with white and brown sugars until they become a fluffy dream. Splash in vanilla and crack in eggs, blending until everything looks smooth and inviting.
Gently fold flour, baking soda, and a pinch of salt into your buttery mixture. Mix carefully to keep the dough light and airy, avoiding overworking the batter.
Sprinkle chocolate chips and festive sprinkles throughout the dough. Stir just enough to distribute the goodies evenly, creating pockets of sweet surprise in every bite.
Drop rounded spoonfuls of dough onto your prepared baking sheet, leaving space between each cookie. Slide the sheet into the oven and bake until edges turn golden but centers remain soft – about 10 minutes.
Let cookies rest on the baking sheet for a few minutes to firm up. Transfer to a cooling rack and wait (if you can!) until they’re ready to munch. These Christmas cookies will spread joy with every delicious bite.
How to Add Flair to Christmas Chocolate Chip Cookies
Plating Tips for Christmas Chocolate Chip Cookies
Keeping Christmas Chocolate Chip Cookies Fresh
FAQs
Yes, you can. Just reduce or eliminate the added salt in the recipe to prevent the cookies from becoming too salty.
Chill the dough for 30 minutes before baking. Cold dough helps cookies maintain their shape and prevents excessive spreading.
No problem! You can use regular rainbow sprinkles or skip them entirely. The cookies will still taste delicious with just chocolate chips.
Absolutely! You can prepare the cookie dough, wrap it tightly, and refrigerate for up to 3 days or freeze for up to 3 months before baking.
Print
Festive Christmas Chocolate Chip Cookies Recipe
- Total Time: 25 minutes
- Yield: 25 1x
Description
These festive Christmas Chocolate Chip Cookies blend holiday nostalgia with classic cookie comfort. Rich chocolate and warm spices create a delightful treat you’ll savor during seasonal gatherings.
Ingredients
- 1 cup unsalted butter, softened
- 2 large eggs
- 1 ½ cups (255 g) semi-sweet chocolate chips
- 2 ¼ cups (532 ml) all-purpose flour
- ¾ cup (150 g) granulated sugar
- ¾ cup (165 g) brown sugar, packed
- 1 tsp (5 ml) baking soda
- ½ tsp (2.5 ml) salt
- 1 tsp (5 ml) vanilla extract
- ½ cup (85 g) red and green holiday sprinkles (or festive M&Ms)
Instructions
- Preheat Preparation: Warm the oven to 350F (175C) and line baking sheets with parchment paper, creating an ideal cooking surface for festive treats.
- Dry Ingredient Fusion: Whisk flour, baking soda, and salt in a medium bowl, establishing a foundational dry mixture for the cookie dough.
- Butter Transformation: Cream butter with granulated and brown sugars in a large mixing bowl until the mixture becomes smooth, light, and exceptionally fluffy, developing the cookie’s signature tender texture.
- Wet Ingredient Integration: Blend vanilla extract and eggs into the butter-sugar mixture, ensuring thorough incorporation and a uniform, silky consistency.
- Dough Development: Fold the dry ingredient mixture into the wet ingredients using low-speed mixing, carefully maintaining the dough’s delicate structure and preventing excessive manipulation.
- Festive Embellishment: Gently fold in chocolate chips and holiday sprinkles, distributing them evenly to create a balanced flavor profile and visually appealing cookie landscape.
- Cookie Formation and Placement: Use a tablespoon or cookie scoop to create rounded dough balls, positioning them strategically on prepared baking sheets with approximately 2 inches between each cookie to allow for proper expansion.
- Baking Perfection: Slide the baking sheets into the preheated oven and bake for 9-11 minutes, watching for lightly golden edges while ensuring centers remain soft and delectable.
- Cooling Technique: Let cookies rest on the baking sheet for 5 minutes, then transfer to a wire rack, allowing them to cool completely and solidify their irresistible texture and flavor.
Notes
- Measure Precisely: Use exact measurements for flour, sugar, and leavening agents to ensure consistent cookie texture and prevent dense or flat results.
- Control Butter Temperature: Soften butter at room temperature for 30 minutes before mixing, creating optimal creaming that produces light, airy cookies with perfect spread.
- Avoid Overmixing Dough: Gently fold dry ingredients into wet mixture, stopping as soon as ingredients combine to maintain tender, soft cookie crumb and prevent tough texture.
- Chill for Enhanced Flavor: Refrigerate dough for 30 minutes before baking to intensify flavors, improve cookie structure, and prevent excessive spreading during baking.
- Prep Time: 15 minutes
- Cook Time: 10 minutes
- Category: Desserts, Snacks
- Method: Baking
- Cuisine: American
Nutrition
- Serving Size: 25
- Calories: 180
- Sugar: 10 g
- Sodium: 100 mg
- Fat: 8 g
- Saturated Fat: 5 g
- Unsaturated Fat: 3 g
- Trans Fat: 0 g
- Carbohydrates: 25 g
- Fiber: 1 g
- Protein: 2 g
- Cholesterol: 30 mg
John Nicholson
Lead Writer & Recipe Developer
Expertise
Recipe Testing and Development, Kitchen Hacks and Time-Saving Tips, Flavor Pairing and Ingredient Selection, Engaging Food Writing and Storytelling
Education
Johnson & Wales University
John Nicholson honed his skills at Johnson & Wales University, learning how to use fresh, local ingredients and down-to-earth techniques to make cooking simple and satisfying.
His recipes blend Southern comfort flavors with a modern touch, inviting everyone to cook with ease and confidence.
Living in Charleston, John takes cues from the city’s lively food scene, local markets, and seasonal produce. He’s all about making meals stress-free through easy tips, flavor pairings, and fun experiments in the kitchen