
Jolly Christmas Eggnog Bread Recipe: A Cozy Holiday Treat
Baking a delightful christmas eggnog bread during the holiday season fills our kitchen with warmth and nostalgia.
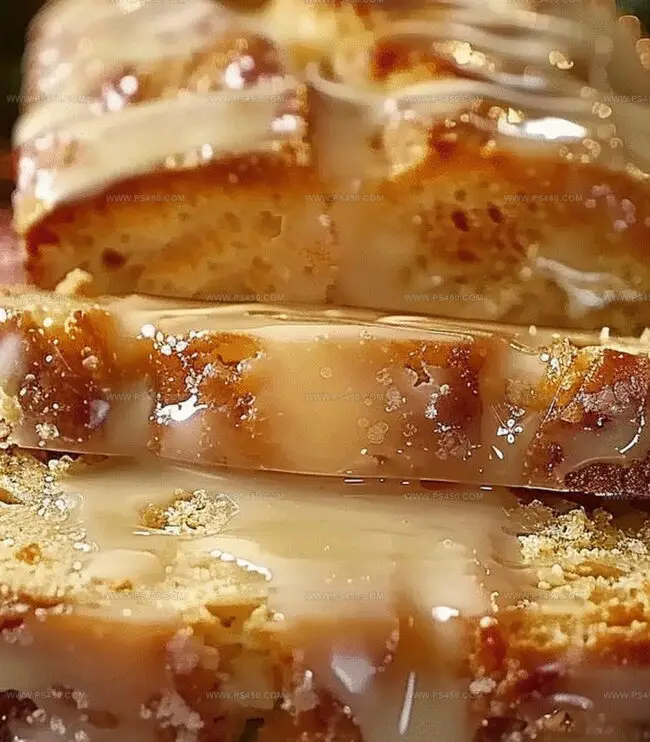
The rich, creamy eggnog blends seamlessly with soft, tender bread, creating a festive treat that sparks joy.
Warm spices like nutmeg and cinnamon dance through each slice, promising comfort and cheer.
This recipe transforms simple ingredients into a mouthwatering dessert that celebrates winter’s most beloved flavors.
Subtle hints of vanilla and rum extract enhance the classic eggnog profile, making each bite a delectable experience.
The golden-brown crust promises a perfect texture that melts in your mouth.
Whether shared at a holiday gathering or enjoyed with morning coffee, this eggnog bread will become your new seasonal favorite.
Quick Recipe Overview

Christmas Eggnog Bread Ingredient Essentials
For Dry Ingredients:For Wet Ingredients:For Glaze and Finishing:Equipment for Mixing and Baking Holiday Bread
How to Make Christmas Eggnog Bread Step-by-Step
Crank your oven to a toasty 350F and give your loaf pan a quick butter massage to prevent sticking.
Toss flour, baking powder, baking soda, salt, nutmeg, and cinnamon into a bowl and whisk them into a fluffy cloud of potential.
Grab another bowl and whirl together sugars, oil, eggnog, eggs, vanilla, and rum extract until they dance into a silky smooth mixture.
Gently fold dry ingredients into wet ingredients, stirring just enough to become friends without getting overexcited.
Pour your gorgeous batter into the prepared pan and let the oven work its for 50-60 minutes. Check doneness with a trusty toothpick – it should emerge clean and proud.
Allow bread to rest in the pan for 10 minutes, then transfer to a cooling rack. Whip up a quick glaze by mixing powdered sugar and eggnog until dreamy and smooth.
Drizzle that luscious glaze over your cooled bread and sprinkle a whisper of nutmeg for a festive touch. Slice, serve, and watch smiles bloom.
Eggnog Bread Flavor Additions and Toppings to Try
How to Present and Serve This Festive Loaf
Save Your Eggnog Bread for Later Without Drying
FAQs
Yes, you can replace rum extract with 1-2 tablespoons of actual rum. Just adjust the liquid content slightly to maintain the bread’s moisture.
Absolutely! The bread wraps nicely and stays fresh for 2-3 days, making it a perfect homemade holiday gift for friends and family.
Not recommended. Eggnog is crucial for the unique flavor and texture. If unavailable, try a milk and spice mixture as an alternative, but the taste will differ.
Use the toothpick test – insert it into the center of the bread. If it comes out clean with no wet batter, the bread is done. The top should also be golden brown.
Print
Tostadas De Tinga Recipe
- Total Time: 30 minutes
- Yield: 4 1x
Description
Spicy Mexican tostadas de tinga bring sizzling chicken flavor to your dinner table. Crisp tortillas topped with shredded chicken, zesty chipotle sauce, and fresh garnishes create a mouthwatering meal you’ll crave again and again.
Ingredients
Protein:
- 2 cups (473 ml) cooked, shredded chicken (rotisserie or boiled)
Main Sauce and Spices:
- 3 medium tomatoes, chopped
- 2 chipotle peppers in adobo sauce, chopped
- ½ teaspoon (2.5 ml) dried oregano
- ½ teaspoon (2.5 ml) cumin
- ½ teaspoon (2.5 ml) salt
- ½ cup (118 ml) chicken broth
Cooking and Preparation Ingredients:
- 1 tablespoon (15 ml) vegetable oil
- ½ cup (118 ml) white onion, thinly sliced
- 2 garlic cloves, minced
- 8 tostada shells (store-bought or homemade)
- 1 cup (237 ml) refried beans (optional, for spreading)
- ½ cup (118 ml) shredded lettuce
- ½ cup (118 ml) crumbled queso fresco (or feta)
- ½ cup (118 ml) sour cream or Mexican crema
- 1 avocado, sliced
- ¼ cup (59 ml) chopped fresh cilantro
- Lime wedges for serving
Instructions
- Craft a vibrant base by sautéing finely chopped onions in a skillet until they turn translucent and release their aromatic sweetness.
- Introduce minced garlic to the pan, stirring quickly to prevent burning and allowing its pungent essence to bloom.
- Pour in ripe, crushed tomatoes and create a robust sauce by incorporating smoky chipotle peppers, fragrant oregano, earthy cumin, and a pinch of salt.
- Simmer the mixture, allowing the ingredients to meld and develop a rich, complex flavor profile for approximately 5 minutes.
- Transform the sauce by blending with chicken broth, creating a smooth consistency or maintaining a rustic, chunky texture as desired.
- Return the sauce to the pan and gently fold in tender, shredded chicken, ensuring each strand is lovingly coated with the spicy, smoky sauce.
- Let the chicken tinga simmer and absorb the vibrant flavors, allowing the sauce to thicken and intensify for 5-10 minutes.
- The result should be a succulent, deeply flavored chicken mixture ready to crown your crispy tostada shells.
Notes
- Achieve the perfect sauce consistency by blending the tomato mixture to your preferred smoothness, ranging from slightly chunky to completely smooth.
- For a leaner version, swap chicken thighs with chicken breast, but be careful not to overcook to maintain moisture and tenderness.
- Enhance the smoky flavor by roasting the tomatoes and chipotle peppers briefly before creating the sauce, which deepens the overall taste profile.
- Prepare the chicken tinga ahead of time and store in the refrigerator for up to 3 days, allowing flavors to meld and intensify for even more delicious results.
- Prep Time: 10 minutes
- Cook Time: 20 minutes
- Category: Lunch, Dinner, Appetizer
- Method: Simmering
- Cuisine: Mexican
Nutrition
- Serving Size: 4
- Calories: 310
- Sugar: 2 g
- Sodium: 480 mg
- Fat: 14 g
- Saturated Fat: 4 g
- Unsaturated Fat: 8 g
- Trans Fat: 0 g
- Carbohydrates: 32 g
- Fiber: 6 g
- Protein: 18 g
- Cholesterol: 60 mg
John Nicholson
Lead Writer & Recipe Developer
Expertise
Recipe Testing and Development, Kitchen Hacks and Time-Saving Tips, Flavor Pairing and Ingredient Selection, Engaging Food Writing and Storytelling
Education
Johnson & Wales University
John Nicholson honed his skills at Johnson & Wales University, learning how to use fresh, local ingredients and down-to-earth techniques to make cooking simple and satisfying.
His recipes blend Southern comfort flavors with a modern touch, inviting everyone to cook with ease and confidence.
Living in Charleston, John takes cues from the city’s lively food scene, local markets, and seasonal produce. He’s all about making meals stress-free through easy tips, flavor pairings, and fun experiments in the kitchen