
Jolly Little Debbie Christmas Cake Balls Recipe: Holiday Joy Bites!
Unleash the magic of holiday baking with these delightful Little Debbie Christmas cake balls that blend nostalgia and festive cheer.
Sweet memories of childhood treats dance through every bite of these delectable morsels.
Softened cake crumbles mixed with creamy frosting create a melt-in-your-mouth sensation that sparkles with seasonal joy.
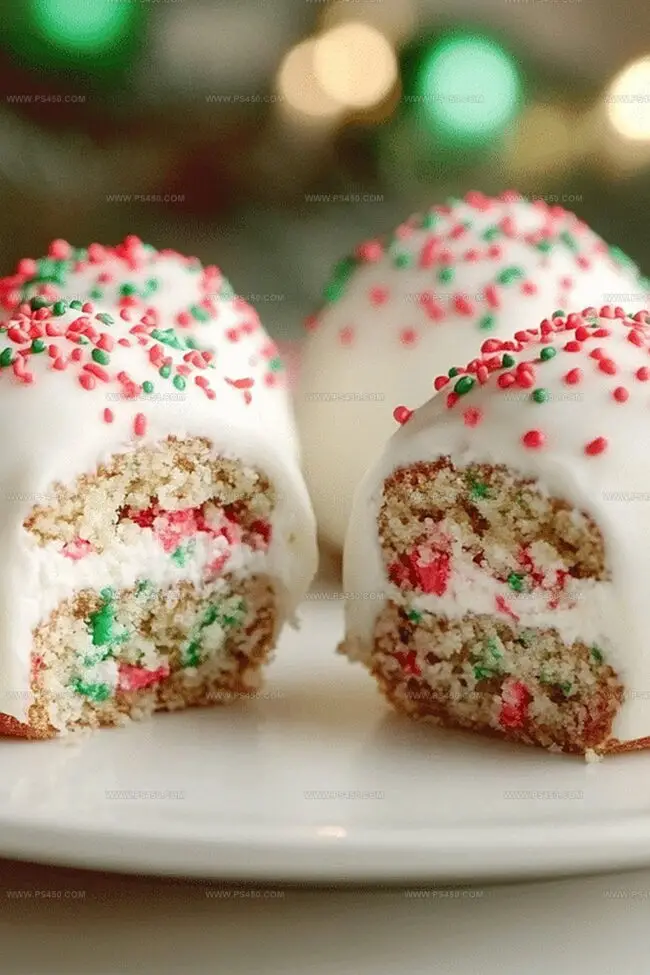
Each cake ball becomes a tiny celebration of Christmas spirit, rolled and decorated with colorful sprinkles and melted chocolate.
The simple ingredients transform ordinary cake into extraordinary bite-sized delights that everyone will adore.
No holiday dessert table feels complete without these charming, irresistible treats that bring smiles and warmth to family gatherings.
Whip up a batch and watch these festive cake balls become the star of your holiday dessert spread.
Quick Recipe Overview
Little Debbie Christmas Cake Balls Ingredient Guide
For Base Ingredients:For Coating Ingredients:For Decorative Elements:Tools That Make Little Debbie Christmas Cake Balls Fun to Prep
How to Form and Dip Little Debbie Christmas Cake Balls

Break Little Debbie Christmas Tree Cakes into fine crumbs using your hands or a food processor. Mix thoroughly until the cake becomes a consistent texture.
Combine cake crumbs with softened cream cheese in a mixing bowl. Work the ingredients together until they form a cohesive mixture that holds its shape when pressed.
Roll the cake and cream cheese blend into small, round balls about the size of a golf ball. Place these tasty morsels on a parchment-lined tray and chill in the refrigerator for half an hour.
Melt chocolate chips in a microwave-safe bowl, stirring every 30 seconds until smooth and glossy. Carefully dip each cake ball into the melted chocolate, ensuring complete coverage. Let excess chocolate drip off before placing back on the tray.
While the chocolate is still wet, shower the cake balls with colorful holiday sprinkles. This adds a playful and celebratory touch to your delicious treats.
Allow the chocolate-covered cake balls to harden at room temperature or in the refrigerator. Once set, these sweet delights are ready to be devoured and shared with friends and family.
Add Sprinkles, Flavors, and More to Cake Balls
Serving Little Debbie Christmas Cake Balls With Flair
Chill or Store Your Cake Balls Until It’s Time to Share
FAQs
No, you can use similar holiday-themed or seasonal cakes. The key is using a cake that crumbles well and has a festive flavor.
Yes, you can prepare cake balls up to 3 days in advance. Keep them refrigerated in an airtight container until ready to serve.
No problem! You can easily crumble the cake by hand using your fingers or breaking it apart with a fork. The goal is to create fine, even crumbs.
A fork works perfectly for dipping and helps drain excess chocolate. If you want extra precision, you can also use chocolate dipping tools available at baking supply stores.
Print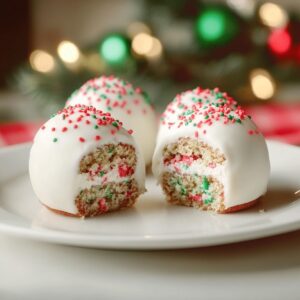
Festive Little Debbie Christmas Cake Balls Recipe
- Total Time: 45 minutes
- Yield: 13 1x
Description
Little Debbie Christmas Cake Balls bring festive cheer to holiday dessert tables with minimal effort. Chocolate-coated spheres packed with seasonal nostalgia offer sweet memories for winter celebrations.
Ingredients
- 6 Little Debbie Christmas Tree Cakes
- 4 oz (113 g) cream cheese, softened
- 1 cup white chocolate chips or candy melts
- 1 tbsp (15 mL) coconut oil or vegetable shortening
- Holiday sprinkles
Instructions
- Preparation: Pulverize the Little Debbie Christmas Tree Cakes into fine, uniform crumbs using a food processor or gentle hand crushing to create a consistent base texture.
- Mixing: Blend cake crumbs with cream cheese, kneading thoroughly until the mixture becomes a unified, pliable dough that holds its shape effortlessly.
- Forming: Craft compact, uniform spheres measuring approximately one inch in diameter, applying steady pressure to create well-structured cake balls.
- Chilling: Arrange the formed orbs on a parchment-lined tray and refrigerate for 30 minutes to firm up the mixture and enhance handling precision.
- Chocolate Coating: Gently melt chocolate chips in a microwave-safe vessel, stirring frequently to achieve a smooth, glossy chocolate coating without burning.
- Dipping: Immerse each chilled cake sphere completely in the molten chocolate, using a fork to ensure elegant, even coverage and allow excess chocolate to drip off.
- Decorating: While the chocolate remains liquid, quickly sprinkle holiday-themed decorations across the surface, ensuring the festive embellishments adhere perfectly.
- Setting: Place the decorated cake balls in a cool area, allowing the chocolate shell to solidify completely, transforming them into delightful, celebration-ready confections.
Notes
Select Chocolate Carefully: Use high-quality chocolate chips or melting wafers for smooth, glossy coating that enhances overall taste and texture.
Chill Before Coating: Refrigerate cake balls for 30 minutes to prevent crumbling during chocolate dipping and ensure clean, professional-looking finish.
Control Moisture Levels: Avoid adding excess cream cheese to maintain proper consistency – mixture should hold shape without being too wet or dry.
Customize Decorations: Experiment with different sprinkle colors or seasonal decorative elements to match specific holiday themes or personal preferences.
- Prep Time: 15 minutes
- Cook Time: 30 minutes
- Category: Desserts, Snacks
- Method: Blending
- Cuisine: American
Nutrition
- Serving Size: 13
- Calories: 150
- Sugar: 12 g
- Sodium: 60 mg
- Fat: 8 g
- Saturated Fat: 5 g
- Unsaturated Fat: 3 g
- Trans Fat: 0 g
- Carbohydrates: 18 g
- Fiber: 0 g
- Protein: 1 g
- Cholesterol: 15 mg
John Nicholson
Lead Writer & Recipe Developer
Expertise
Recipe Testing and Development, Kitchen Hacks and Time-Saving Tips, Flavor Pairing and Ingredient Selection, Engaging Food Writing and Storytelling
Education
Johnson & Wales University
John Nicholson honed his skills at Johnson & Wales University, learning how to use fresh, local ingredients and down-to-earth techniques to make cooking simple and satisfying.
His recipes blend Southern comfort flavors with a modern touch, inviting everyone to cook with ease and confidence.
Living in Charleston, John takes cues from the city’s lively food scene, local markets, and seasonal produce. He’s all about making meals stress-free through easy tips, flavor pairings, and fun experiments in the kitchen